
Conditional Formatting on Widget
Change the colour and icon of a widget's value automatically, based on the number it shows.
1. Overview
Conditional formatting lets a widget change how its main value looks depending on the value itself. For example, a total can show in red below a target and in green once it reaches it, so you can read the state of your dashboard at a glance.
Conditional formatting is set up in the widget's settings, using one or more rules. Each rule compares the widget's primary value against a number and, when it matches, applies a colour and, optionally, an icon.
2. Adding Conditional Formatting
-
Open the dashboard and click the edit (pencil) icon.
-
On the widget you want to change, click the (3 Dot Menu) and select Edit.
-
On the Data tab, turn on Conditional formatting.
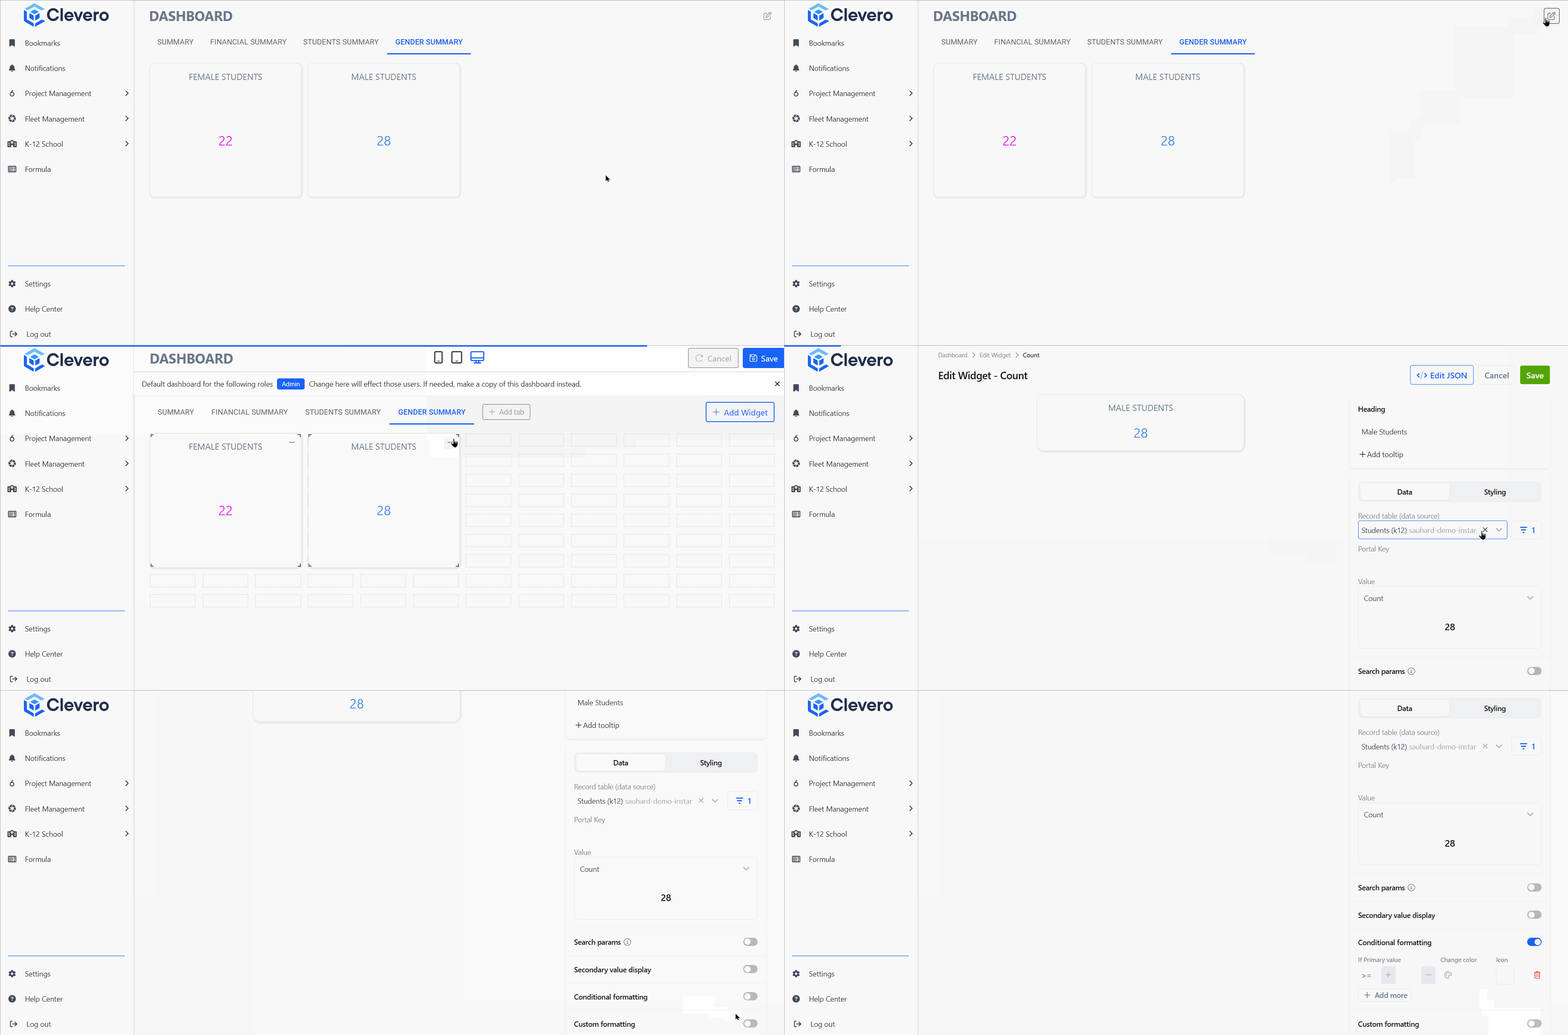
- Set up the rule using the fields in the rule row:
| Field | Details |
|---|---|
| If Primary value | The condition that decides when the rule applies to the widget's primary value. The comparison defaults to >= (greater than or equal to), so the rule applies when the value is equal to or higher than the number you enter. For example, with >= and a value of 100, the rule applies to a widget value of 100 or more. Enter the number in the field beside the operator, typing it in or using the + and - buttons. |
| Change color | The colour applied to the value when the rule matches. Click the field to open a colour picker. |
| Icon | An optional icon shown when the rule matches. Click the field and use the Search icon... to find one. |
- Click Save to save the widget, then Save again on the dashboard.
📘 Note: Conditional formatting is turned off by default on a widget. Turning it on does not change how the widget looks until you add a rule with a value and a colour.
3. Adding More Rules
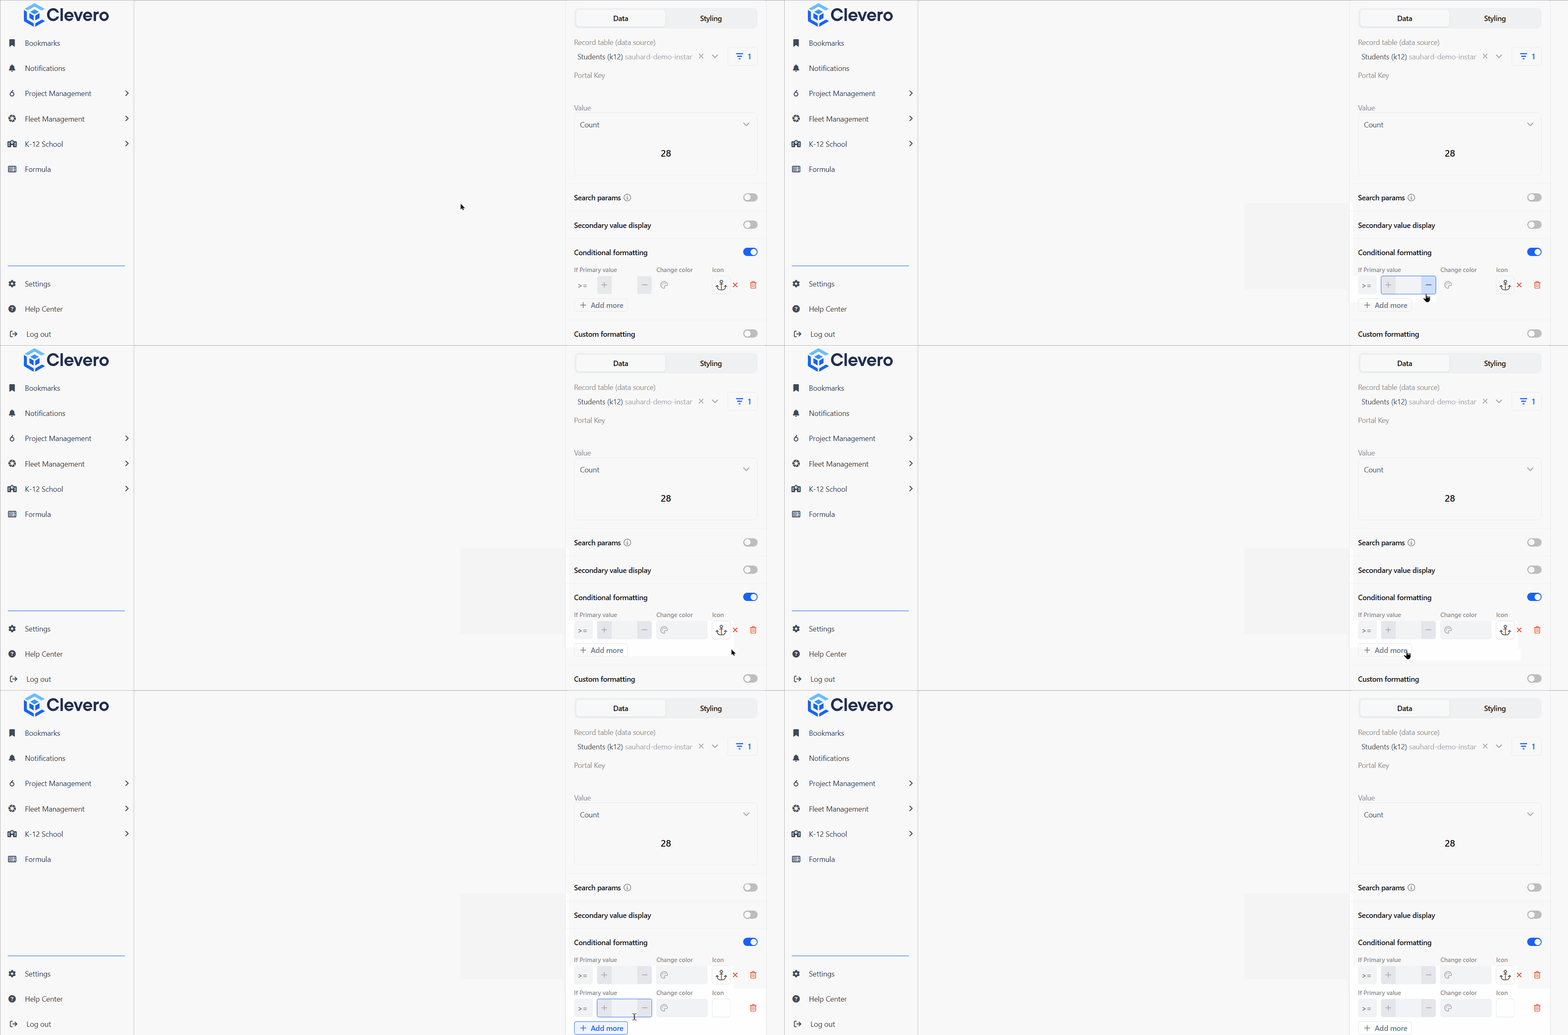
To format the value differently across ranges, add more than one rule.
- In the Conditional formatting section, click Add more.
- A new rule row appears below the first. Set its comparison, colour, and icon in the same way.
4. Removing a Rule or an Icon
To remove a rule you no longer need, click the red delete (bin) icon at the end of its row. The rule is removed along with its colour and icon.
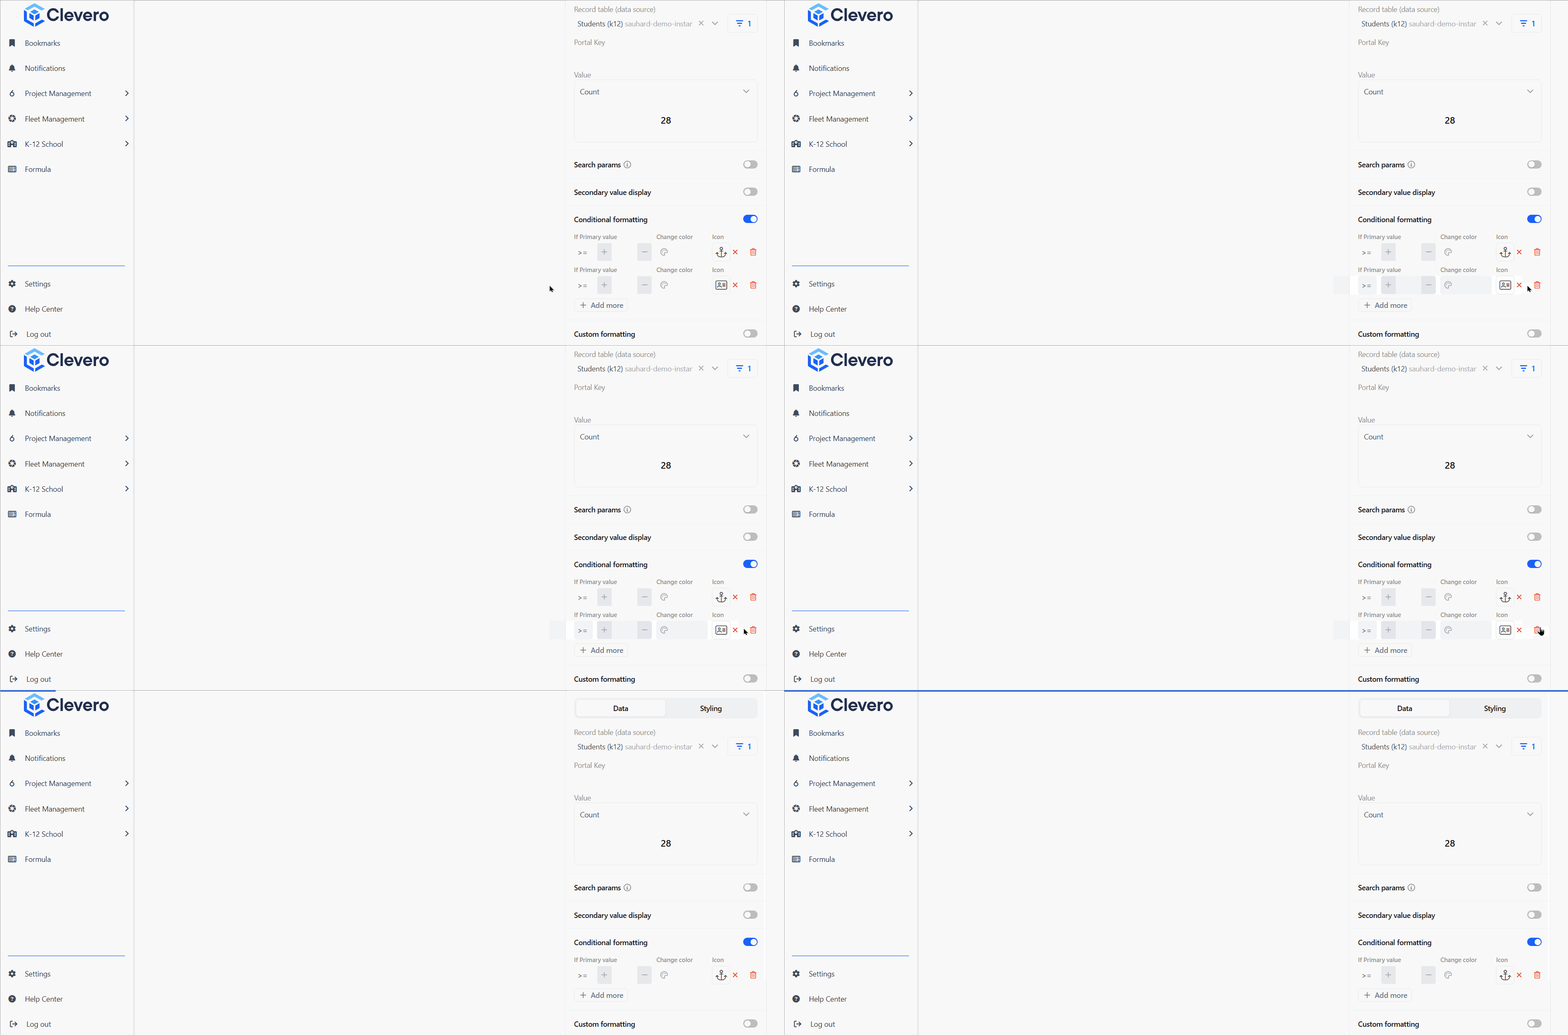
To remove only the icon from a rule, click the X next to the icon. The rule stays in place with its comparison and colour, and only the icon is cleared.
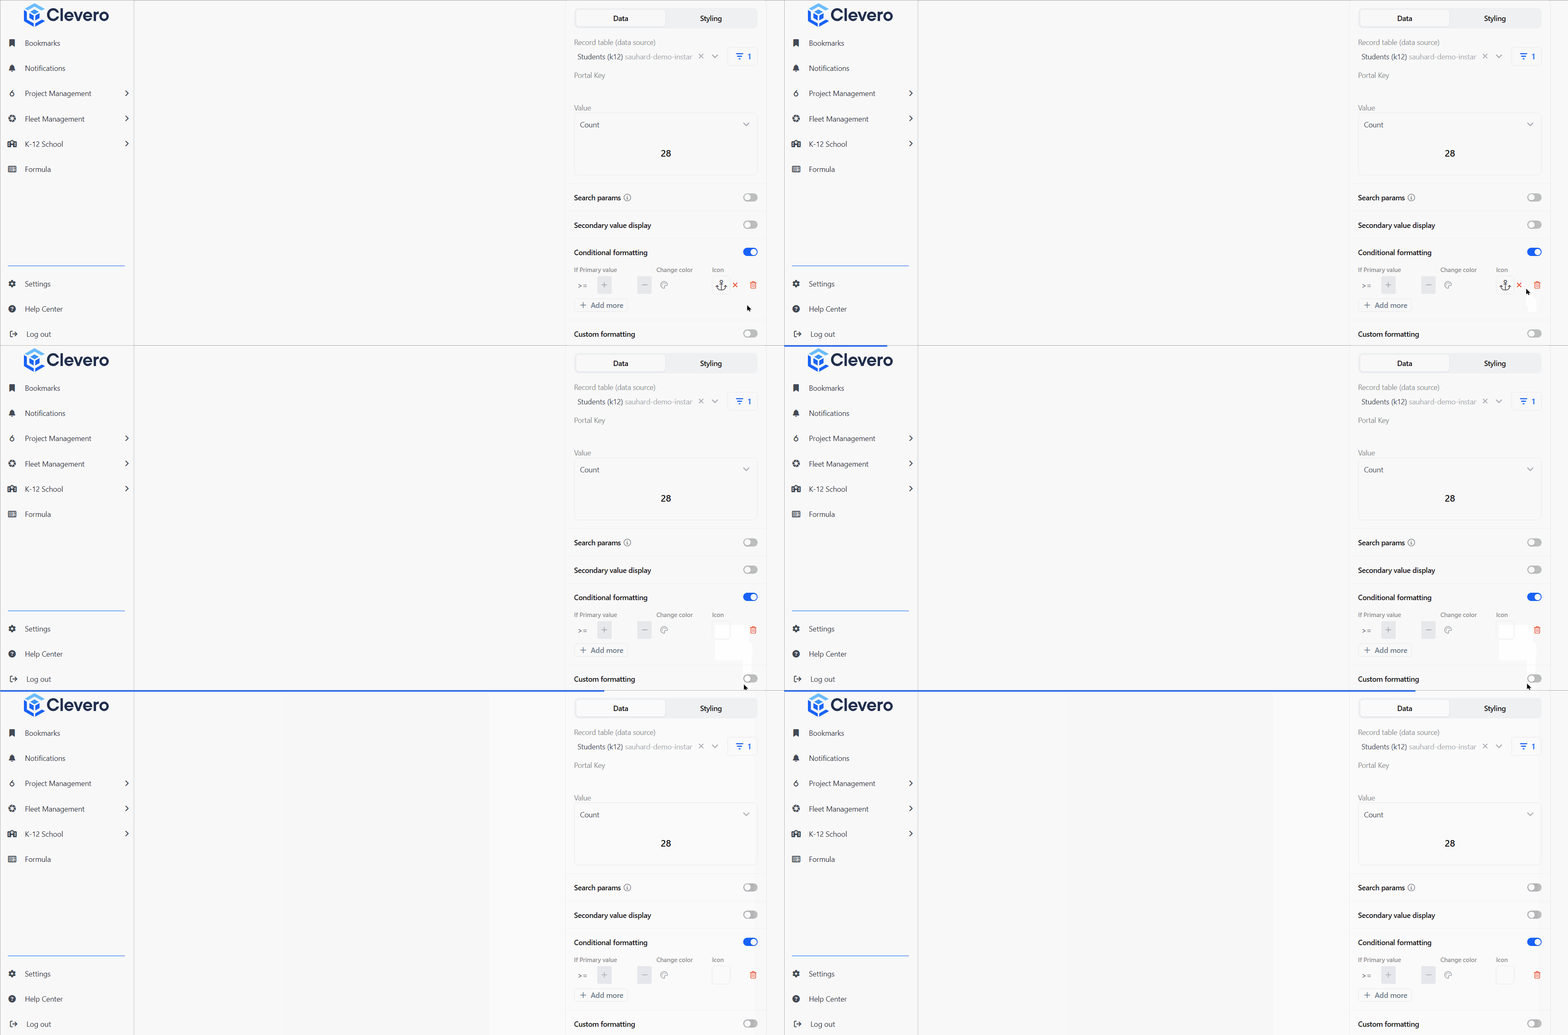
📘 Note: The red delete (bin) icon removes the whole rule. The X next to the icon removes only the icon.
5. Notes
- Conditional formatting is set per widget. Each widget needs its own rules.
- Conditional formatting is available on the number widgets only: Count, Sum, Average, and Grouped Count. It is not available on chart widgets (Bar Graph, Line Graph, Radar Chart, Pie Chart, Radial Bar Chart, Funnel Chart), Record Table, Quick Links, Count Link, Rich Text, or Video.
📘 Note: The Record Table widget has its own Color code rows setting on the Styling tab, which is separate from conditional formatting and is described in the Record Table article.
📌 Need Help?
If you require assistance or encounter any issues, please don't hesitate to contact us for further support.
Updated about 1 hour ago