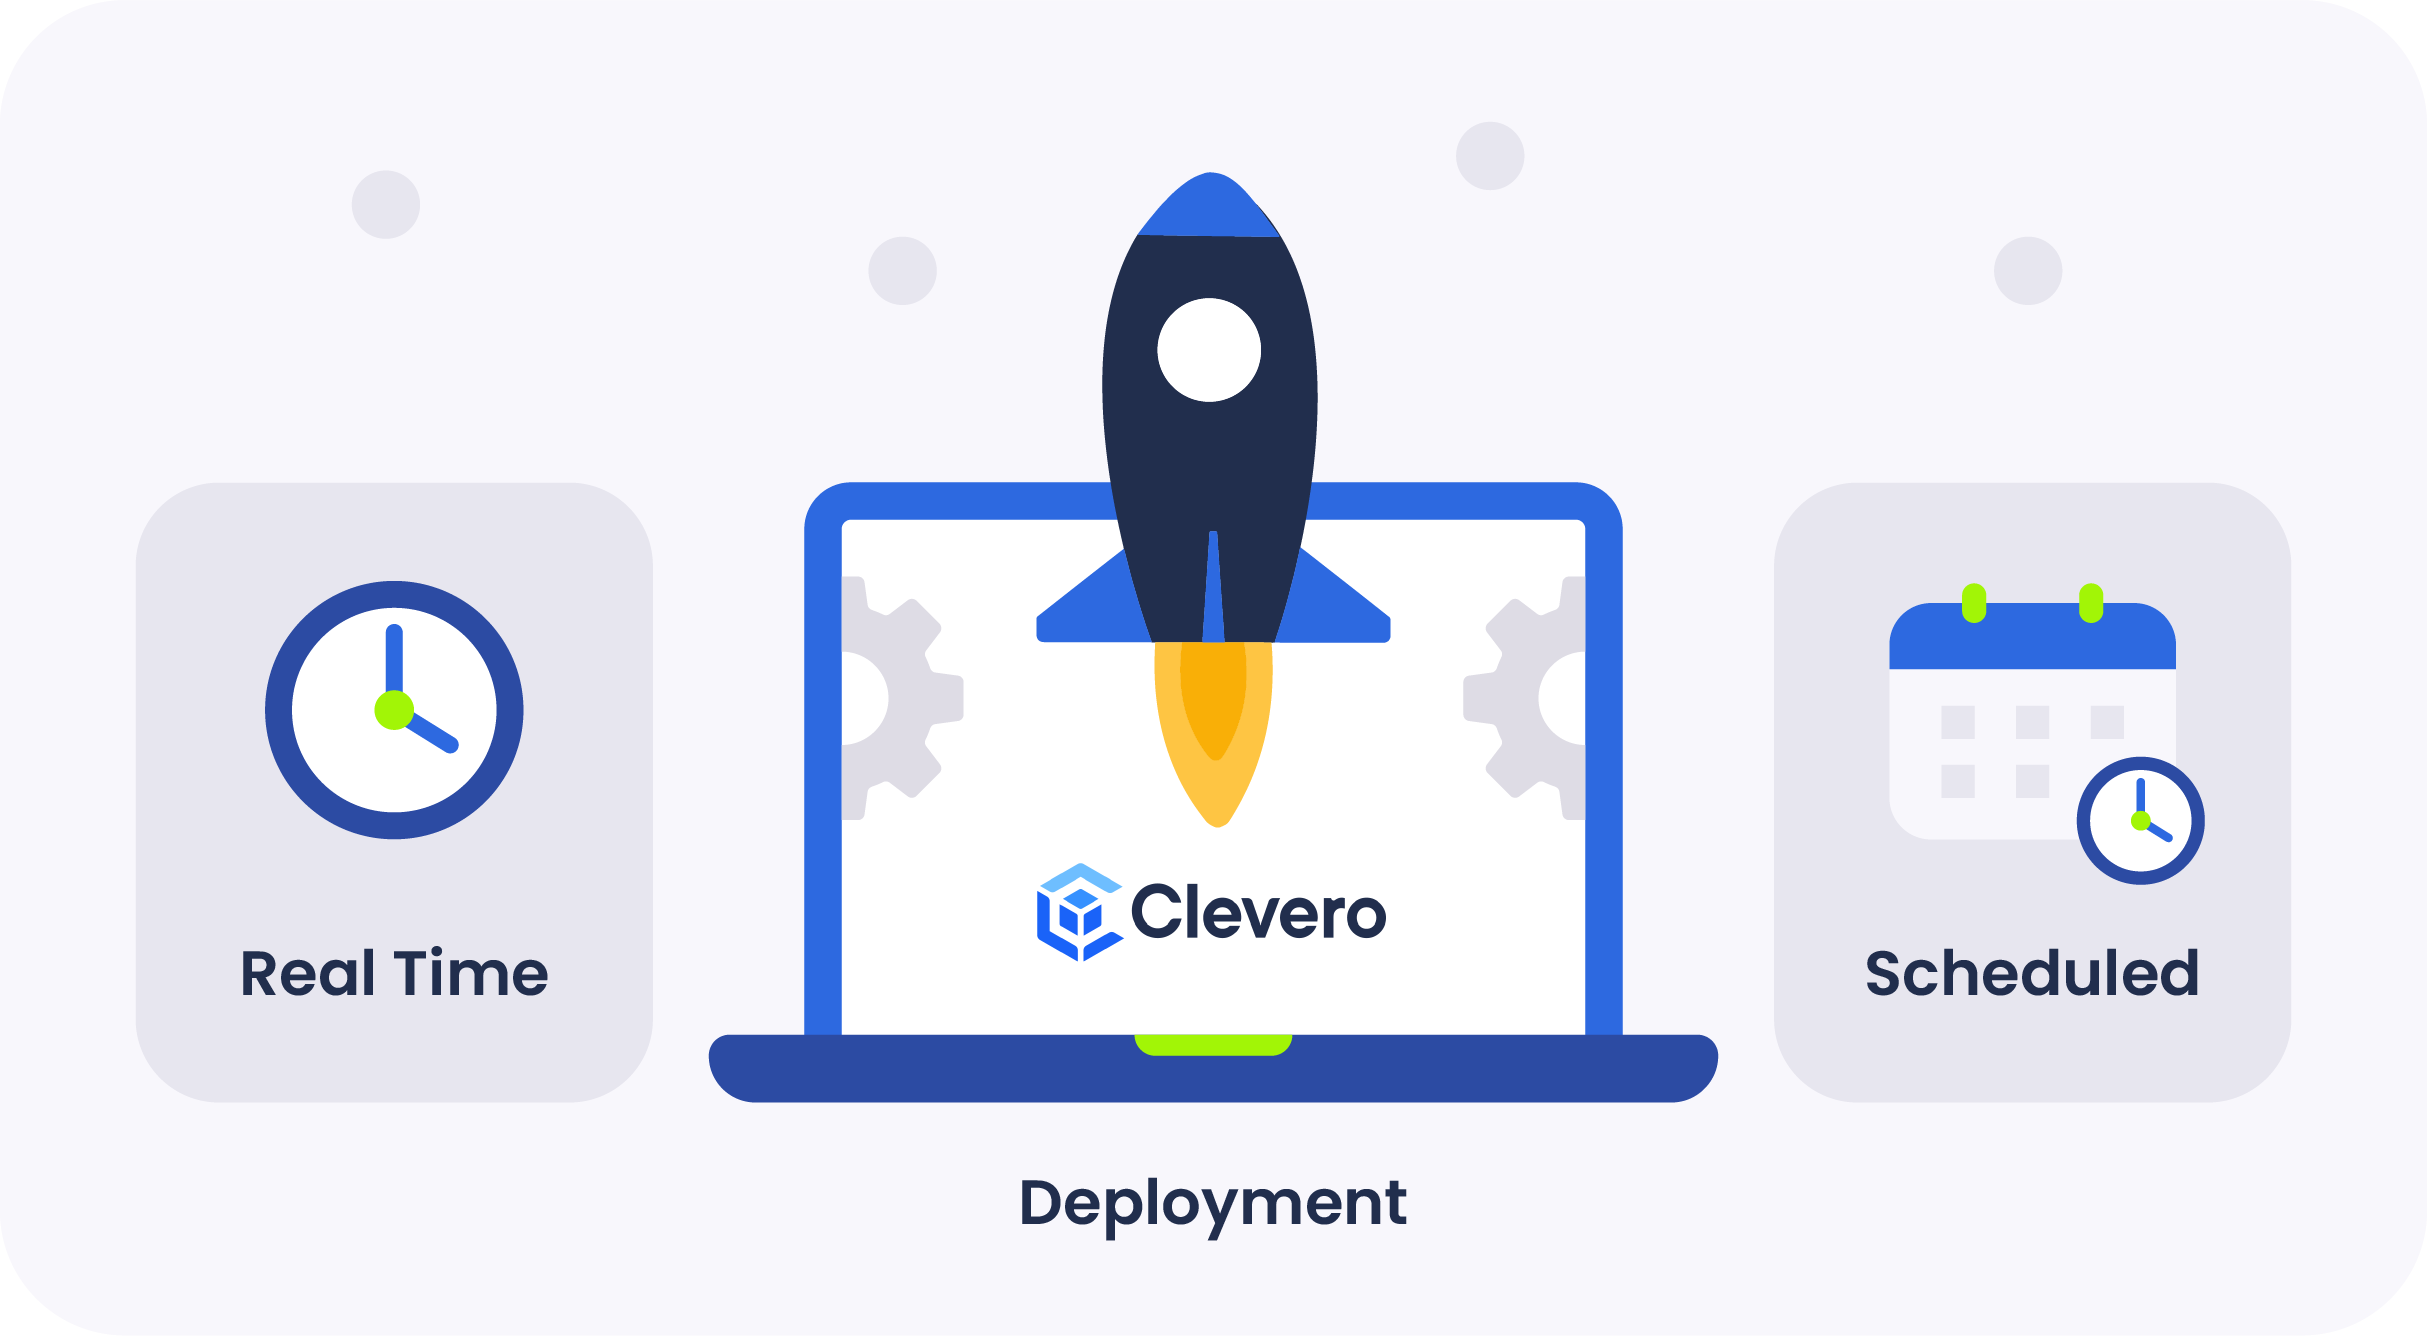
Deployments
🚀 Streamline your workflows with our deployments feature.
Deployment is a central hub within the Clevero system where users can manage and configure script deployments. This page enables users to control the execution of scripts based on various events and interactions within the system.
There are two methods of deployment available: Real-Time and Scheduled deployments.
- Real-Time Deployment: With real-time deployment, users can configure scripts to be executed immediately in response to specific events.
- Scheduled Deployment: Users can schedule the execution of scripts to occur at specified times or intervals. This method is ideal for automating repetitive tasks, batch processing, or actions at specific moments.
1. Real-Time Deployment
To generate a new deployment, follow the steps below:
- Click on the "Settings" option and proceed to "System Settings".
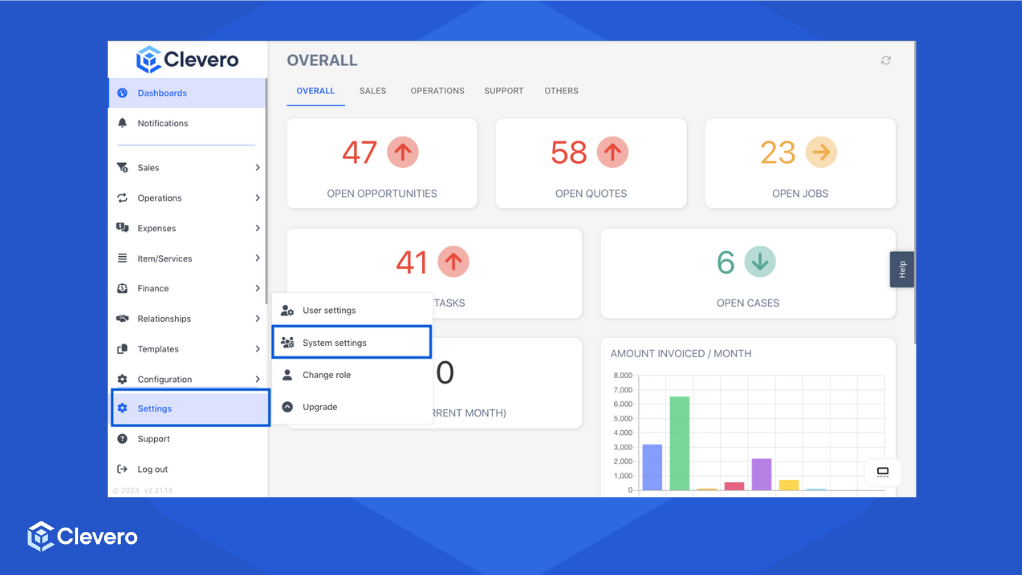
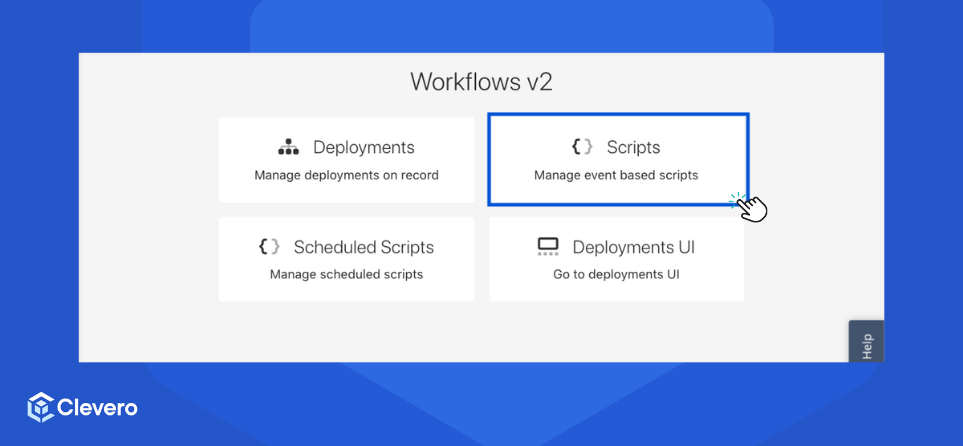
- Choose "Workflows" from the available options.
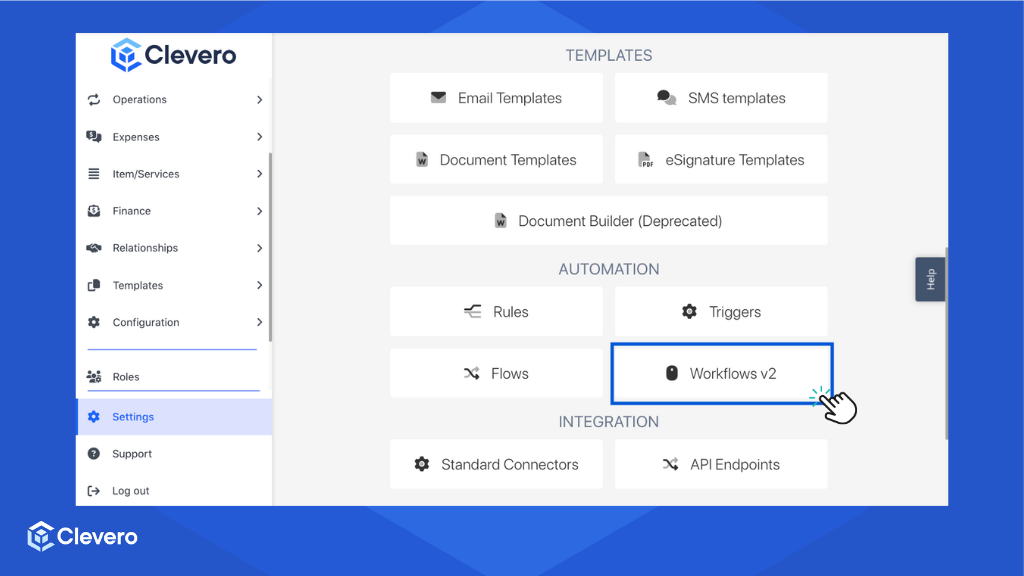
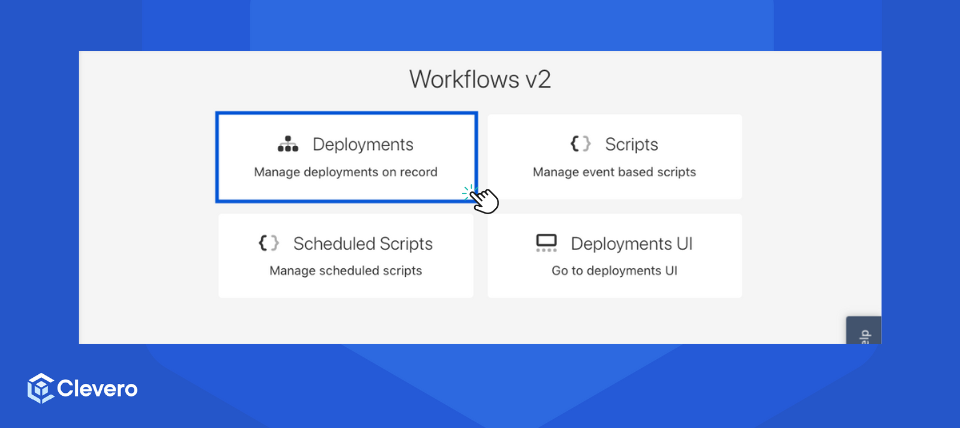
- Select the "Deployments" option.
Info:Before proceeding to the next step, ensure that you have created scripts.
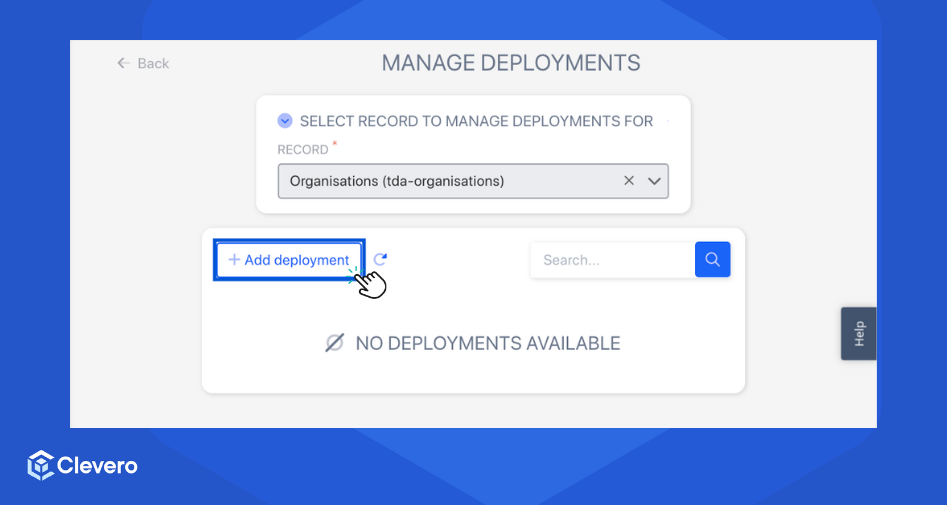
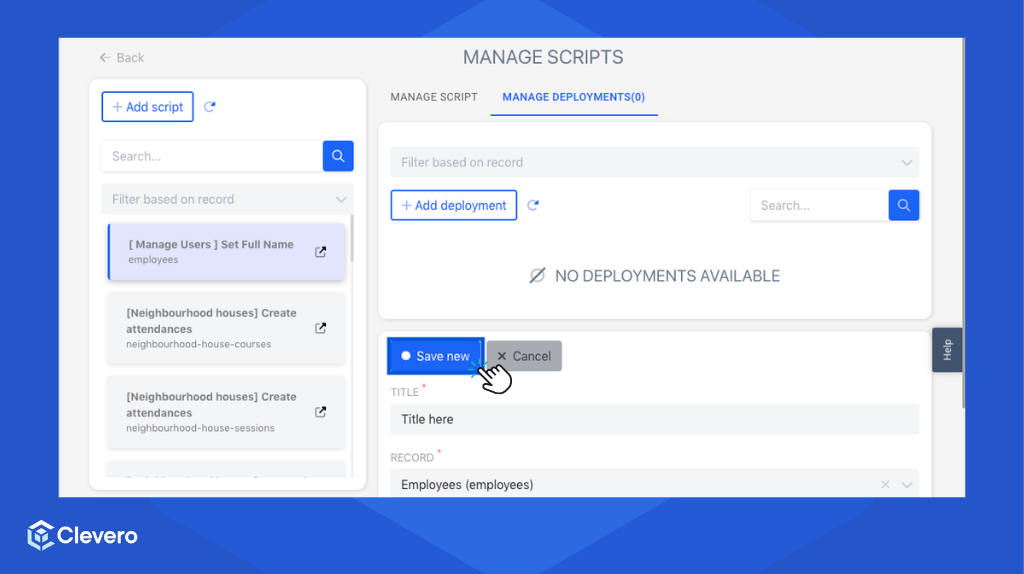
- Choose the record you wish to manage deployments for.

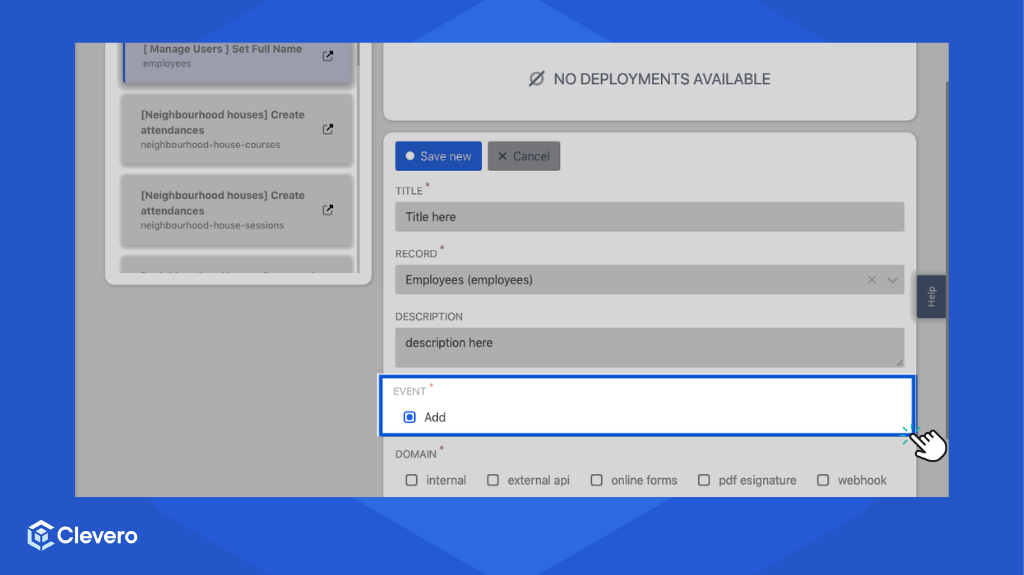
- Click on "Add deployment".
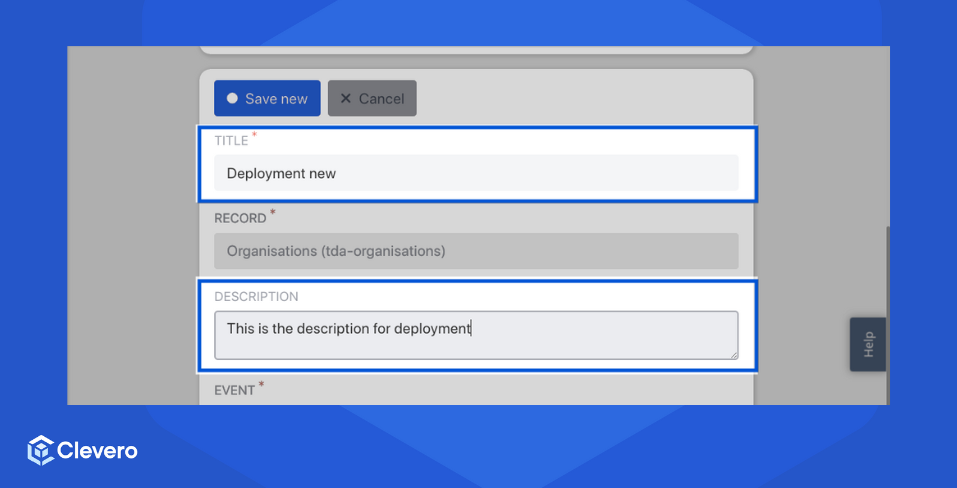
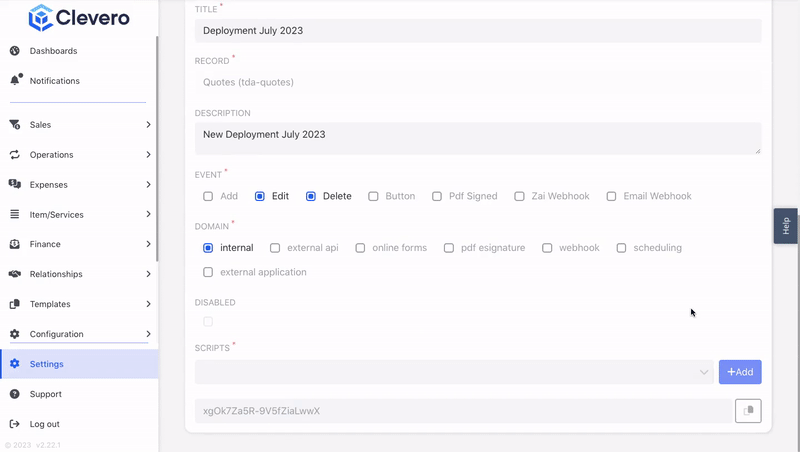
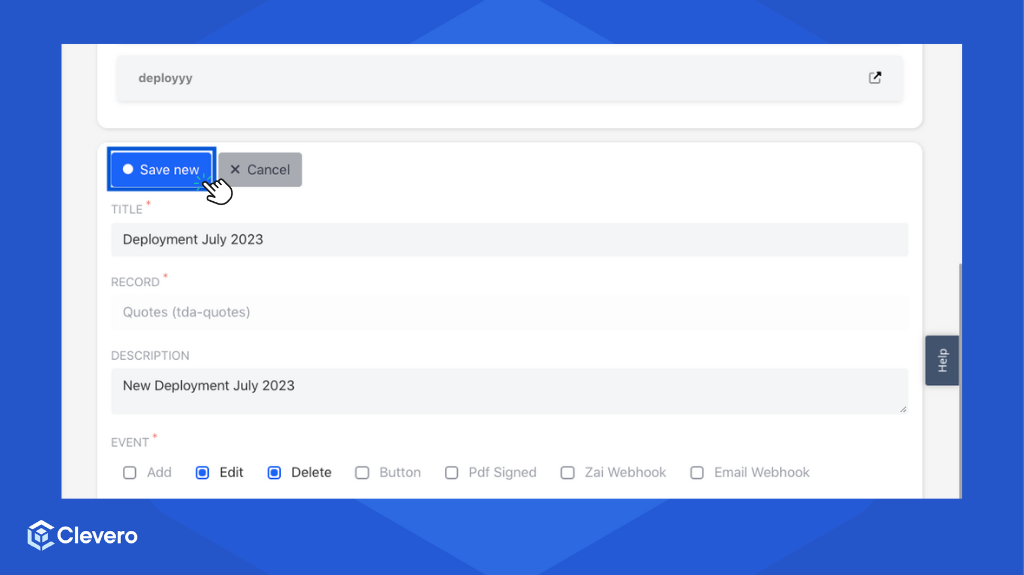
- Fill in the title and description of the deployment.
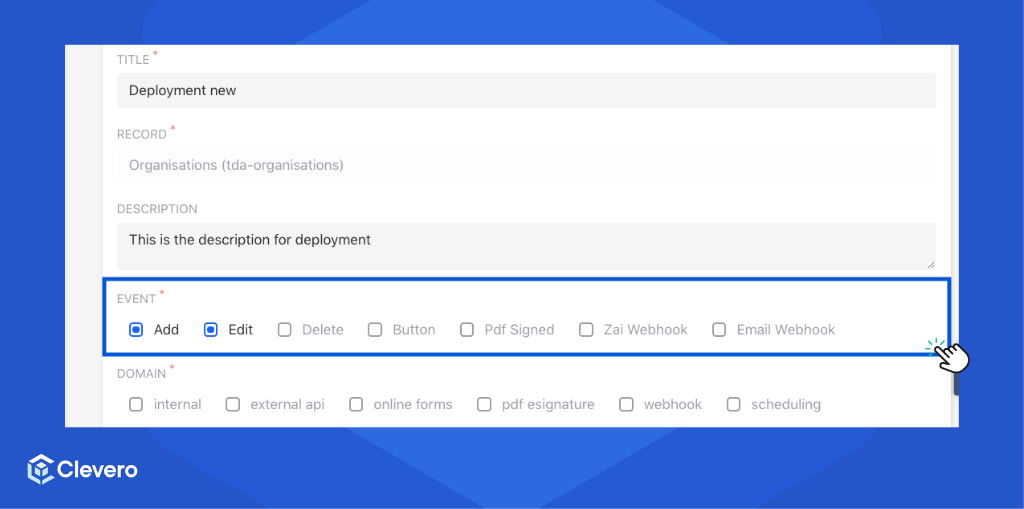
- Select one or more events from the "Event" list. These events will trigger the deployment to run. Some of the supported events include:
- Add: This event activates the script when adding a new item or record.
- Edit: This event activates the script when an existing item or record is edited.
- Delete: This event activates the script when an item or record is deleted.
- Button: Selecting this event allows you to initiate a test deployment through a button trigger.
- PDF Signed: This event is triggered when a PDF document is signed.
- Zai Webhook: This event captures interactions related to payment gateways facilitated by the Zai webhook.
- Email Webhook: This event is triggered when an email webhook returns an identification ID.
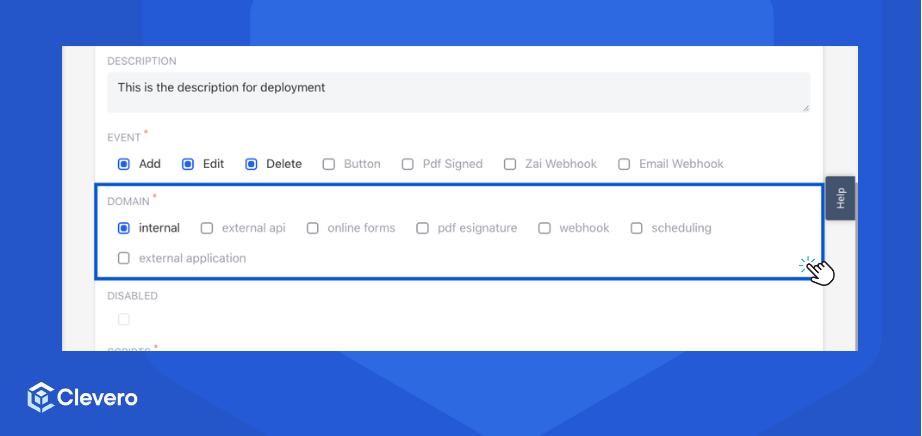
- Specify the domain(s) where the script will be executed and interact with various system elements. The available domains are:
- Internal: It is used for deploying scripts that interact with internal data within the Clevero system.
- External API: It is designed for deploying scripts that communicate with external applications or services through APIs.
- Online Forms: It is used for deploying scripts that interact with and process data from online forms.
- PDF Esignature: It is used for deploying scripts that handle PDF documents and electronic signatures.
- Webhook: It is used for deploying scripts that respond to external events triggered by webhooks.
- Scheduling: It allows users to deploy scripts scheduled to run at specific times or intervals.
- External Application: It is used to deploy scripts that interface with external applications and services outside the Clevero system.
- Select the scripts to deploy. You can add multiple scripts in one deployment, which works in ascending order.
Note:You may receive a notification stating that some events are not supported. This occurs when you have not selected those specific events in the script. Ensure that you select all the relevant events for the script that you want to be triggered.
- Click on the "Save new" to save the changes.
1.1. Set Deployment from Existing Script
- Select the "Scripts" option from the menu.
- Choose the desired script that you want to deploy.
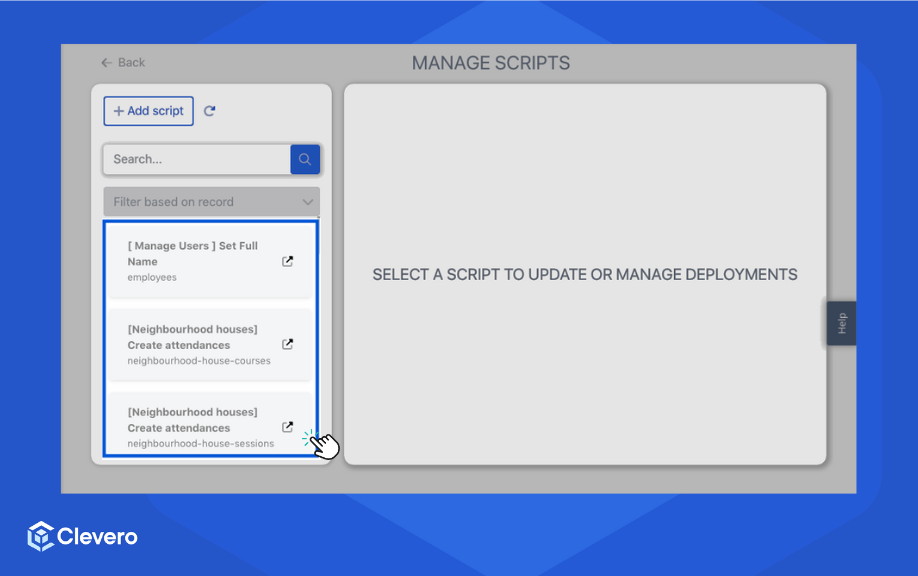
- Click on the "Manage Deployment" tab to access the deployment settings.
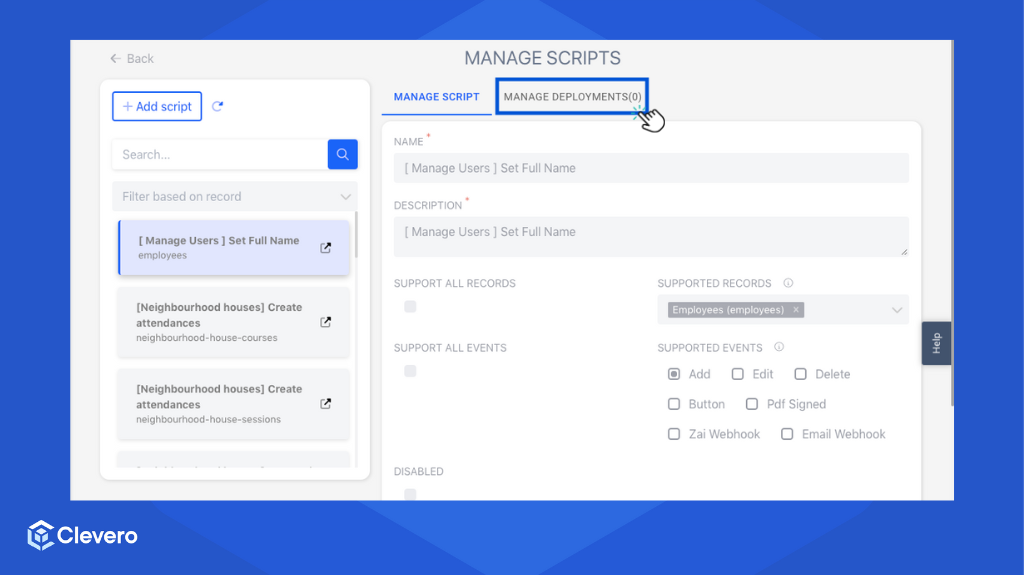
- You will need to follow the same steps as creating a new deployment. The difference is that the "Event" selection only displays specific events configured within the script.
- Click on "Save new" to save the changes.
2. Scheduled Deployment
To create a new scheduled deployment, follow these steps:
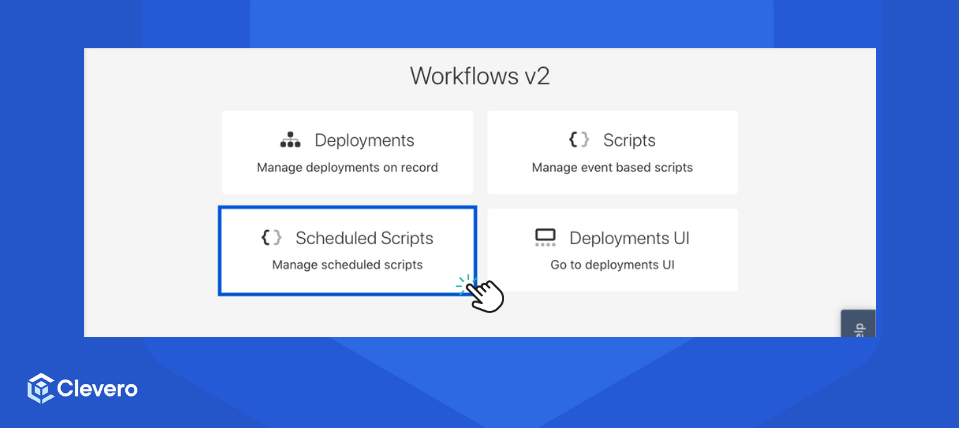
- Click on the "Settings" option and proceed to "System Settings".
- Choose "Workflows" from the available options.
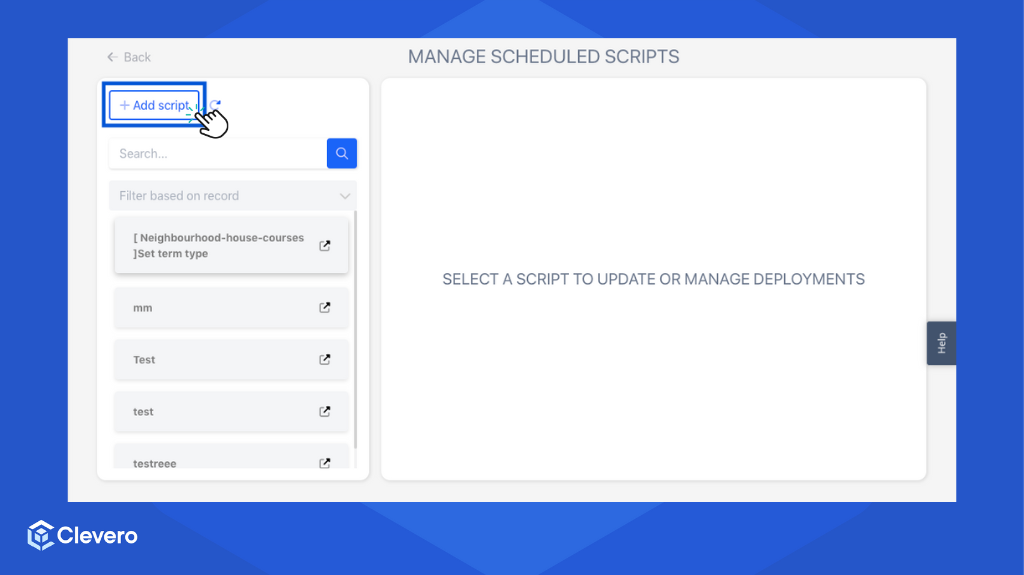
- Select the "Scheduled Scripts" option.
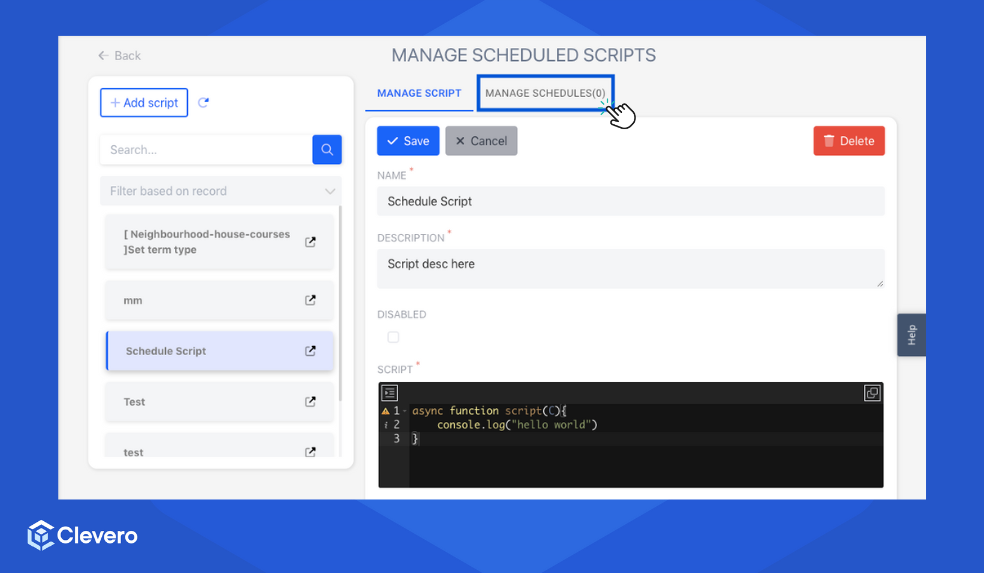
- Click the "Add script" button to create a new scheduled script. Fill in all the provided fields.
Info:For more information about creating scripts, please refer to the Script page.
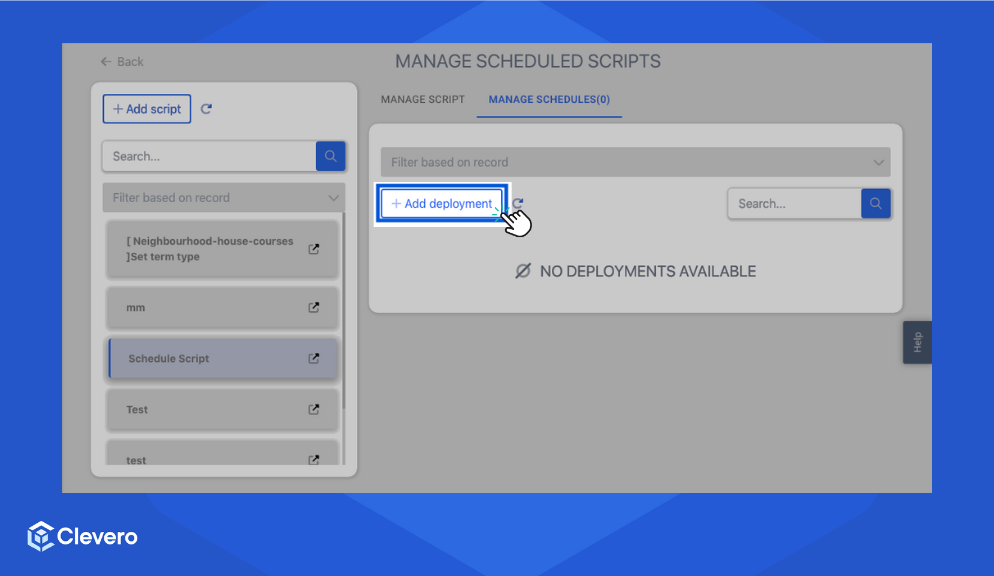
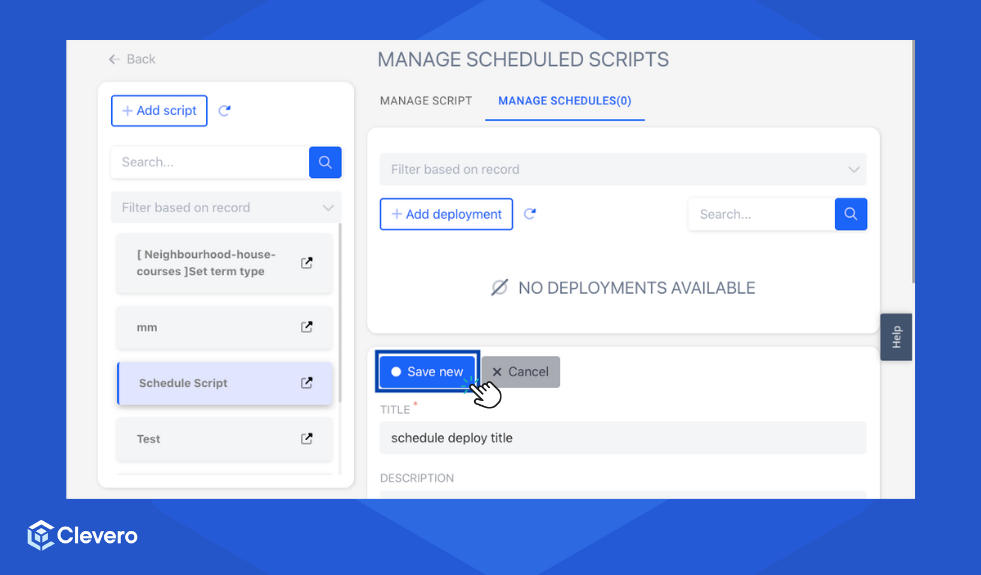
- After saving the script, switch to the "Manage Schedules" tab.
- Click on the "Add deployment" button.
- Provide a name and description for the deployment.
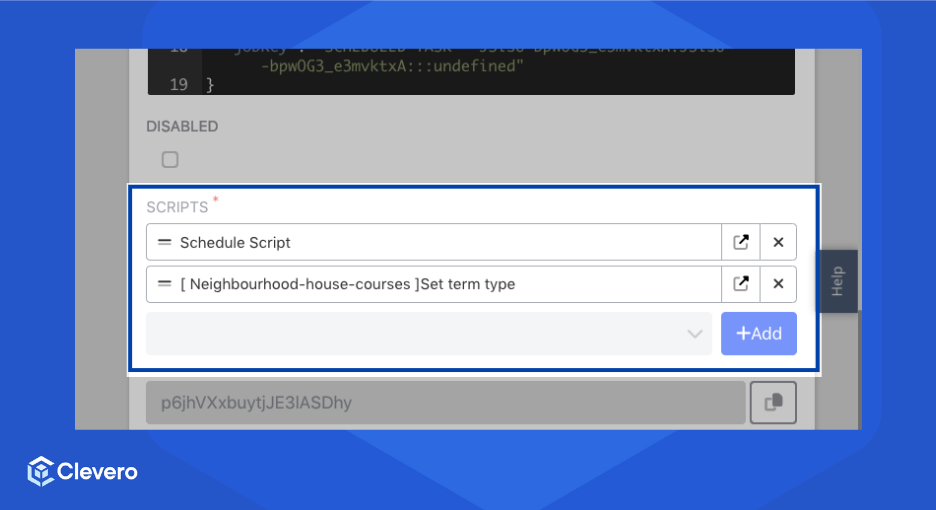
- Write the "Scheduled Metadata" to define the schedule configuration that needs to run.
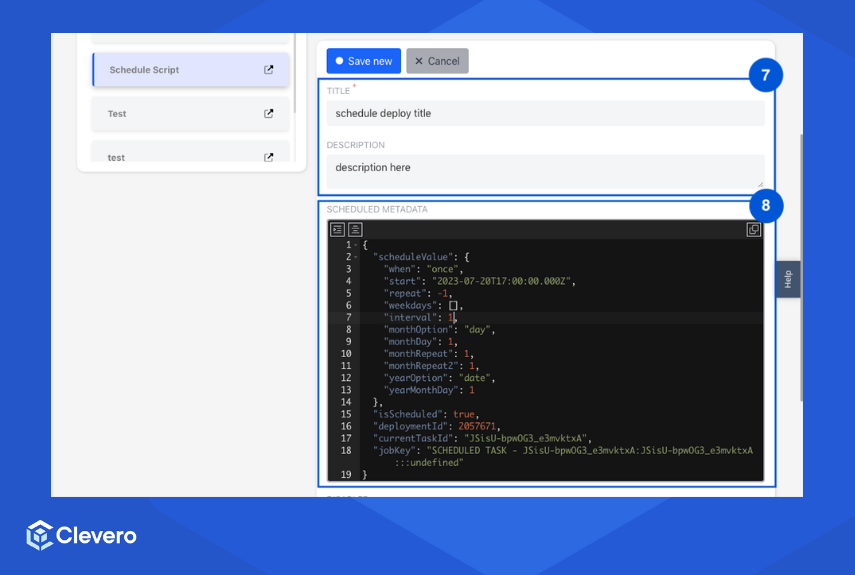
Below is an example of the Scheduled metadata:
{
  "scheduleValue": {
    "when": "once",
    "start": "2023-07-20T17:00:00.000Z",
    "repeat": -1,
    "weekdays": [],
    "interval": 1,
    "monthOption": "day",
    "monthDay": 1,
    "monthRepeat": 1,
    "monthRepeat2": 1,
    "yearOption": "date",
    "yearMonthDay": 1
  },
  "isScheduled": true,
  "deploymentId": 2057671,
  "currentTaskId": "JSisU-bpwOG3_e3mvktxA",
  "jobKey": "SCHEDULED TASK - JSisU-bpwOG3_e3mvktxA:JSisU-bpwOG3_e3mvktxA:::undefined"
}
Info:If you need assistance with creating the scheduled metadata, please feel free to contact us for support.
- The script you created before will be included in the deployment. You may also add another script to be deployed.
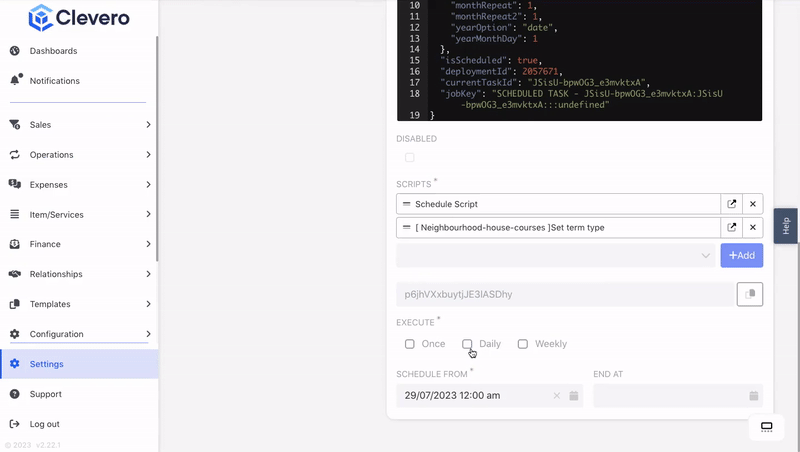
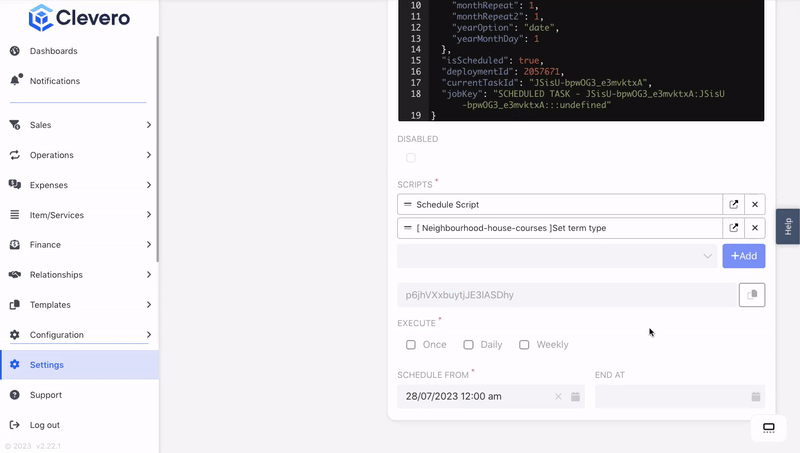
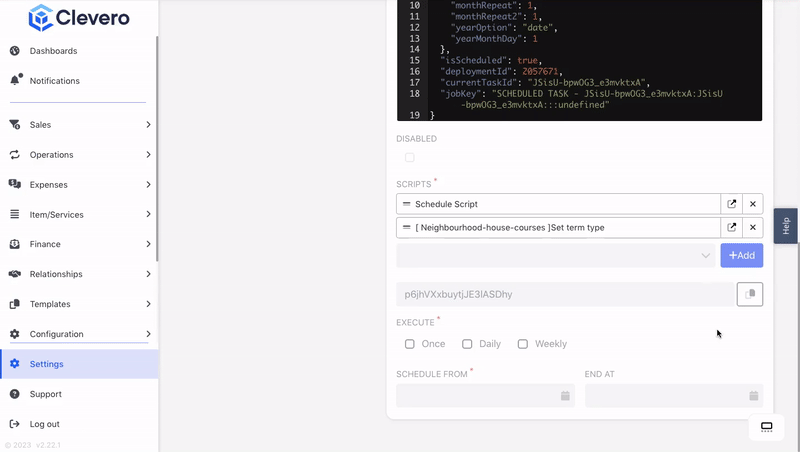
- Now, set the frequency of the deployment:
1️⃣ Once
Choose "Once" if you want the deployment to run only once. Set the date and time for the deployment.
The example below shows that the deployment will occur on July 29, 2023, at 12.45 am:
2️⃣ Daily
Choose "Daily" if you want the deployment to run daily. Set the start and end date and the interval between days.
The example below shows that the deployment will start on August 1, 2023, and end on August 31, 2023. It will run daily at 2:00 pm, with an interval of 2 days between each execution:
3️⃣ Weekly
Choose "Weekly" if you want the deployment to run on specific days of the week. Set the start and end date, specify the days the deployment should repeat (you can select more than one day), and set the interval between weeks.
The example below shows that the deployment will start on September 1, 2023, and end on September 30, 2023. It will run weekly on Mondays, Wednesdays, and Fridays at 10:00 am, with a 1-week interval between each execution:
- Click on "Save new" to save the changes, and the deployment will be executed based on the schedule.
📌 Need Help?
