Standard Connectors
🔌 Swift Integrations with Clevero's Standard Connectors.
Connectors for Integrations
Connectors are tools that help Clevero work together with other services. They make things easier by allowing different systems to share information smoothly.
You can access connectors by following these steps:
- Go to "Settings" > "System Settings".
- Select "Standard Connectors".
Now let's learn about the connectors available for you:
1. General
1.1. Stripe
Integrating with Stripe helps with online payments. By connecting Stripe to Clevero, you can accept payments securely and handle invoices efficiently.
To connect with Stripe, follow these steps:
- Enter your Stripe API keys:
- Publishable Key: A key that you can share publicly.
- Product Id: A unique ID for a specific product.
- Secret Key: A password to confirm your identity and access sensitive information.
- Signing Secret: A secret code to verify that something is genuine and not fake.
- To get the above information, you have to:
- Open your Stripe account.
- Go to Developers > API Keys.
- Copy the keys and paste them into Clevero.
- Click on the "Save" button to save your changes.
1.2. Pin Payments
Integrating with Pin Payments enables smooth payment processing. With Pin Payments, you can accept online payments effectively and manage transactions seamlessly.
To set up Pin Payments:
- Check the "Use Pin Payments" box.
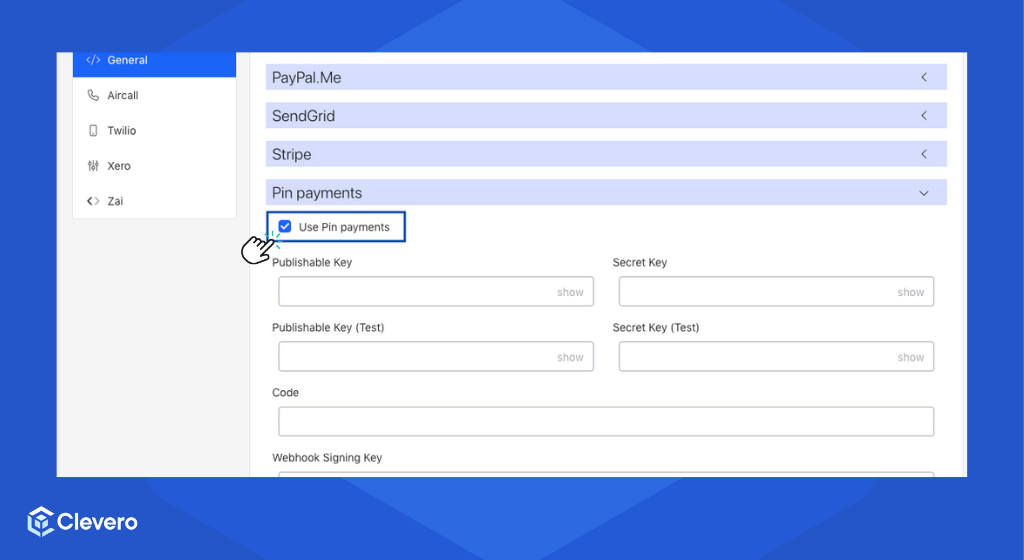
- Enter your Pin Payments API keys—either test, live, or both.

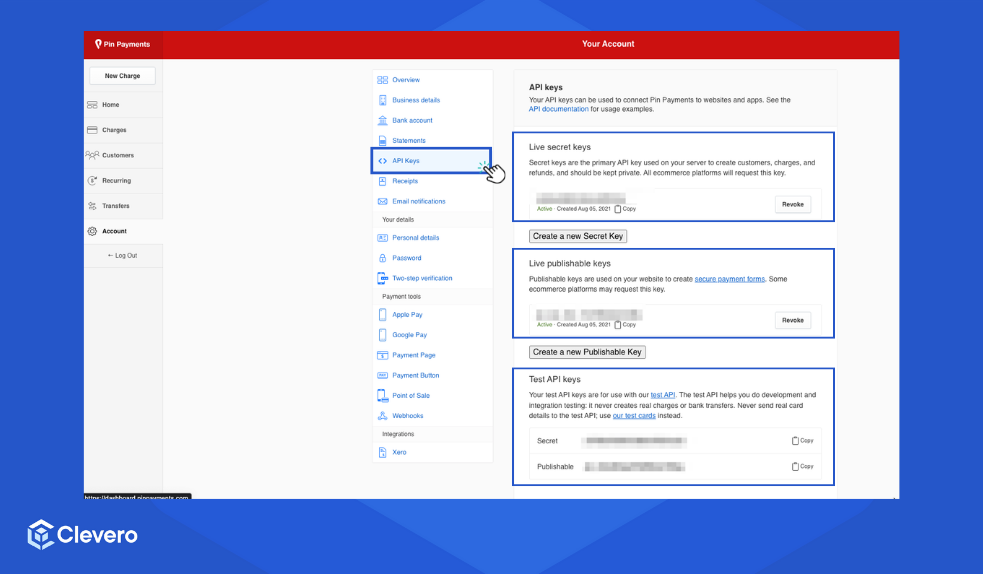
Go to your Pin Payments account and select the "Account" menu.

Choose the "API Keys" option. Copy the live secret, publishable, and test API keys.
- Input the code and webhook signing key, which is used to confirm the authenticity and communication between Clevero and Pin Payments.
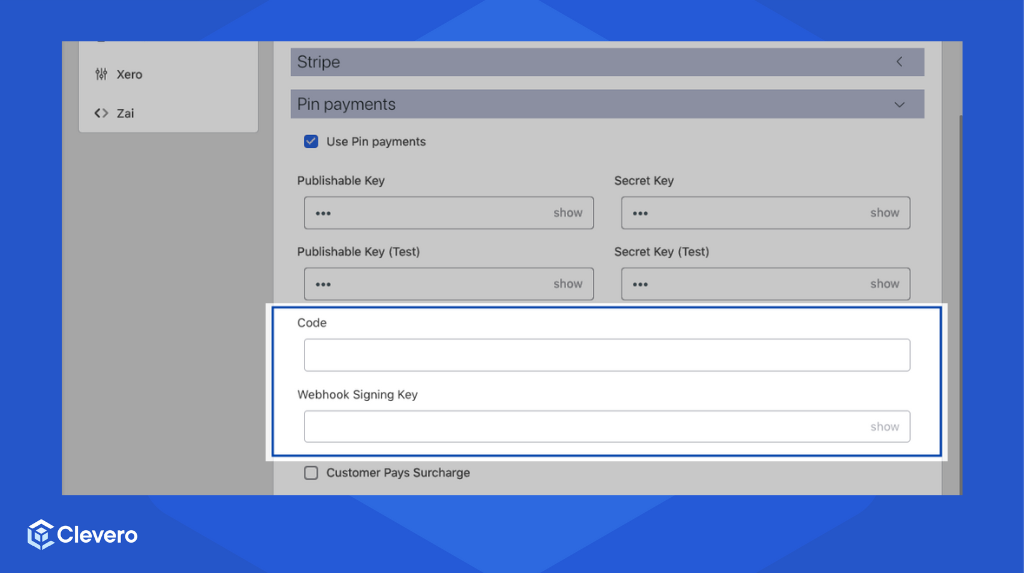
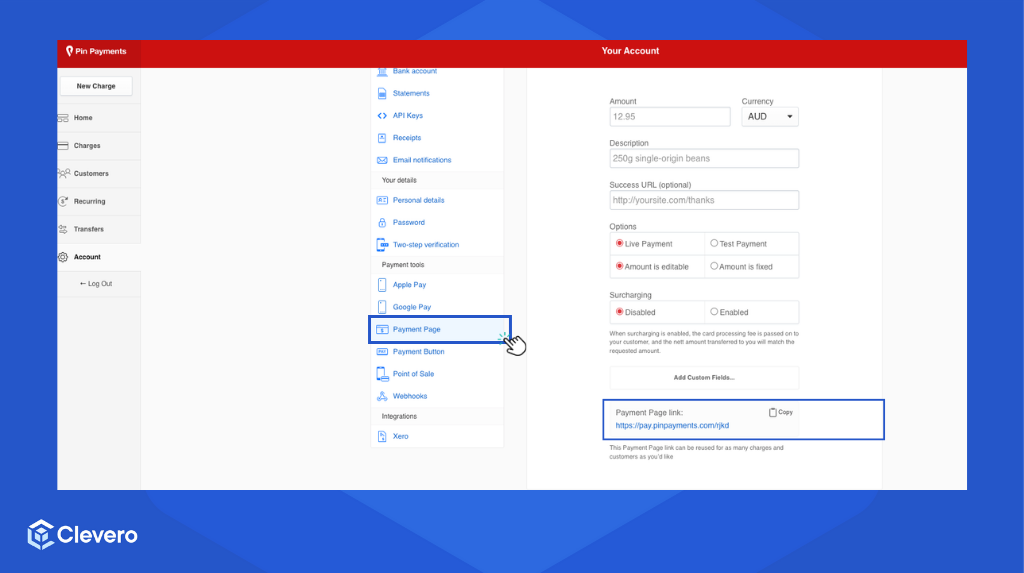
Go to your Pin Payments account and select the "Account" menu.
Choose the "Payment Page" option. Copy the payment page link and paste it into Clevero.
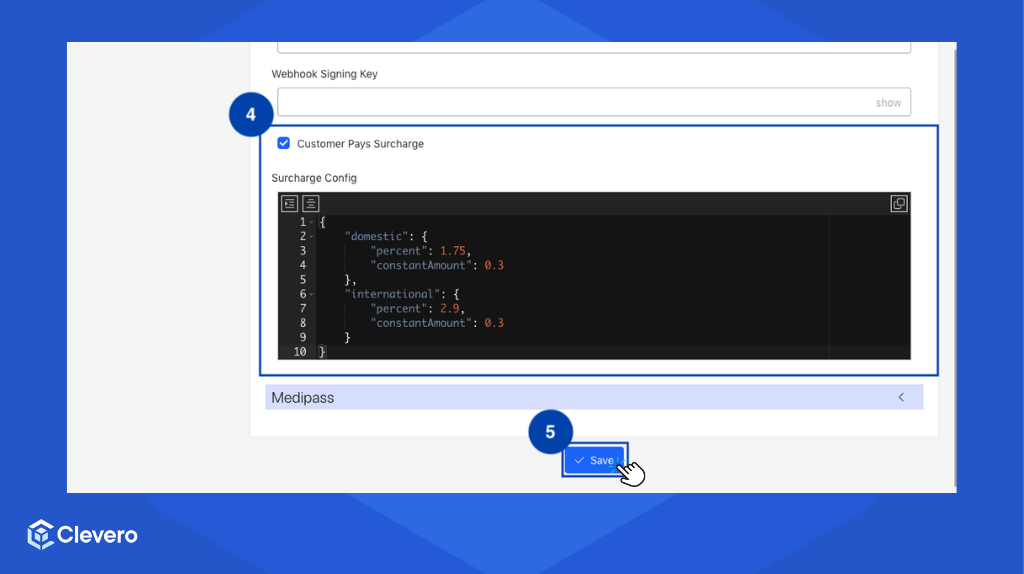
- If a surcharge applies to the instance, enable "Customer Pays Surcharge". Then, add the Surcharge Config below.
{
    "domestic": {
        "percent": 1.75,
        "constantAmount": 0.3
    },
    "international": {
        "percent": 2.9,
        "constantAmount": 0.3
    }
}
InfoThe
percentandconstantAmountvalues might differ based on your Pin Payments account and should match their provided values.
- Click the "Save" button to save the changes.
2. Aircall
- You can enable the Aircall Dialer at the instance level through the following settings page:
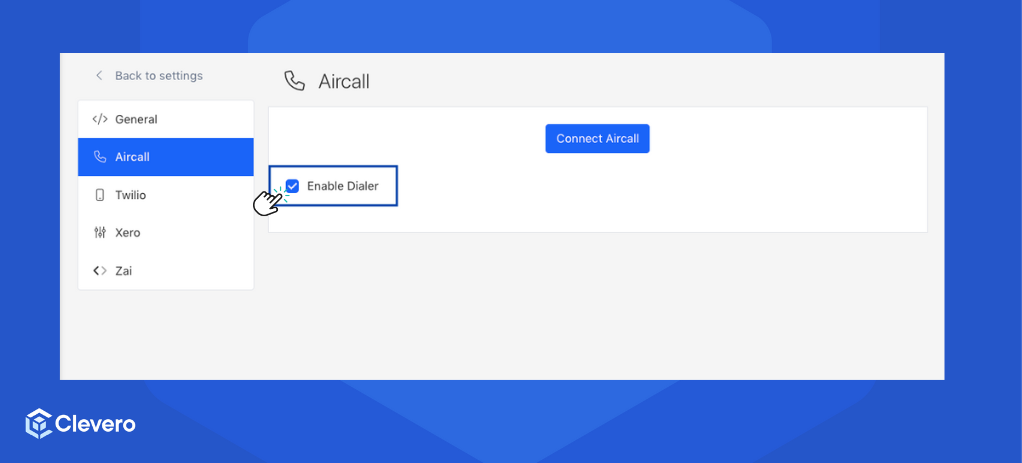
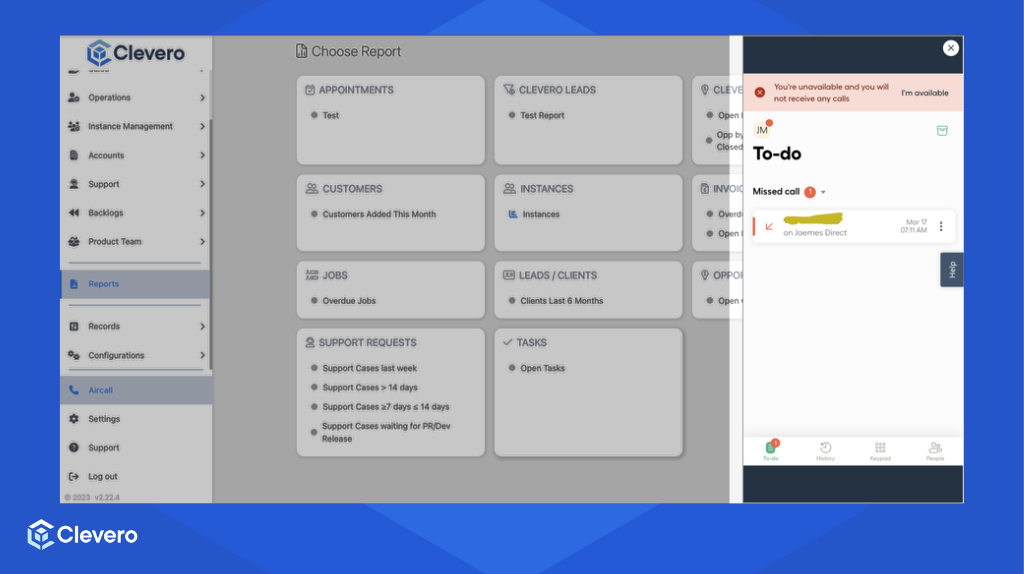
- After checking the checkbox, you'll see the Aircall Dialer icon in the side navigation bar if you reload the page. You'll need to sign in to your Aircall account to use it.
NoteWe don't save any specific credentials for this dialer, so each person using it needs their login details.
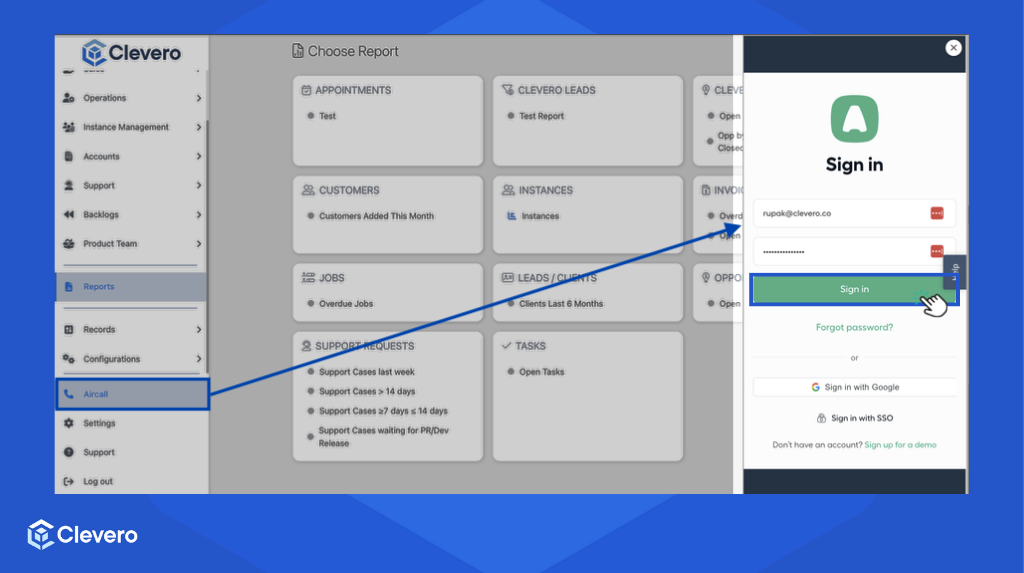
- After logging in, the dialer should look like this. This will allow the users to place calls.
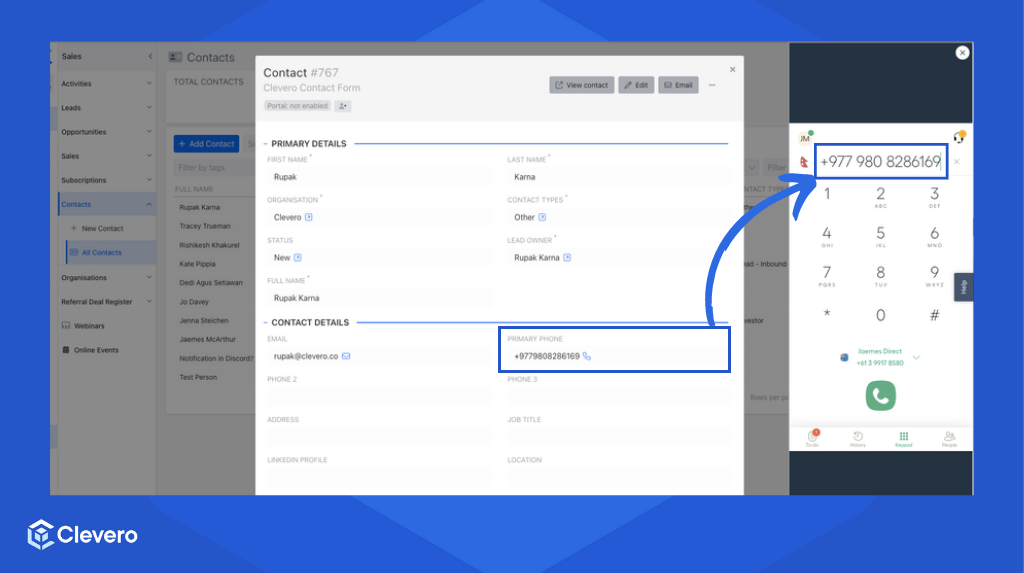
- You can manually input phone numbers to make calls. Additionally, clicking phone number fields in view mode within Forms or Entry Layouts will automatically copy the active number to the dialer.
3. Xero
The Xero integration simplifies syncing data between Clevero and Xero. This connection can be set up to streamline processes within specific modules. For example, the Consultants module can be configured to generate Xero invoices whenever a Clevero invoice is created.
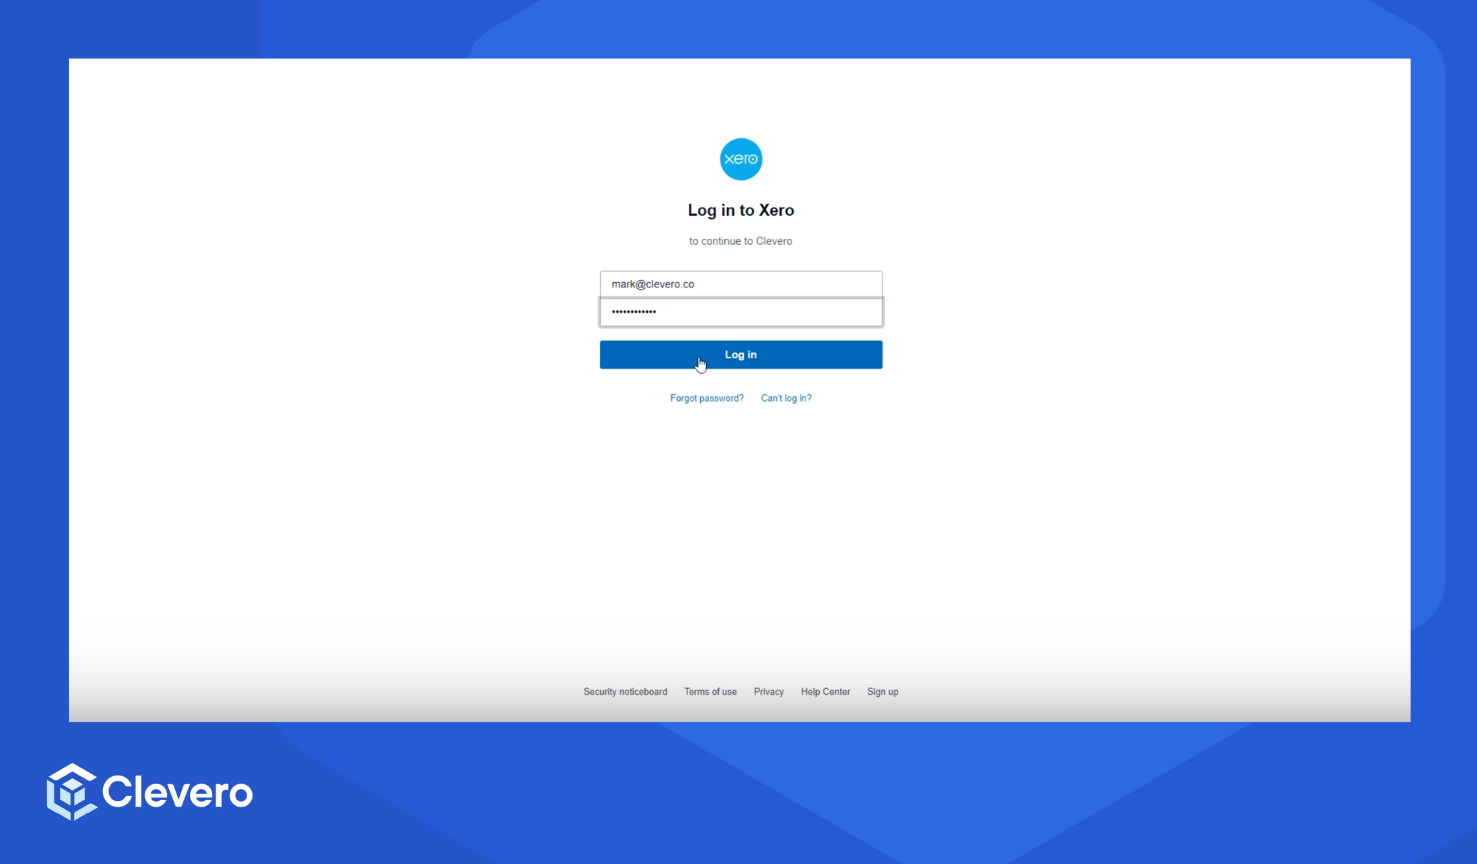
- Start by connecting Clevero to Xero. Click the "Connect to Xero" button.

- Enter your Xero credentials > Click the "Login" button.
- Set up multi-factor authentication (MFA) to add a layer of security to your Xero account. If you've already set it up, click "Not now" to skip it.
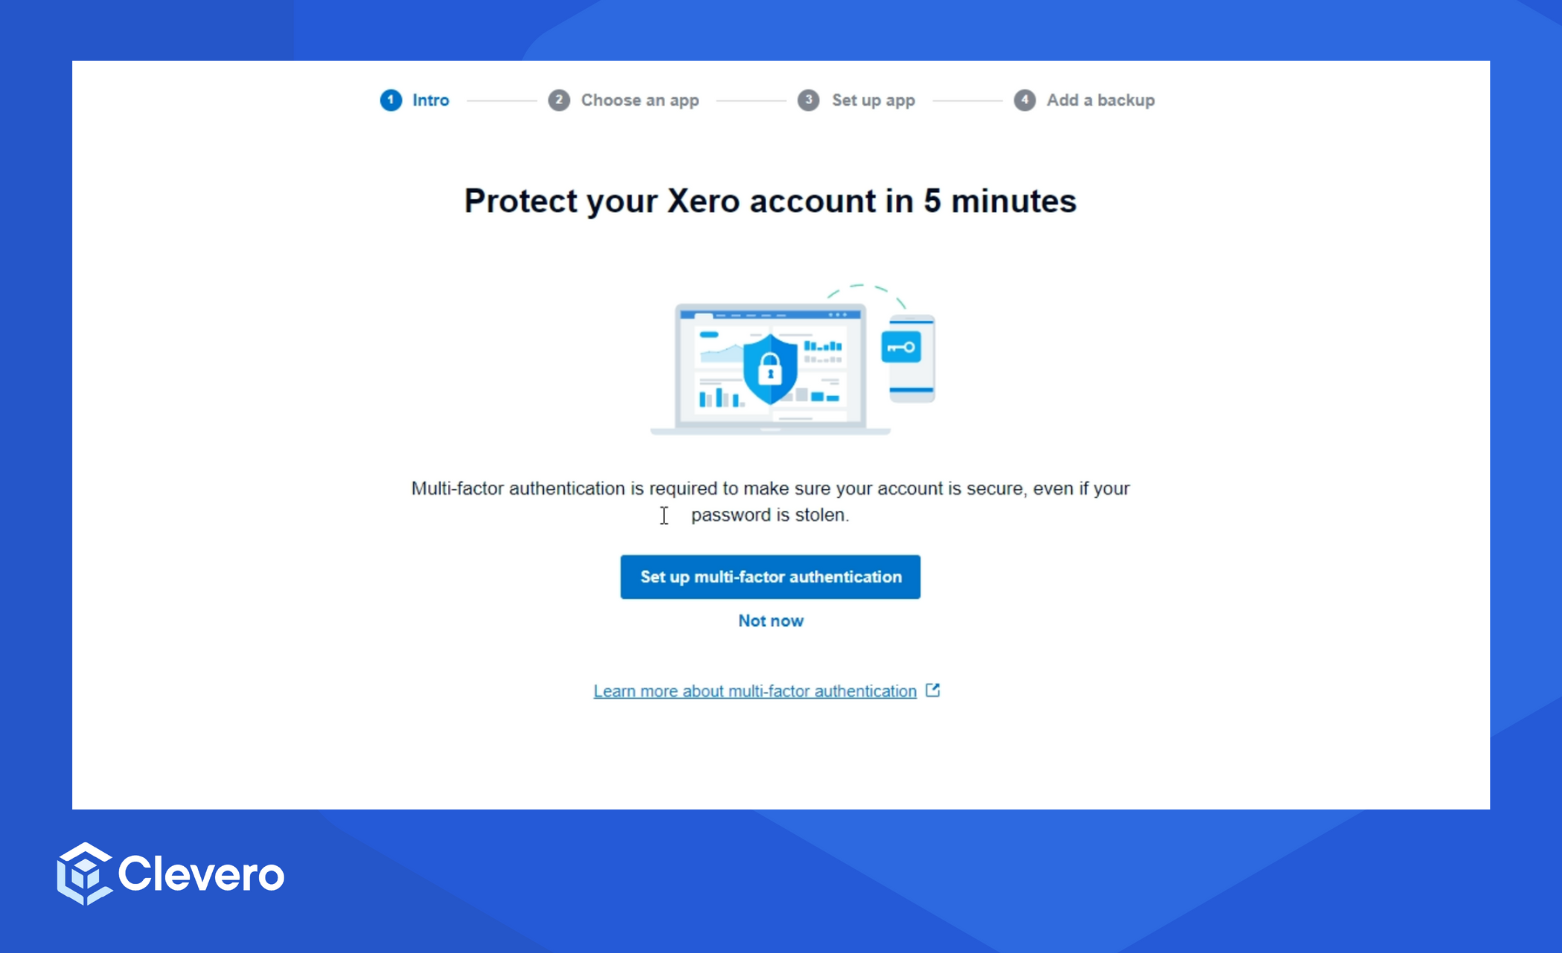
Info:See the Xero documentation for details on setting up MFA.
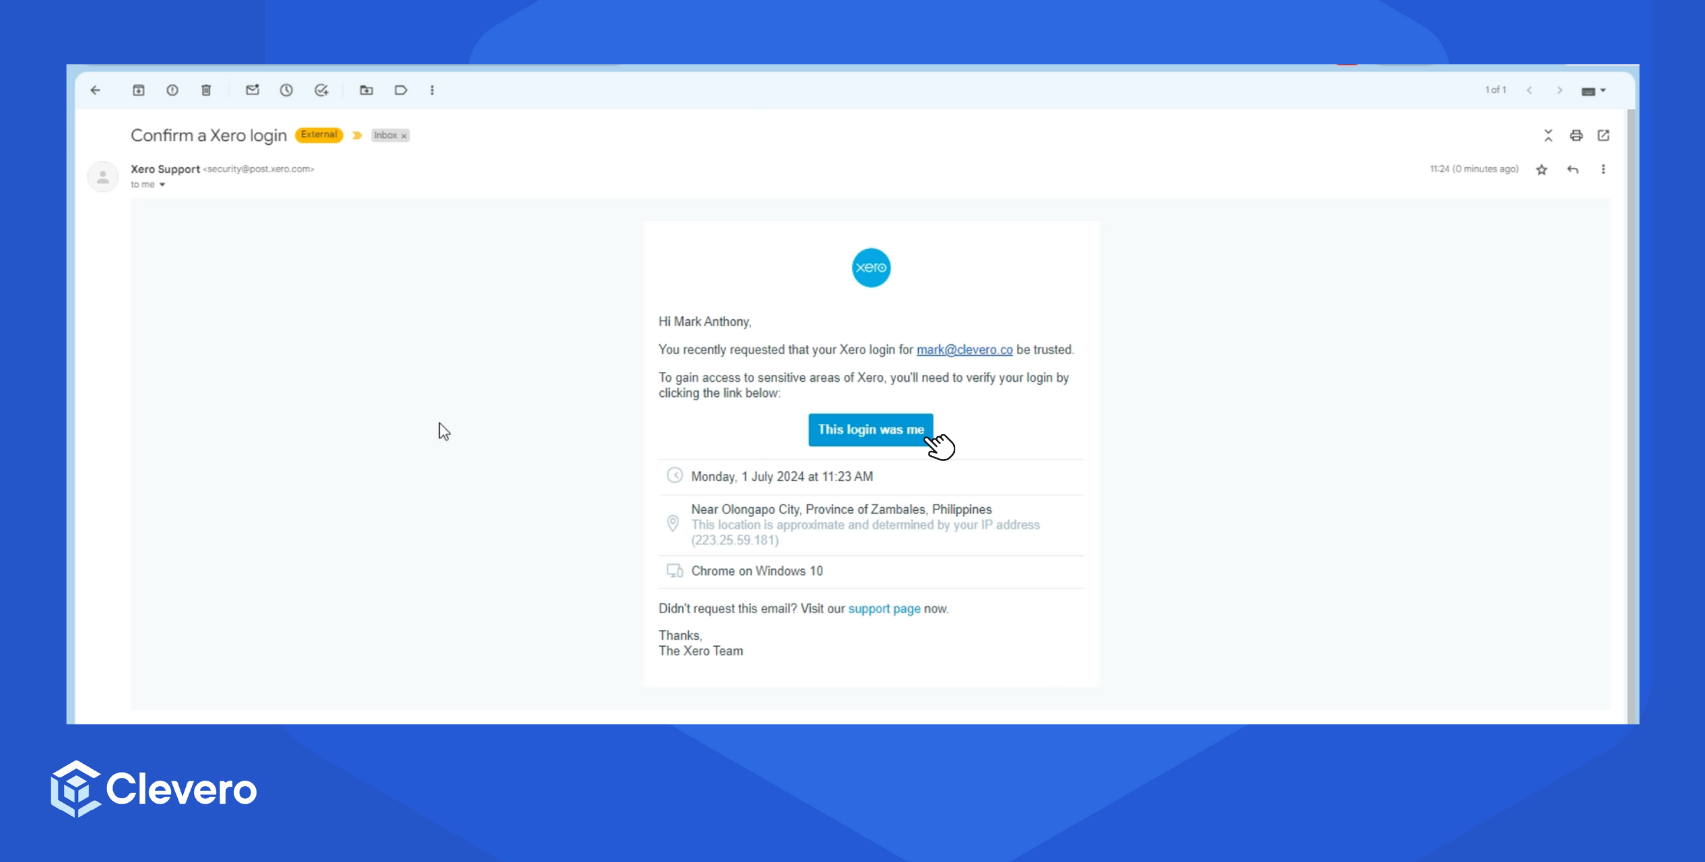
- Confirm the Xero login on your email.
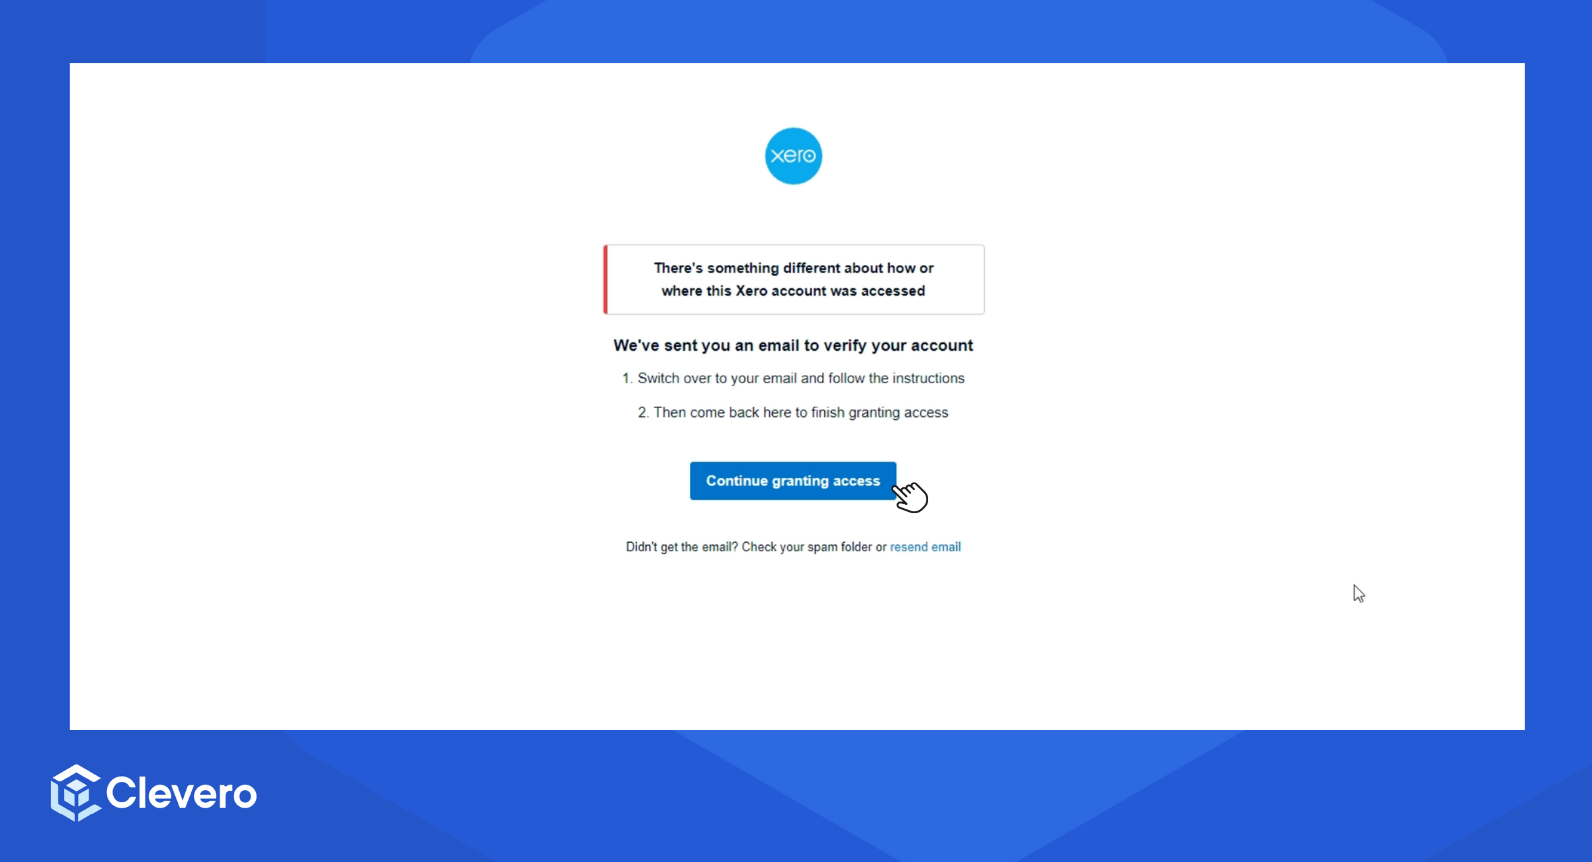
- Return to the Xero page and click the "Continue granting access" button.
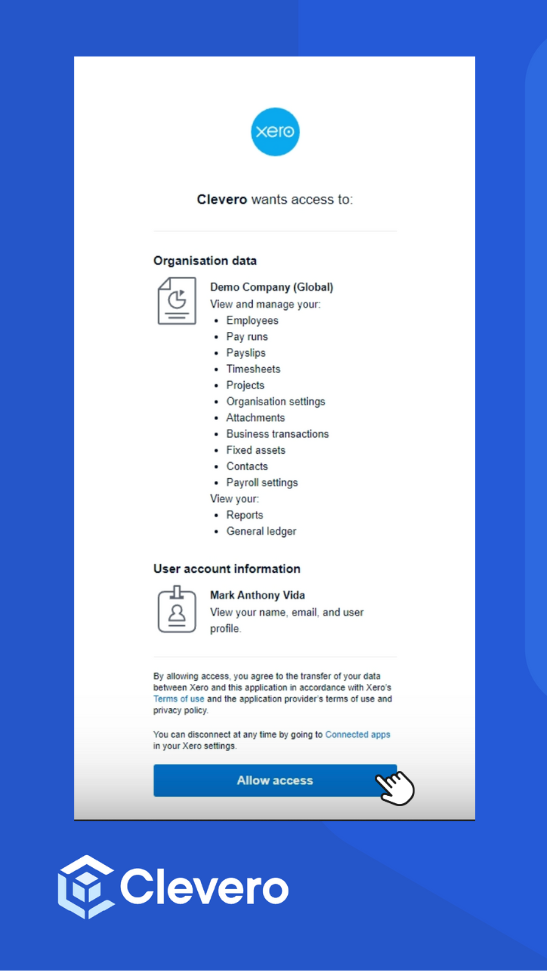
- Clevero will request permission to access your Xero organisation's data and account details. Choose the organisation you want to connect to.
- Click "Allow Access" to proceed.
- You're now connected to Xero.
- Sync Organisation from Xero: Use this to sync organisations from Xero to Clevero.
- Sync Accounts, Currencies, Tax Rates, Branding Themes, and Items from Xero: Use this to sync accounts, currencies, tax rates, branding themes, and items from Xero to Clevero.
- Sync Customers and Suppliers from Xero: Use this to sync customers and suppliers from Xero to Clevero.
- Once you click the sync button, a confirmation pop-up will appear indicating that the sync was successful, and the desired entries will be automatically imported into Clevero.
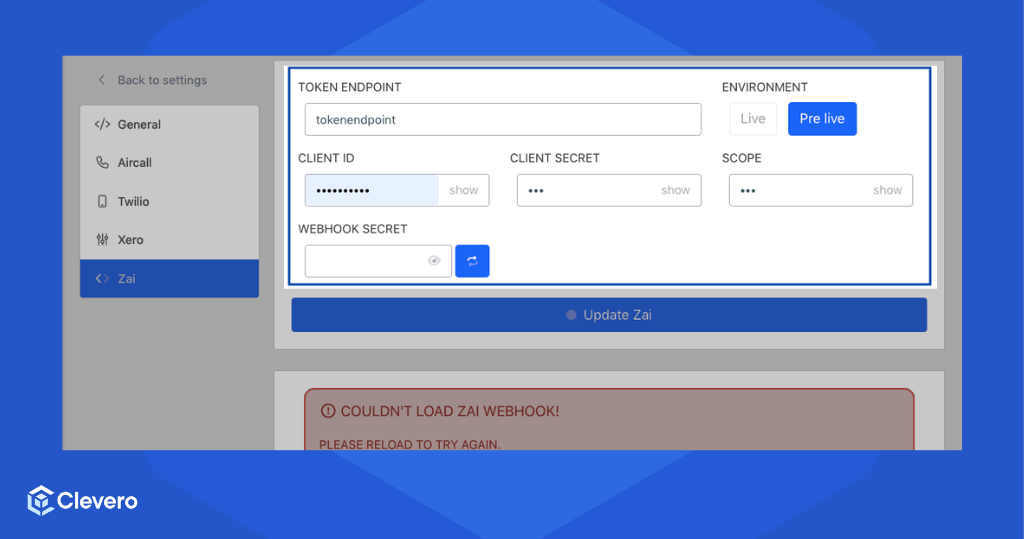
4. Zai
Integrating Zai with Clevero brings valuable advantages by enhancing your overall experience. With the Standard Connector, you can update Zai.
- Input or modify the following details:
- Token Endpoint: A specific URL provided by Zai to obtain an authentication token.
- Client ID and Secret: A credential unique to your application. The Client ID is like a username, and the Client Secret is a password-like key that should be kept confidential.
- Scope: The specific permissions or access levels your application requests from Zai.
- Environment: The operational environment in which your application will interact with Zai (Live/Pre-Live).
- Webhook Secret: A unique key shared secret between Zai and your instance.
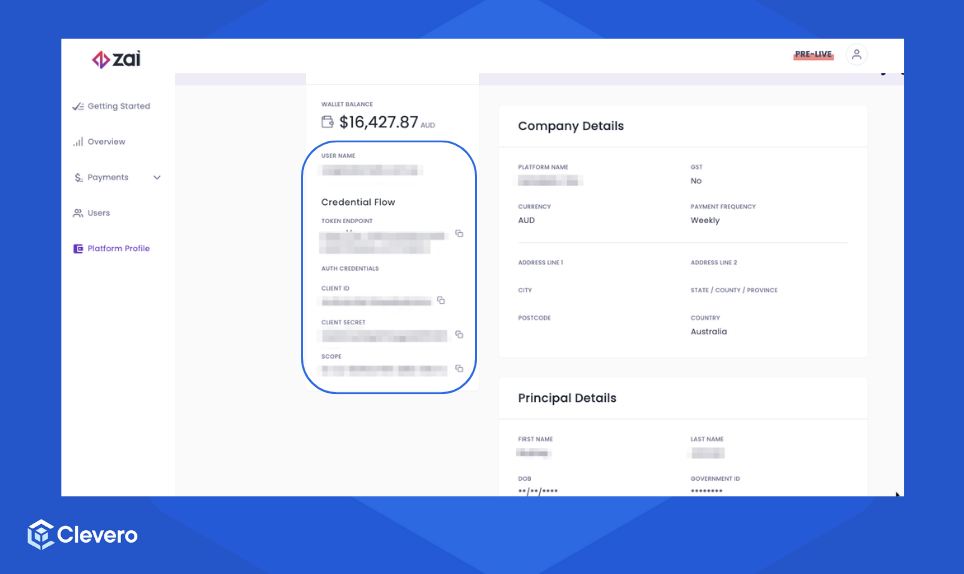
- Go to your Zai account's platform profile to obtain the required information. There, you'll find the necessary details that you can copy.
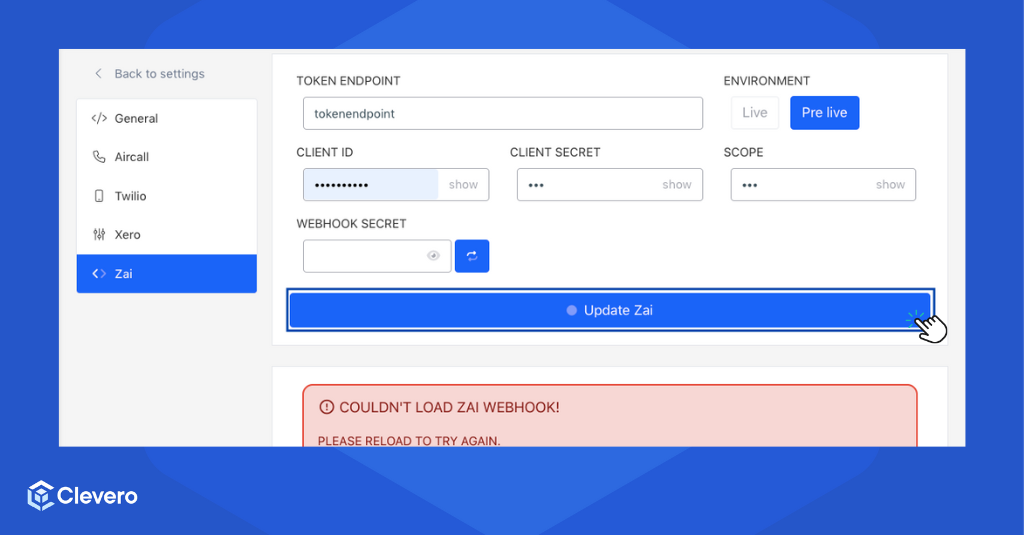
- Click the "Update Zai" button to proceed with the integration.
📌 Need Help?
