Record Auto IDs
🆔 Automatically generated unique identifiers assigned to records.
Record Auto IDs in Clevero simplify the process of uniquely identifying records. With Record Auto IDs, you can eliminate the manual effort of assigning unique identification numbers to each record, allowing seamless data management and organisation.
Why Use Record Auto IDs?
Imagine you’re a project manager at a busy design agency. Your team juggles multiple projects at once, each with its own tasks, milestones, and deliverables. Simply naming a project after a client (e.g., “ABC Company”) isn’t enough, especially when the same client has several projects running simultaneously.
That’s where Record Auto IDs help. Instead of manually creating references, the system automatically assigns unique identifiers (e.g., PR-100) to each record. These IDs make it easy to distinguish and track projects without extra effort from you or your team.

By using Auto IDs, you keep your records organised, avoid confusion, and save time managing project data.
Auto ID Generation Rules
Auto ID generation rules dictate the principles behind generating unique identification numbers for records in Clevero. Here are some key aspects to consider:
| Rules | Description |
|---|---|
| Incrementing Rules | Auto IDs may increment by a fixed number (e.g., +1). |
| Handling Overwrite | Clevero's Auto ID generation rules consider scenarios where records need correction. The system can handle the gaps left by the current records and ensure the generated IDs remain sequential or follow the designated numbering pattern. |
| Numbering Patterns | Auto IDs can follow predefined numbering patterns, such as sequential numbers. |
| Starting Number | You can define the starting point for Auto IDs, allowing you to continue from a specific number. |
| Uniqueness | Auto IDs must be unique for each record to avoid conflicts or duplication. |
Watch the guided demo below to define the structure, prefixes, suffixes, and numbering patterns to align with your preferences.
You can also follow the same steps using the written guide below.
Generate Auto ID Formats
- Navigate to "Settings" > "System Settings".
- Select "Records".
- Choose the desired record you want to configure.
- On the sidebar, click on "Auto IDs".
- Specify each setting provided:
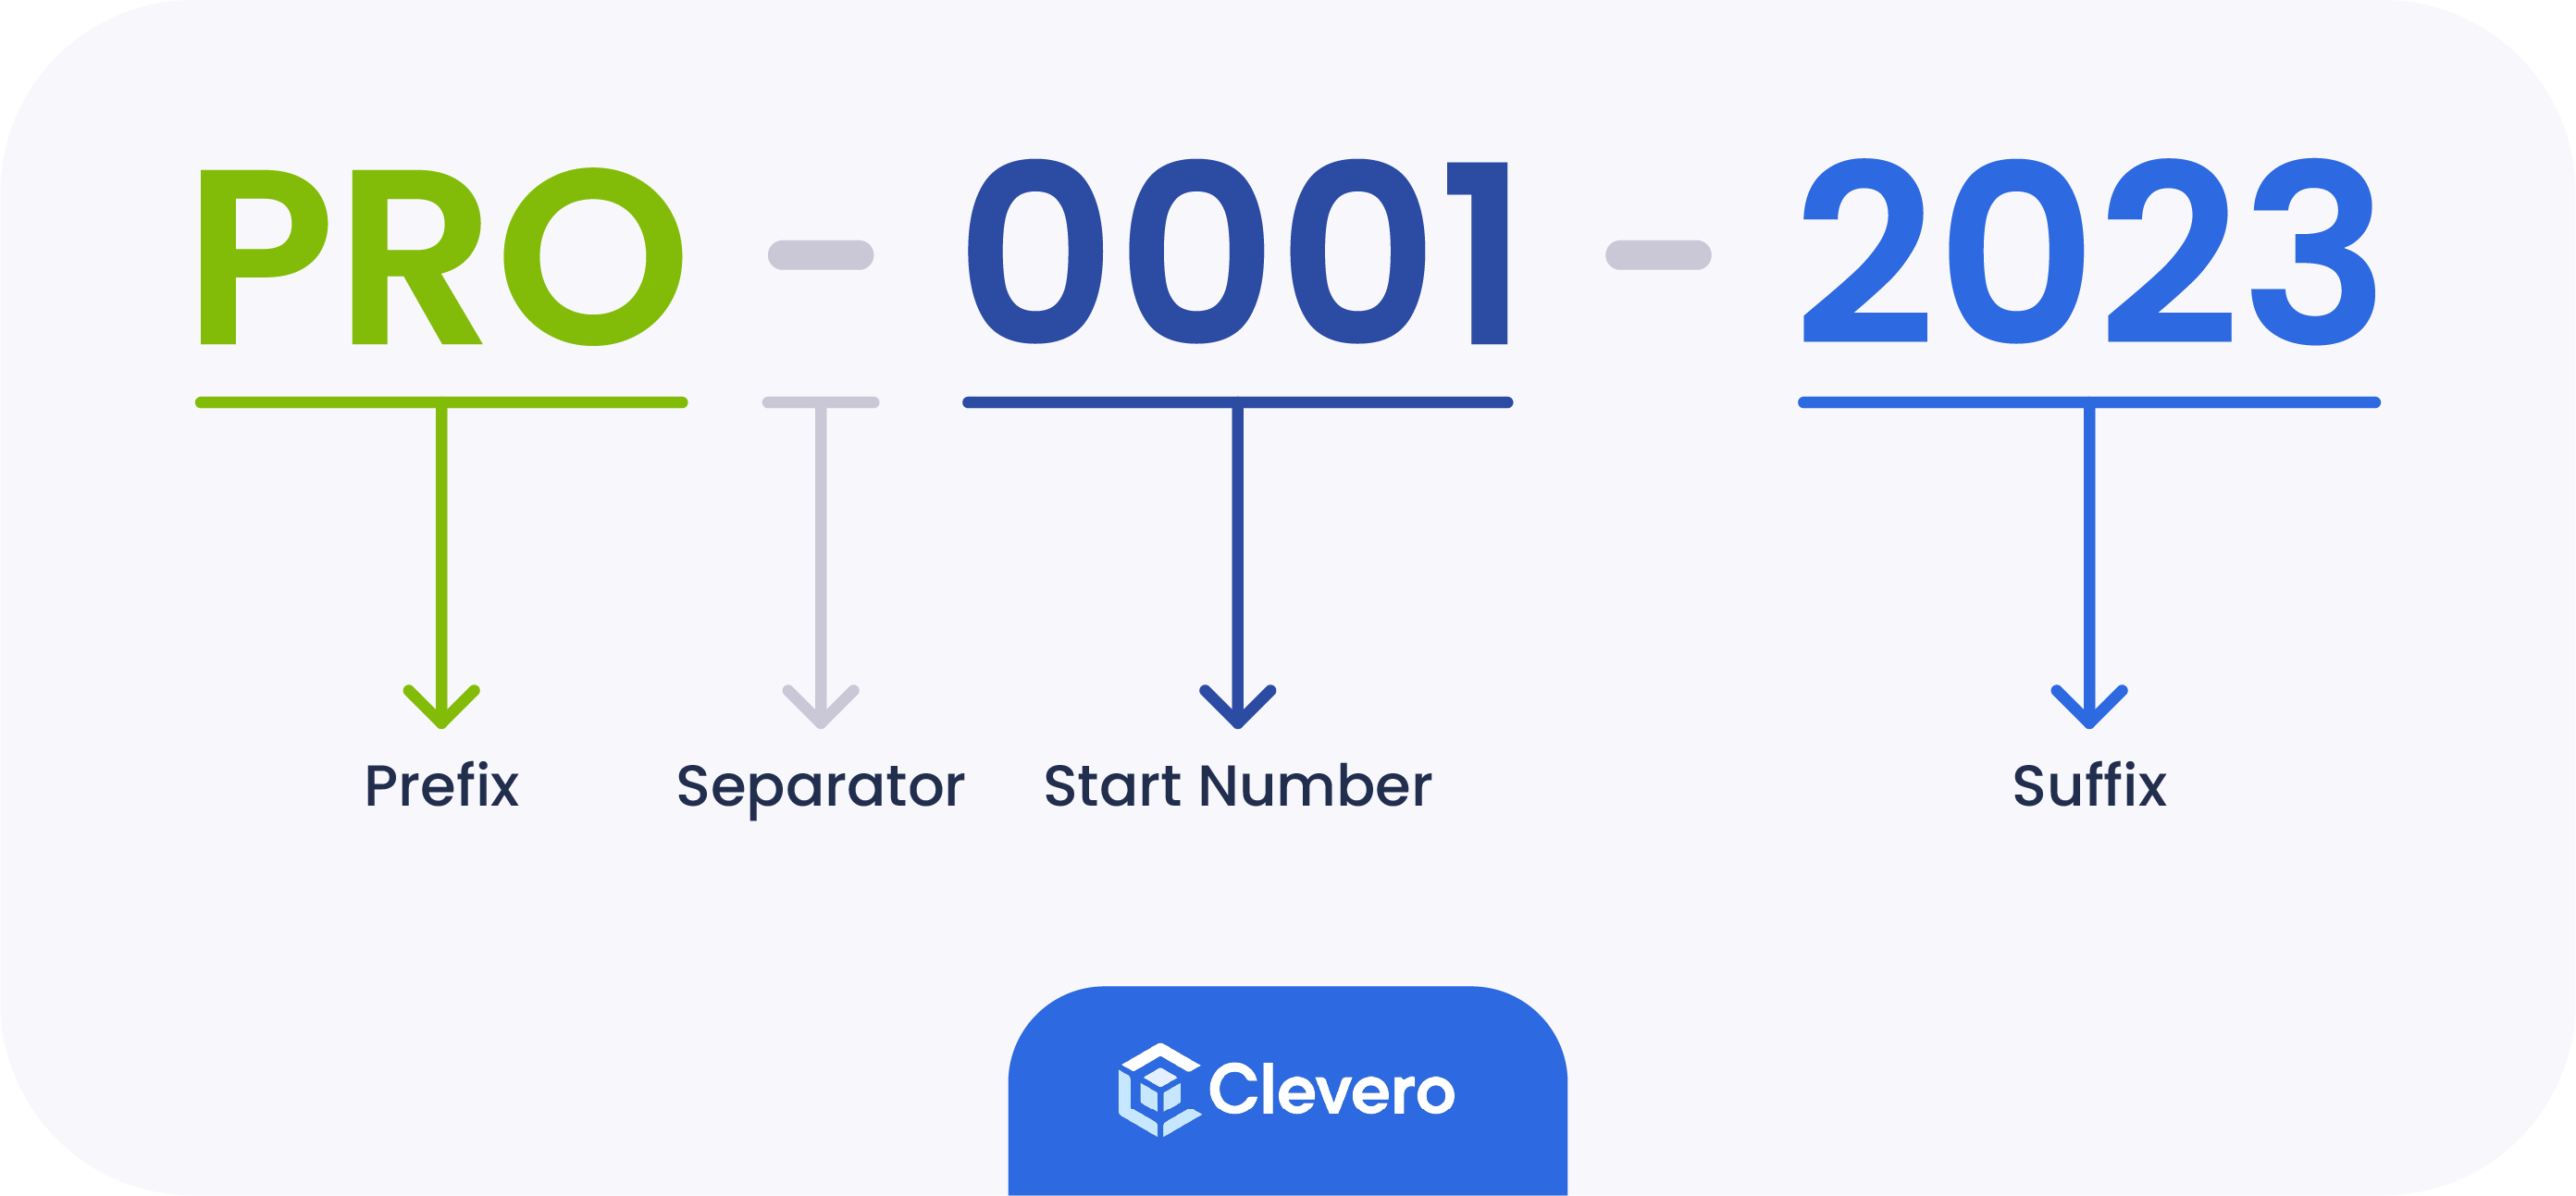
- Prefix: A set of characters or numbers before the ID. It helps add context or specific information to the ID. For example, "PRO".
- Suffix: A set of characters or numbers after the ID. This feature is handy for including additional information or formatting requirements. For example, "2023".
- Separator: A character or symbol that separates the prefix, ID, and suffix. It enhances readability and improves the visual representation of the generated IDs. Commonly used separators are hyphens ( − ), underscores ( _ ), or periods ( . ). For example, "-".
- Minimum Digits: The minimum number of digits to use. It ensures that the IDs are displayed consistently. For example, "4".
- Start Number: The initial value of the ID. It allows you to specify the starting point for the sequence. For example, "1".
- Click on the "Save" button to save the changes.
Overwrite Number
Overwriting the current number with a new number allows error correction, ensures data consistency, and facilitates the reorganisation and merging of records. However, it's important to maintain data integrity by adhering to formatting rules and uniqueness criteria when assigning the new number.
- On the Auto IDs form, check the "Overwrite current number with new number" box.
- Specify the newly assigned number for an auto-incrementing ID.
- Click on the "Save" button to save the changes.
RecommendationAvoid overwriting record auto IDs with the same existing number to prevent duplicate IDs.
📌 Need Help?
