Quickstart
Get started quickly with Clevero by following these steps to log in to your instance.
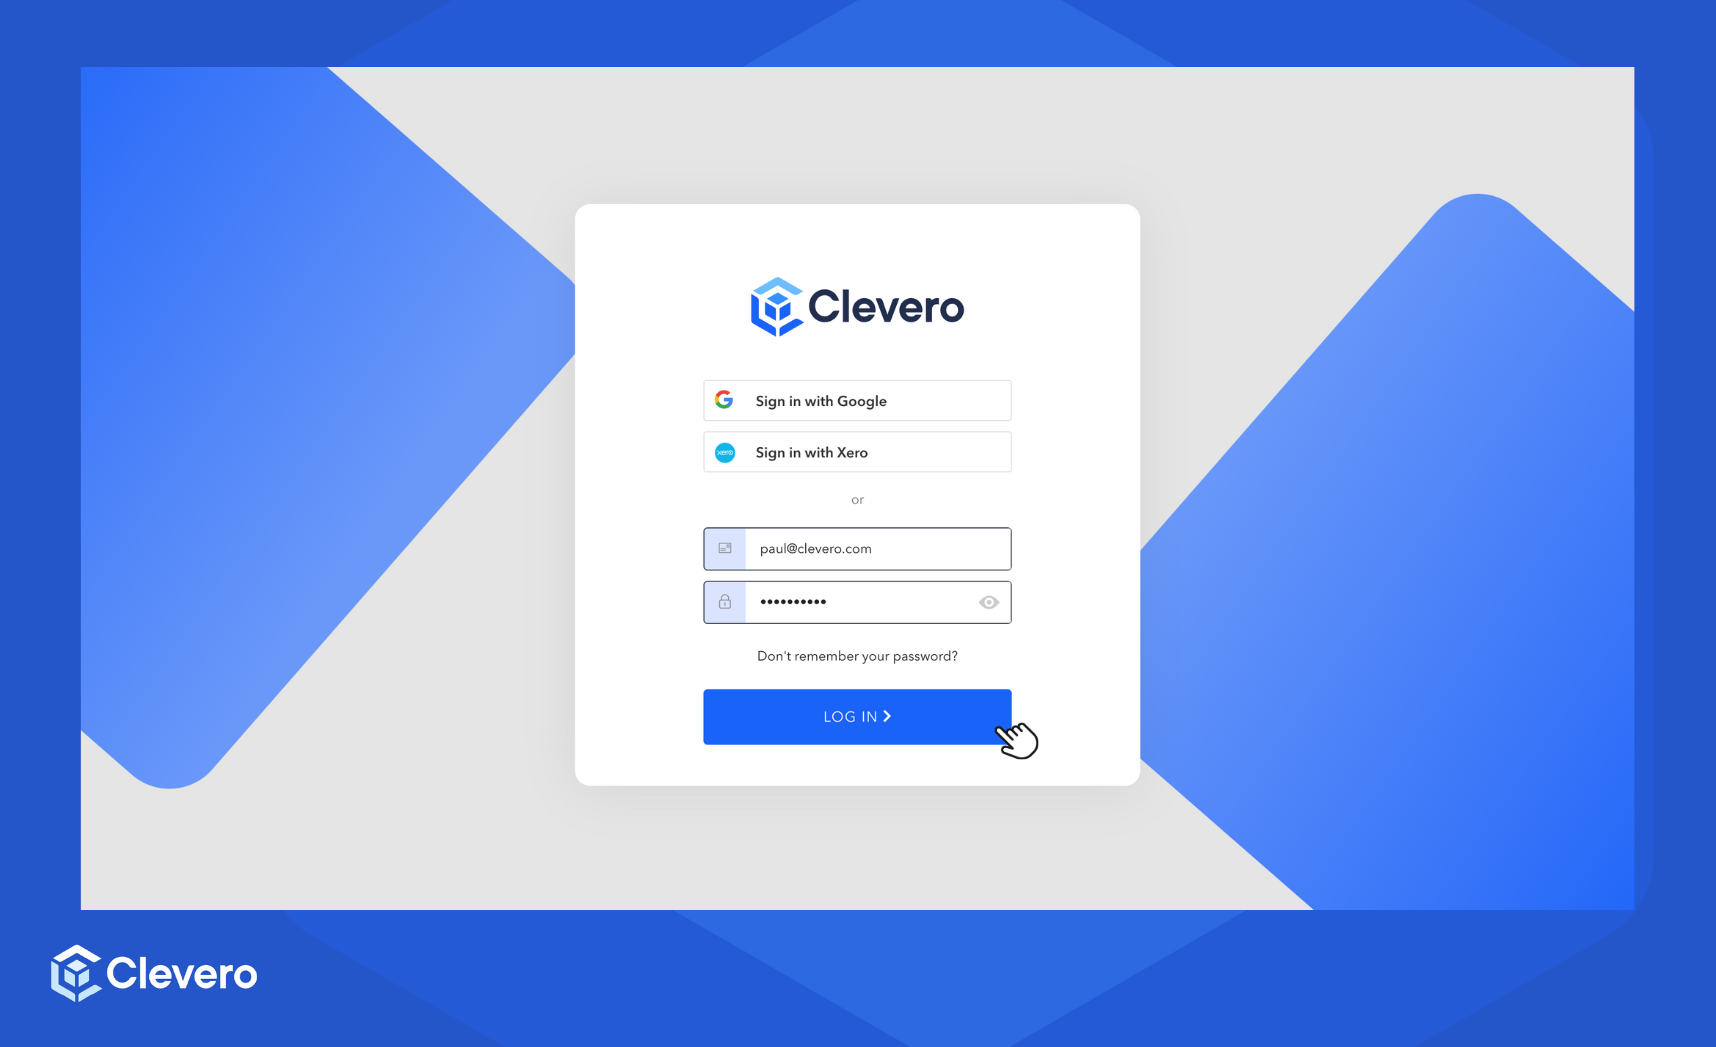
Step 1: Log in to the Clevero App
- You can log in to the app using the following ways:
- Log in with your username and password.
- Log in with Google.
- Log in with an Xero account.
- Click on Log In to proceed.
Secure your account with 2FA AuthenticationYou can now use Two-Factor Authentication as an additional security layer to ensure that you are the only person who can access your account. Learn more at the 2FA Authentication page.
Step 2: Reset Password
When you first register with the Clevero app, you can only log in using the provided username and password. After logging in, you can create your designated password for future logins.
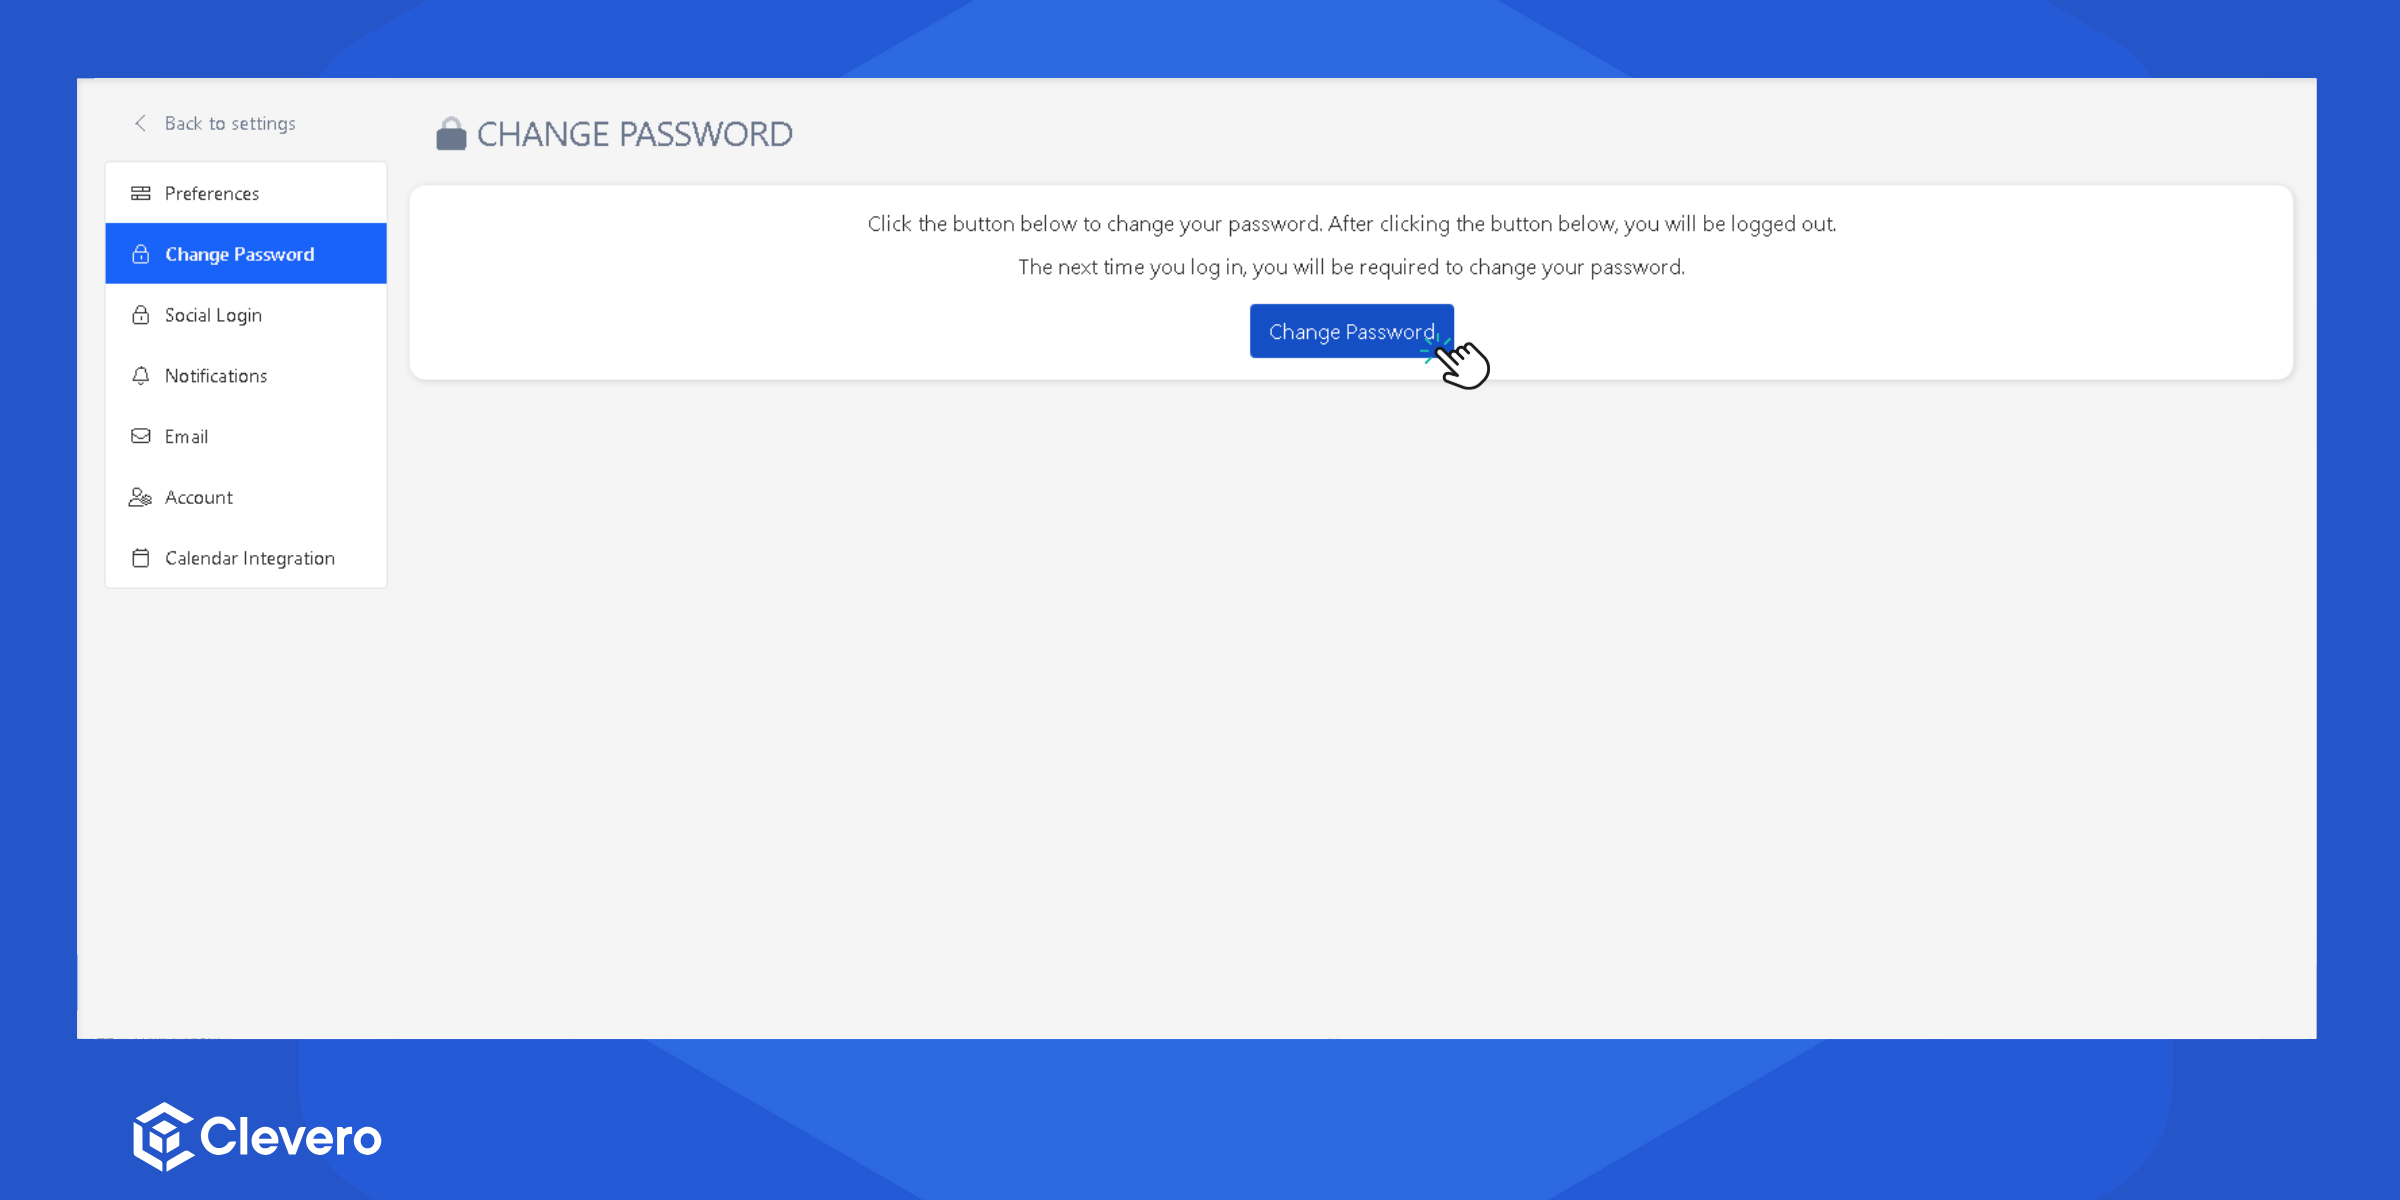
Info:For step by step instructions to reset your password, please visit the Resetting Password page.
Step 3: Add Users
Next, add users to your organization. Furthermore, you can manage the organization's user accounts by editing the user details, applying roles, and deactivating users.
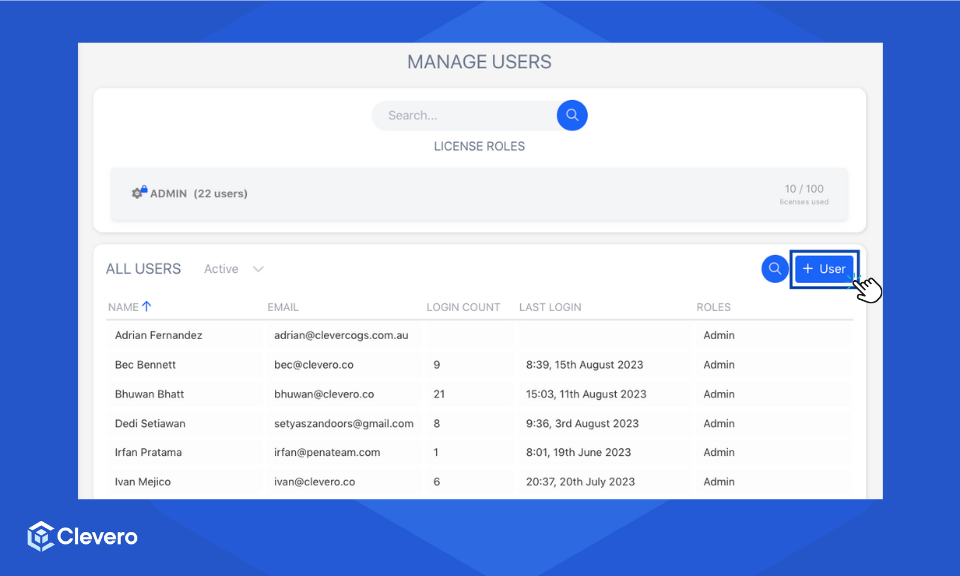
Info:For step by step instructions on adding a user and assigning a role, see the Adding User & Applying Role page.
Step 4: Update Instance Settings
This instance holds the special settings and details linked to your account, from contact information, location details, timezone, currency, email template, and e-signature setting.
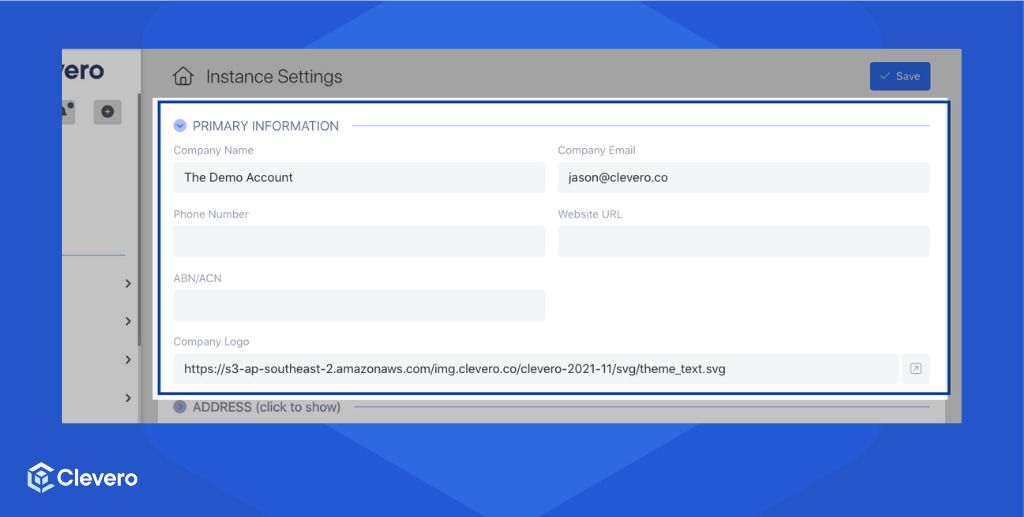
Info:For step-by-step instructions on updating instance settings, see the Updating Instance Settings page.
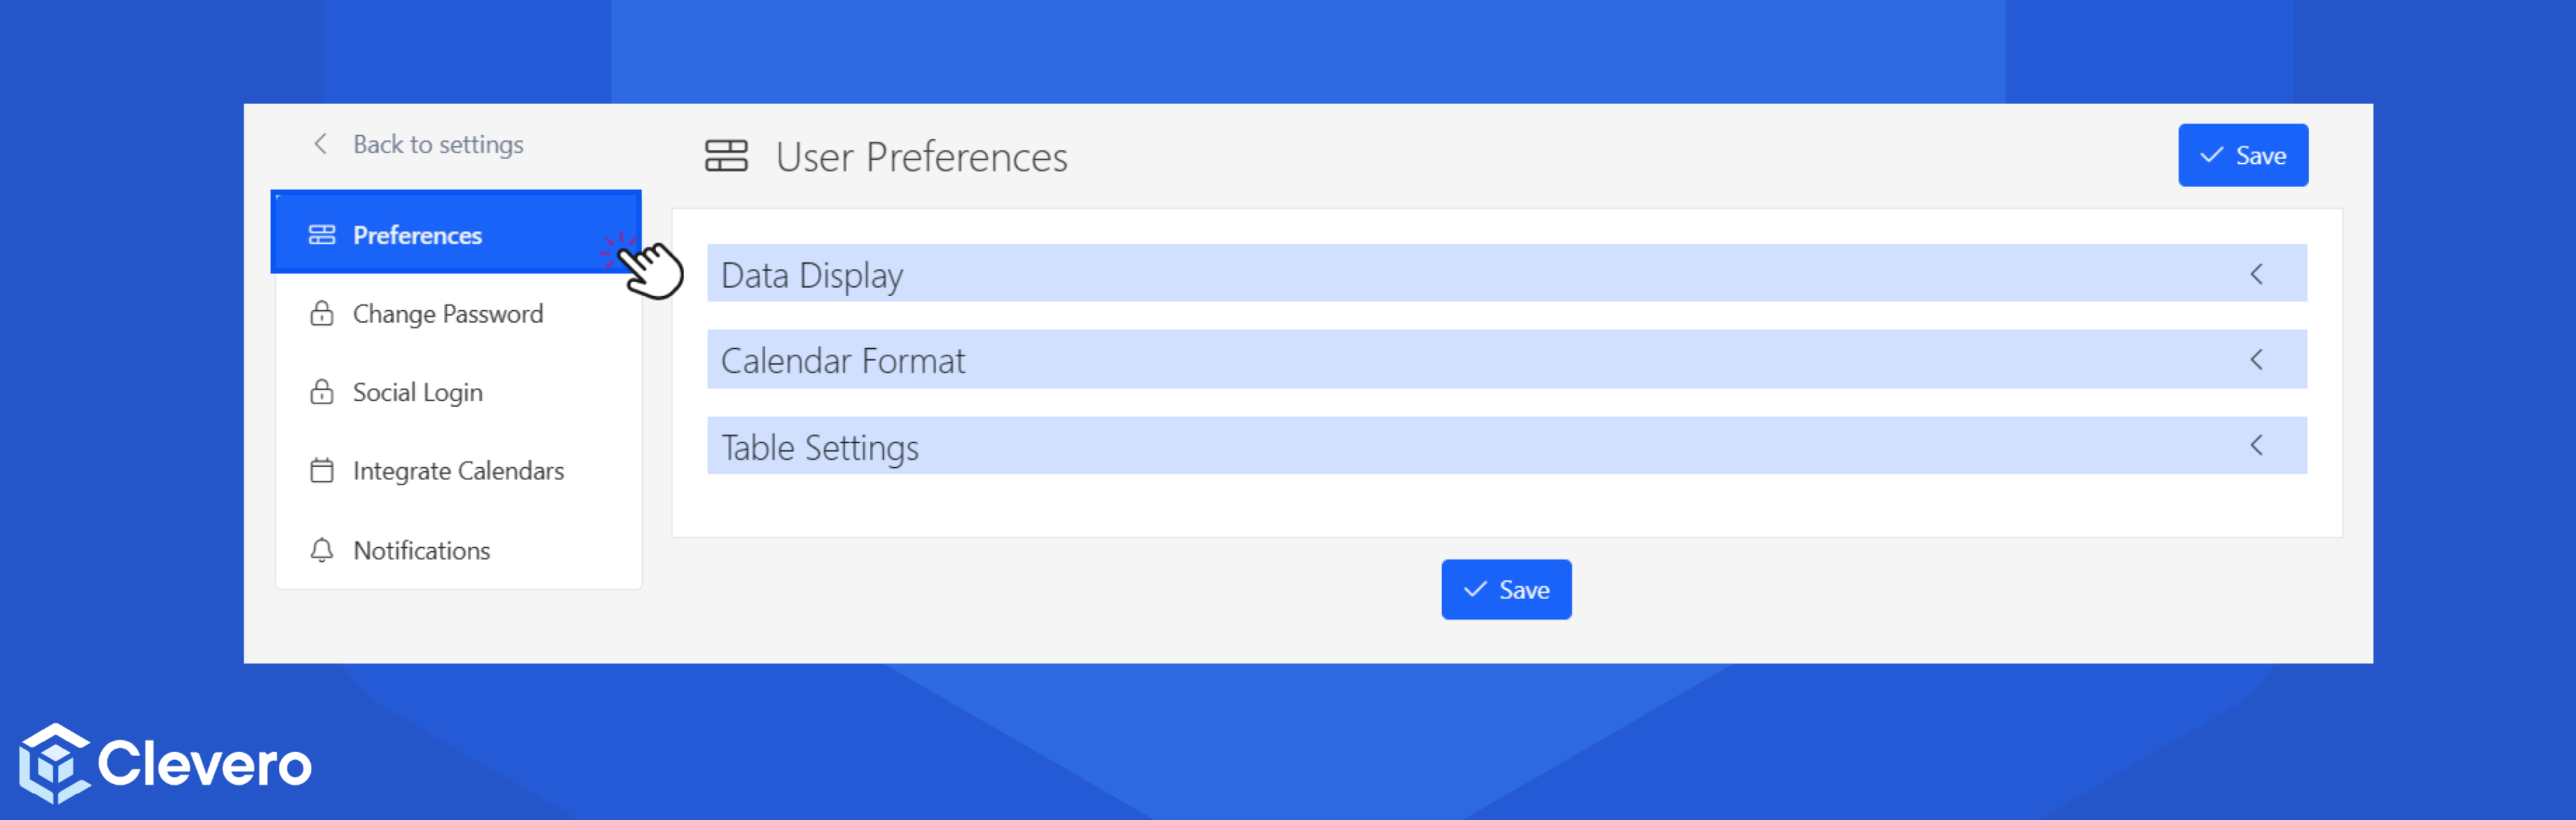
Step 5: Update User Settings
You can manage your personal settings to get a good user experience in the app. For example, you can choose how the data is displayed (in time format), how many table rows are displayed, link your Google/Xero account for future login, and how you want to receive notifications of any events happening in the app.
InfoFor step-by-step instructions on updating user settings, see the Updating User Settings page.
[Optional] Step 6: Contact Support
Whether you're facing an issue, encountering a bug, or have a suggestion for a new feature, our support system is here to help you meet your needs.
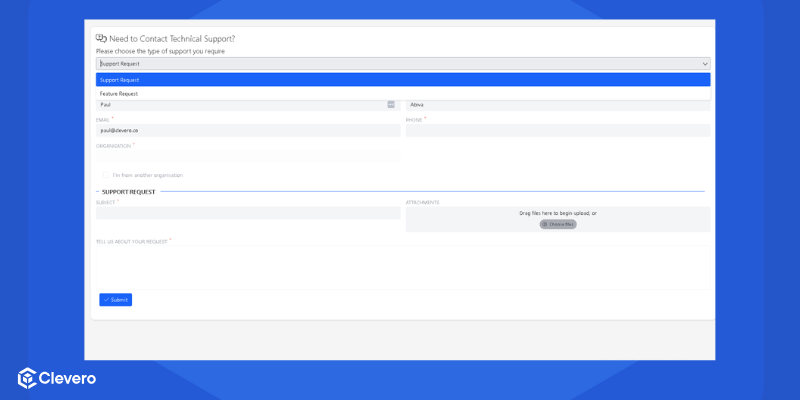
InfoFor step-by-step instructions on submitting a support case, see the How to Submit a Support Case page.
📌 Need Help?
