Dashboard Layout
🖥 Explore the central hub for displaying key data and insights in an easy-to-use interface.
Dashboard Layout is a dynamic canvas that allows you to showcase reports and quick-link widgets in a clean, visually engaging way. By creating a dashboard layout, you give users access to the information they need as soon as they log in.
Follow the steps below to set up a new dashboard layout.
Step 1. Set Up the Layout
- From the sidebar, select Settings → System Settings.
- Select Reports and Dashboard.
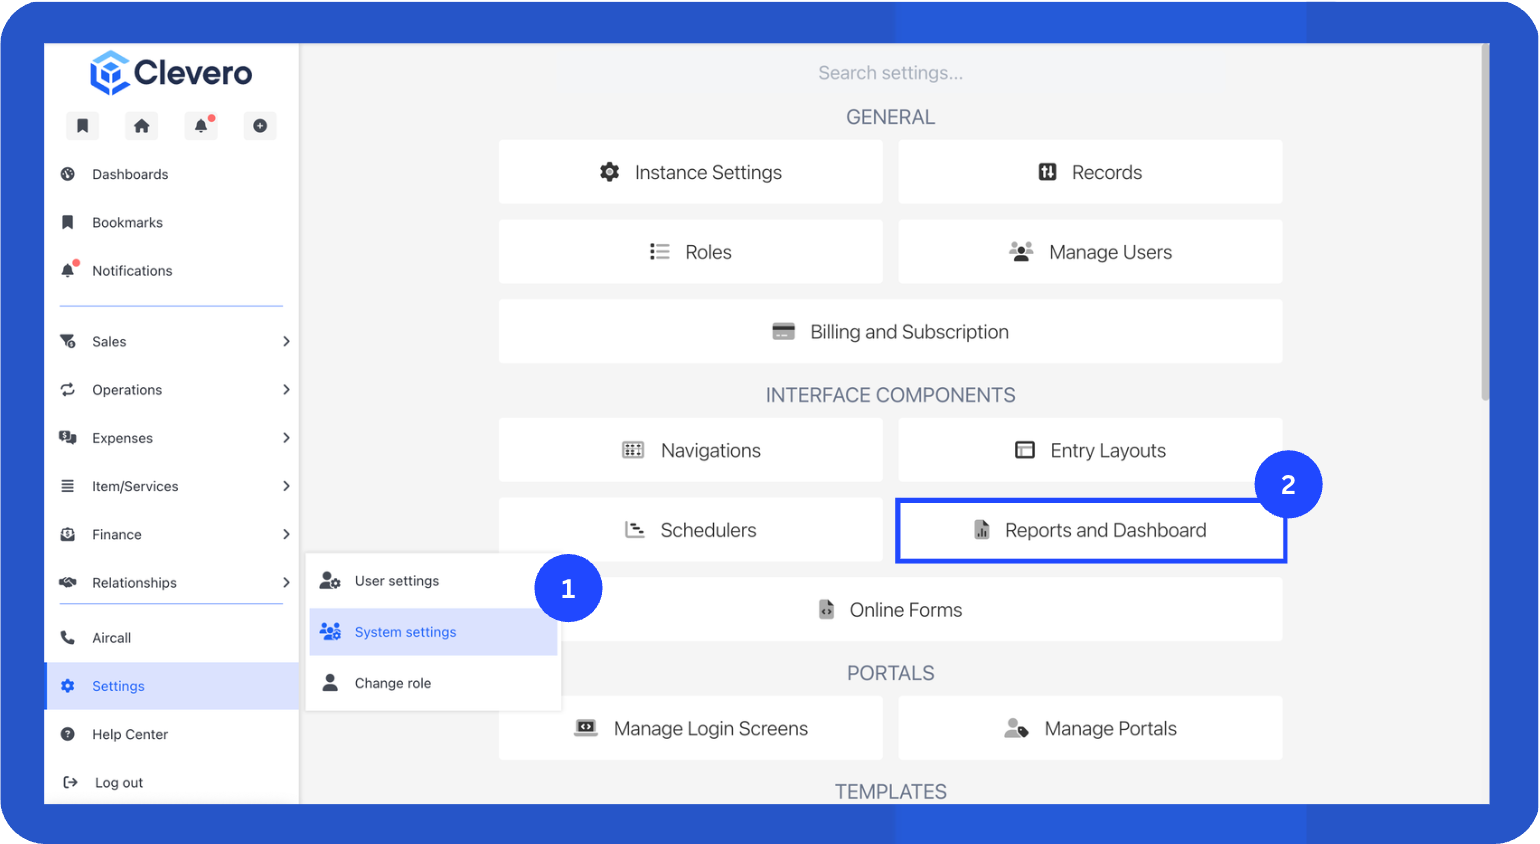
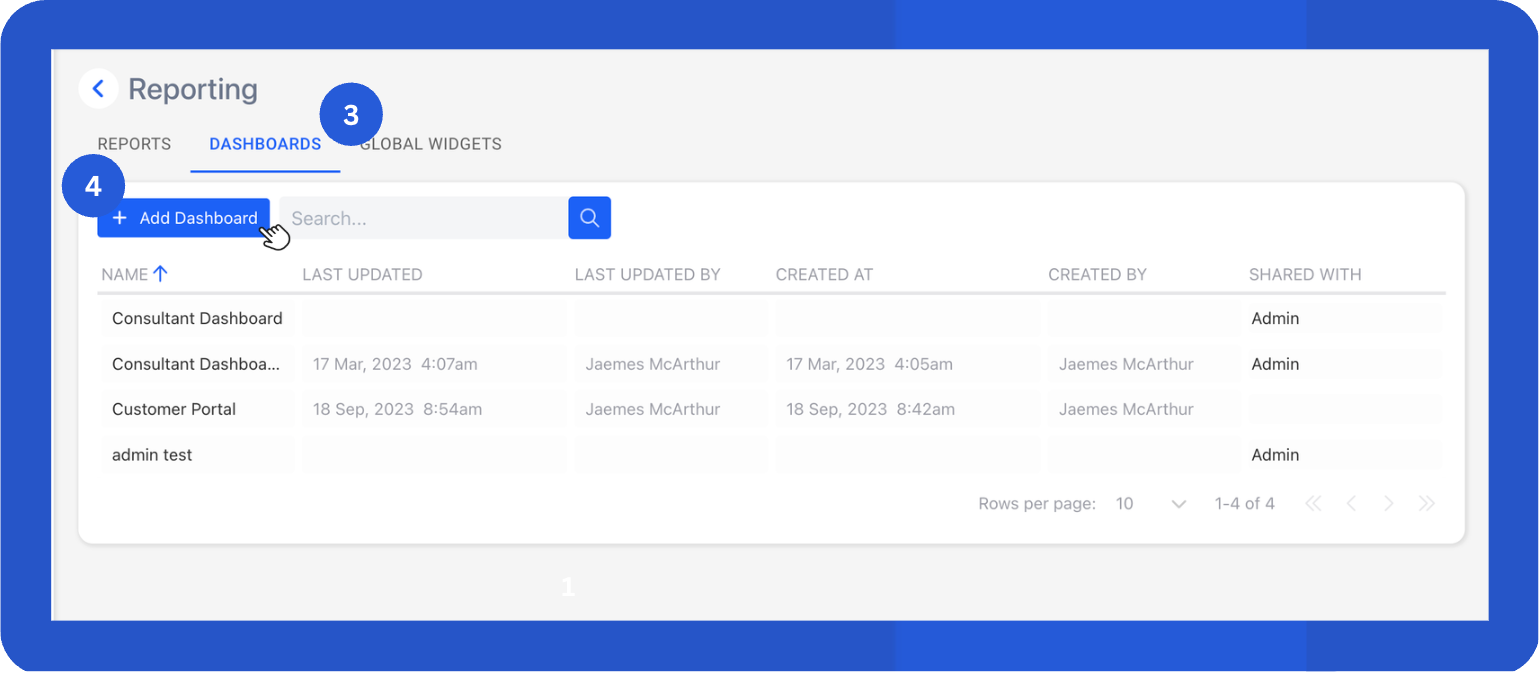
- Open the Dashboards tab.
- Click + Add Dashboard to create a new layout.
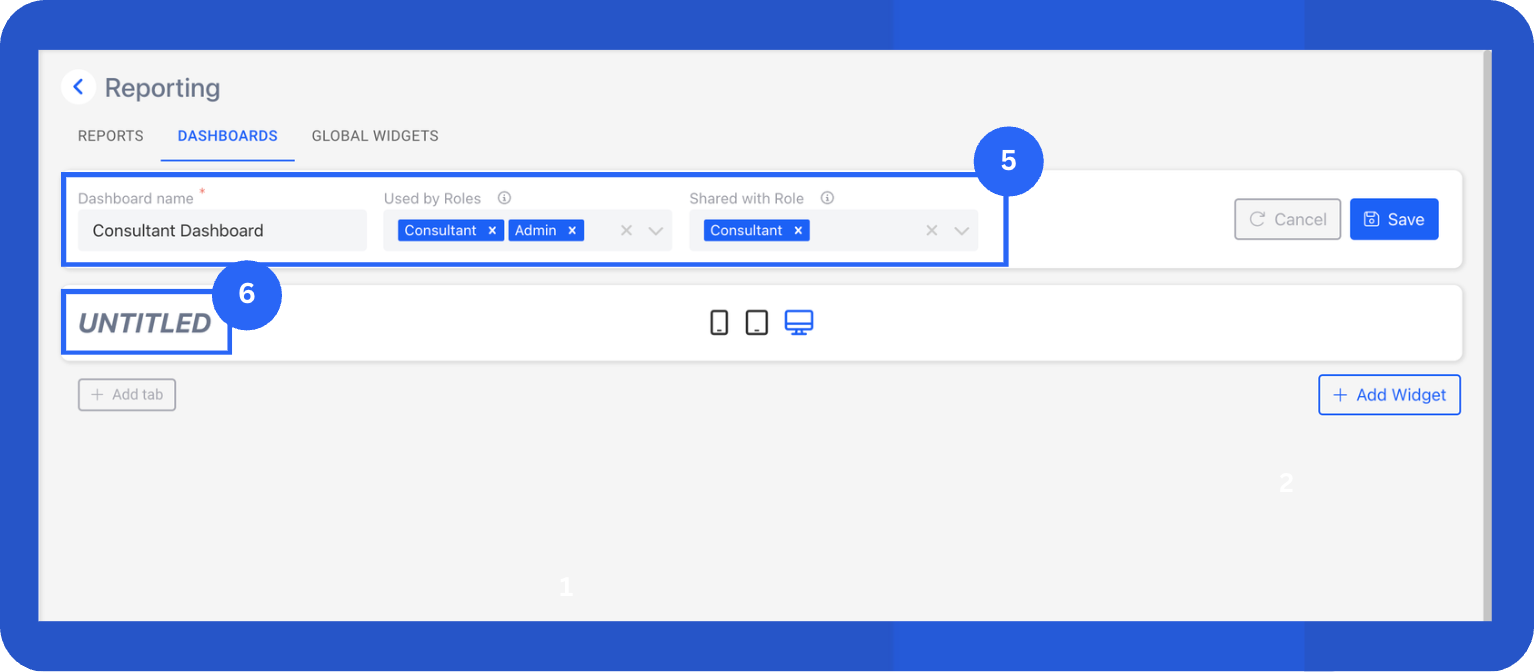
- Fill in the general settings.
- Dashboard Name: This is your internal layout name. It won’t appear to users on the page.
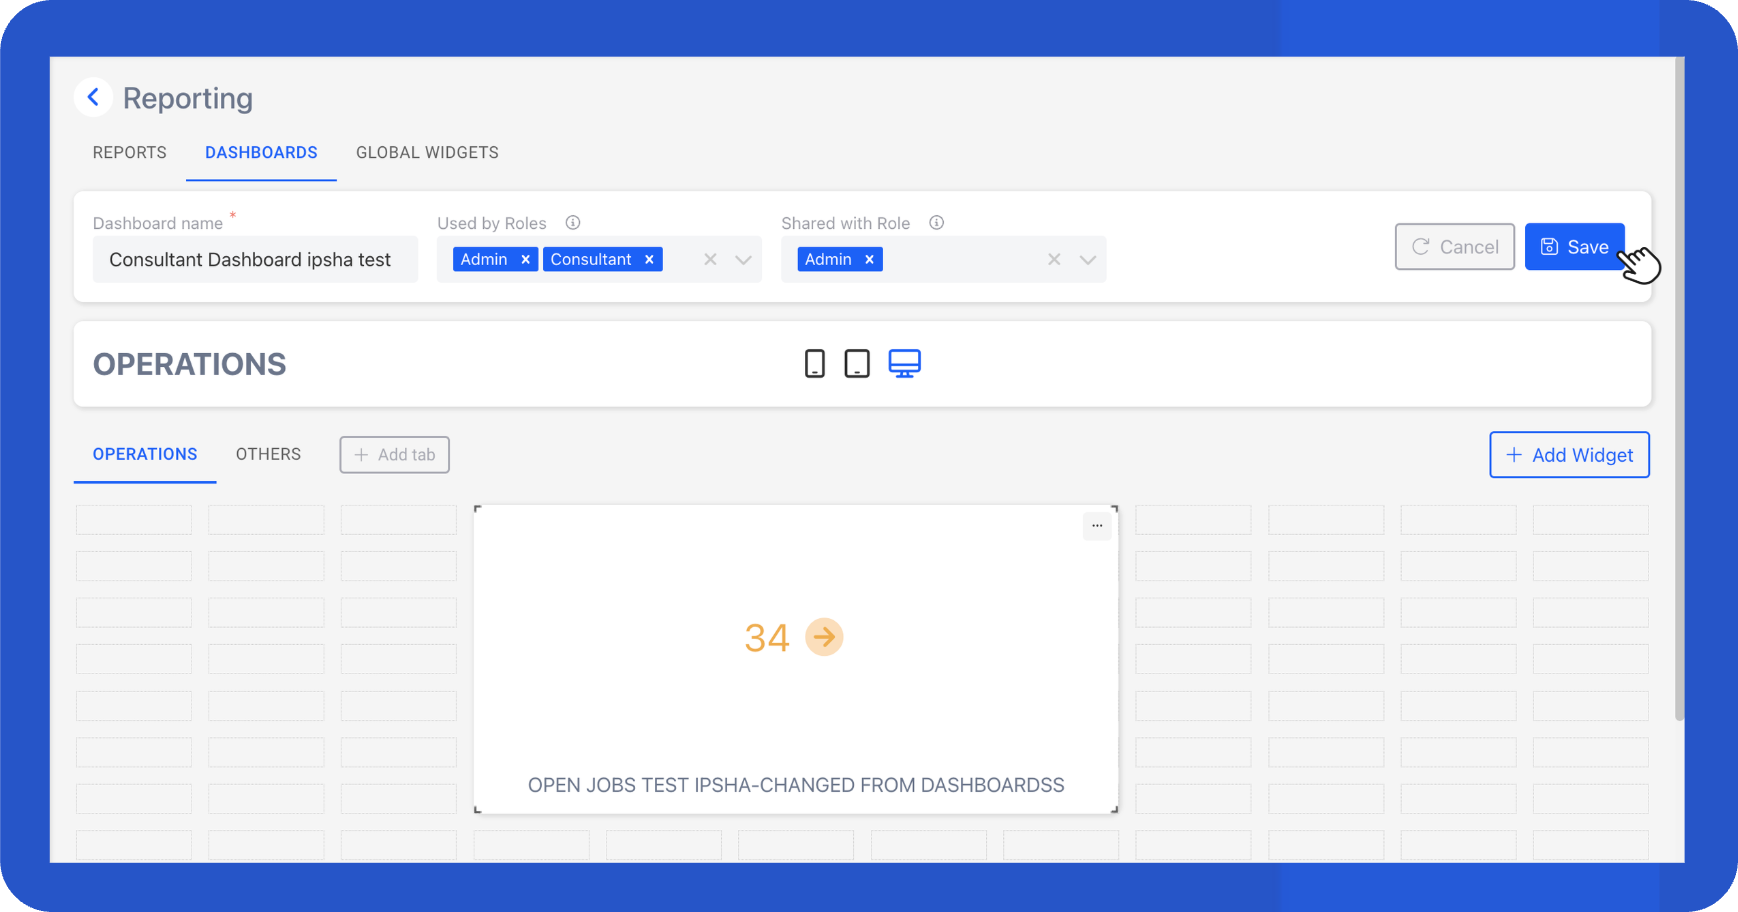
- Used by Roles: Users with these roles will see this dashboard as their default homepage.
- Shared with Roles: Users with these roles can view this dashboard from their Reporting section.
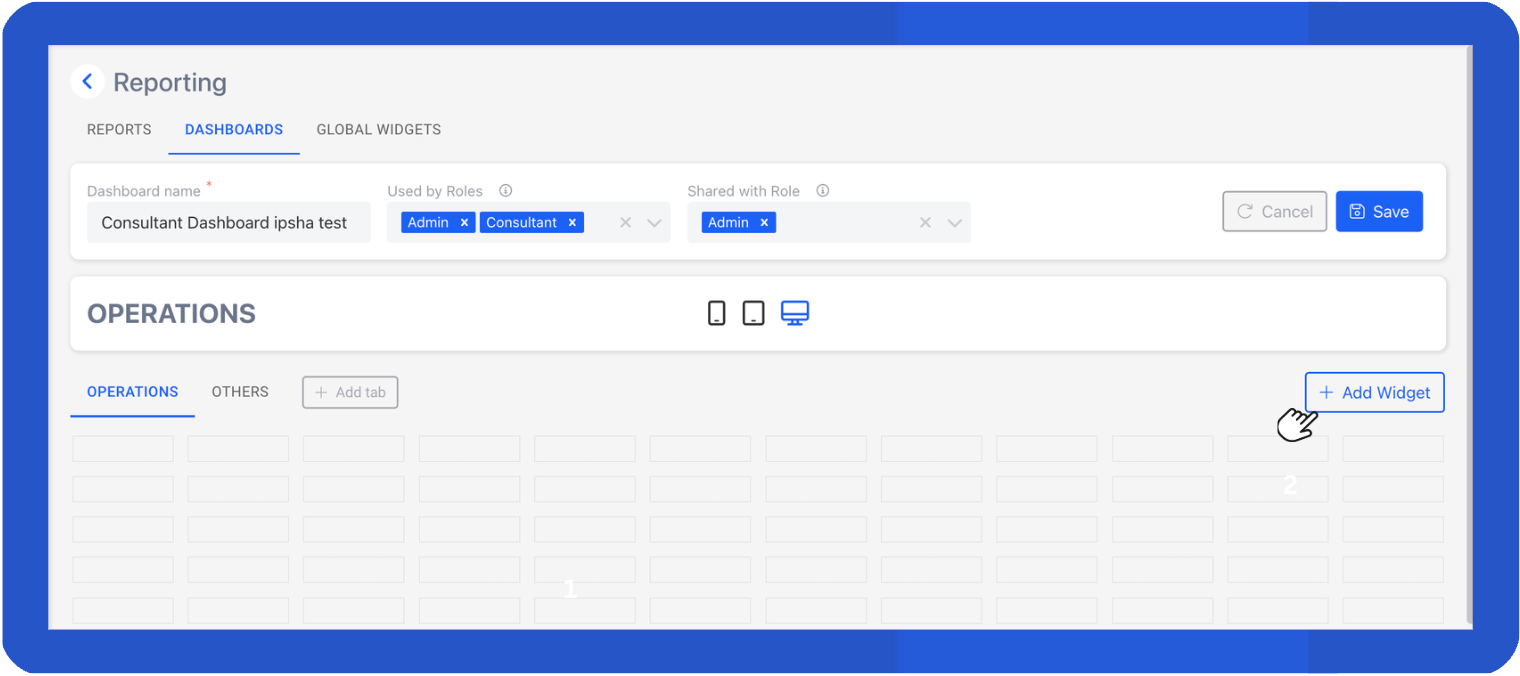
- Inside the layout editor, replace Untitled with your dashboard name.
Step 2. Add Widgets
Widgets display your data in real time. You can create new widgets, duplicate existing ones, or use global widgets shared across multiple dashboards.
Add a New Widget
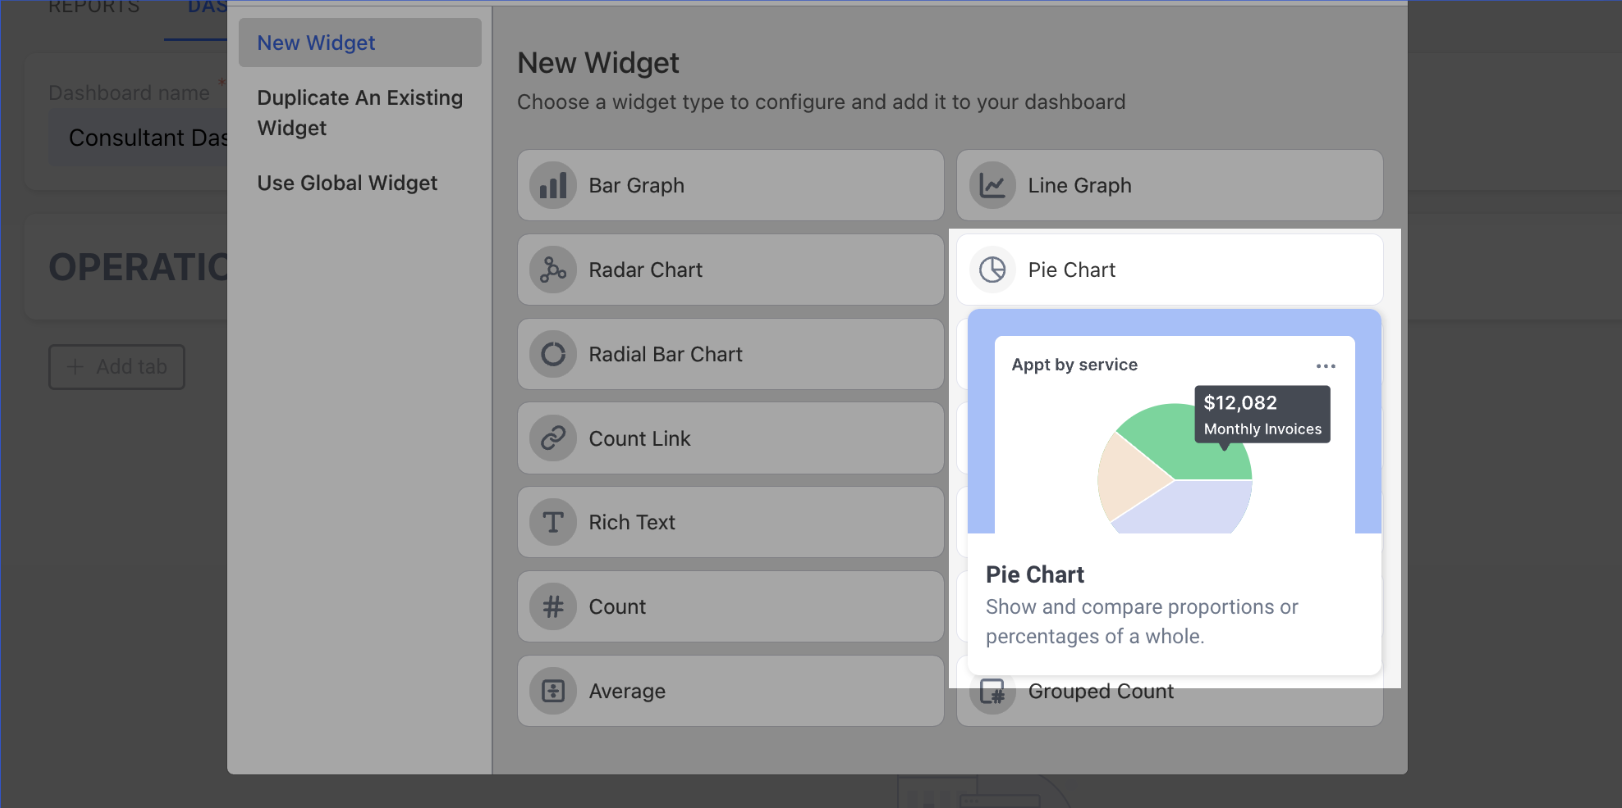
- Click + Add Widget.

- Select New Widget, then choose the type of widget you want to add.
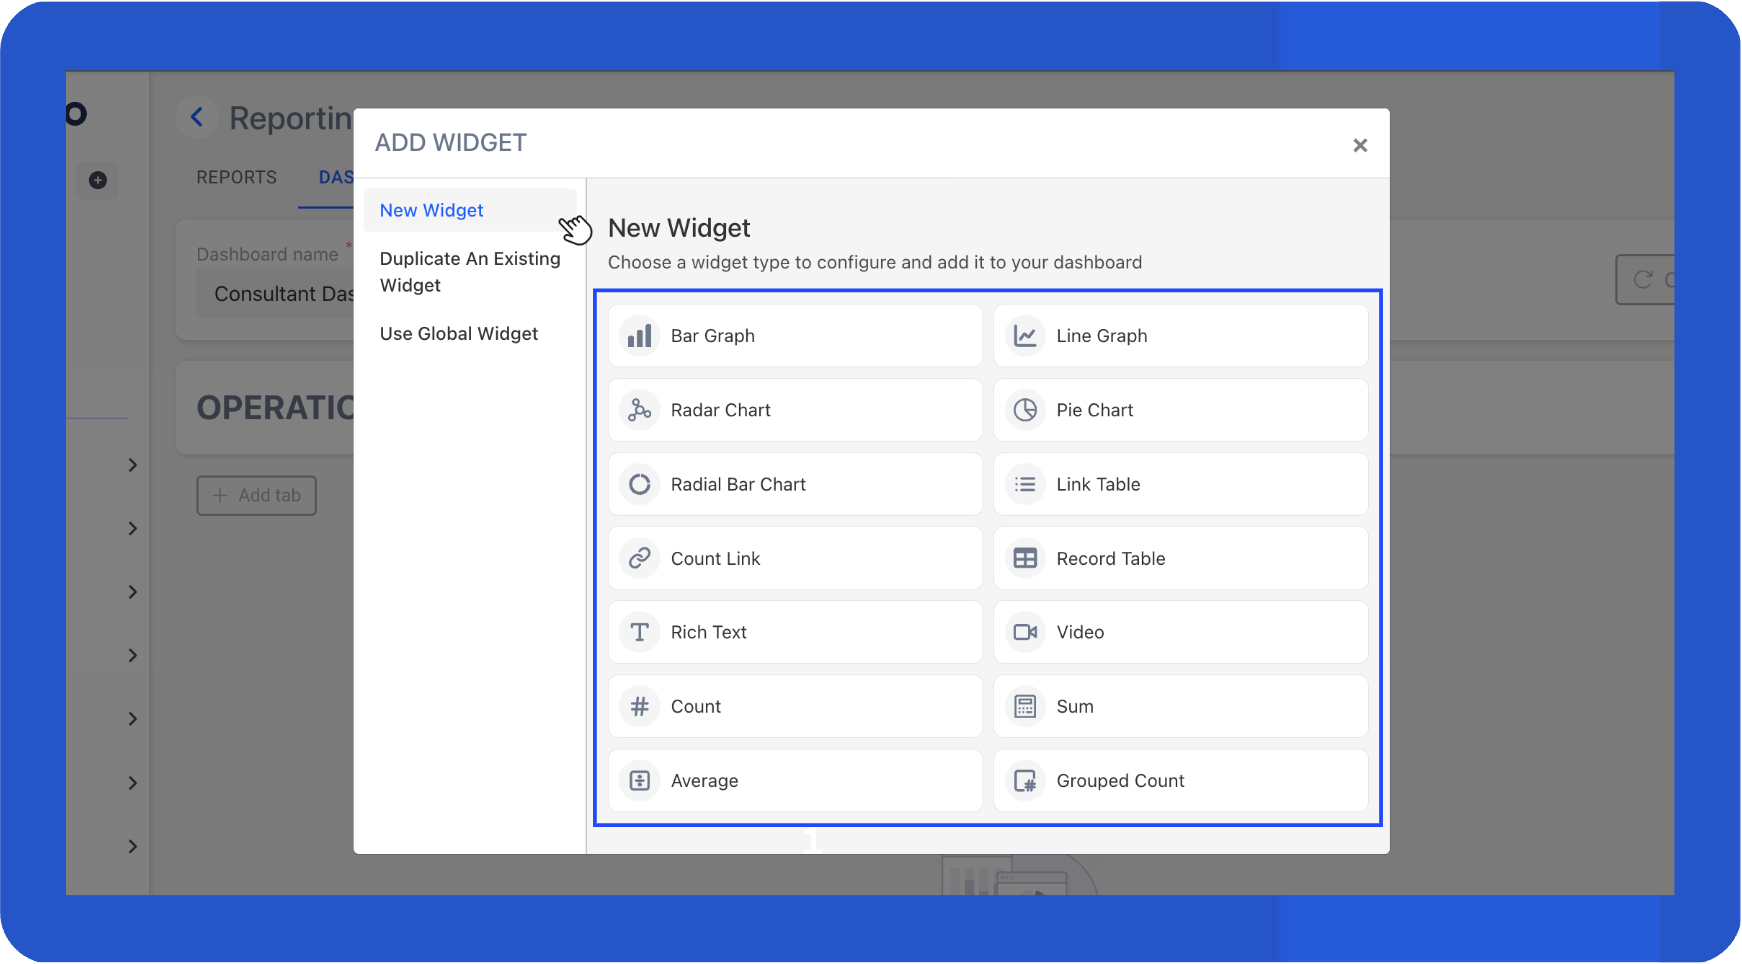
TipHover over each widget type to preview what it looks like.
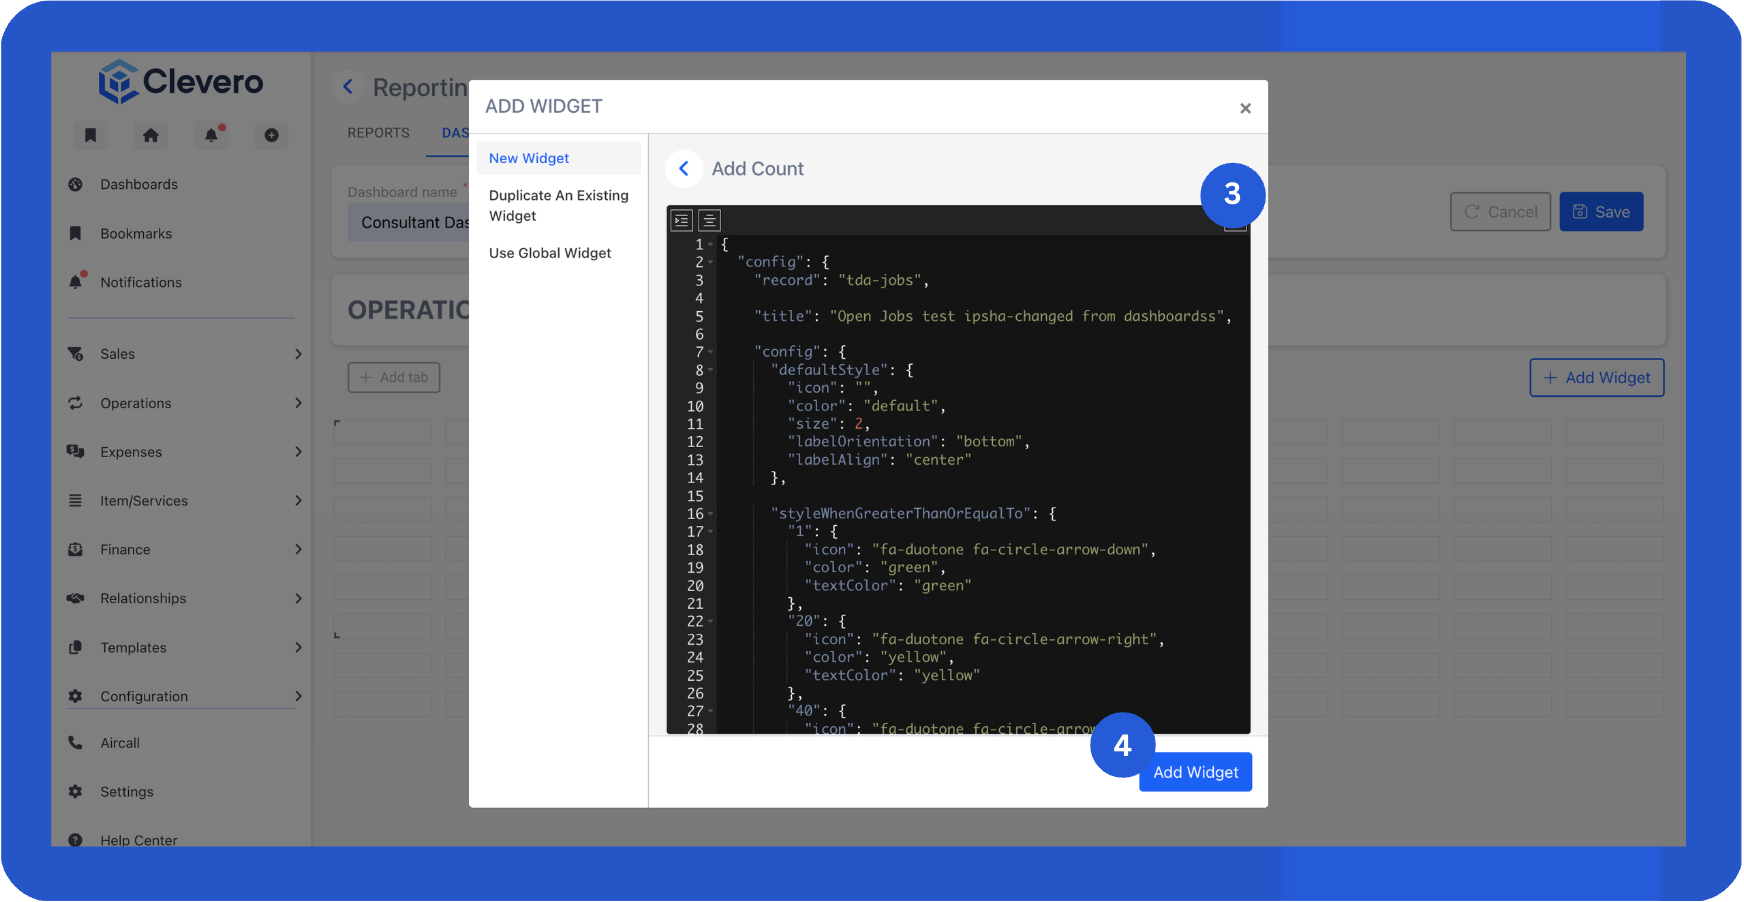
- Configure the widget. For example, if you select a Count widget, you’ll set the record source, filters, conditions, styling, and display options.
InfoSee the Record Widgets for more information about managing and configuring widgets. You can also reach out to us for assistance.
Here’s an example configuration:
{
  "config": {
    // The record the widget pulls data from
    "record": "tda-jobs",

    // Title displayed on the widget
    "title": "Open Jobs test ipsha-changed from dashboardss",

    // Widget styling and behaviour settings
    "config": {
      "defaultStyle": {
        // Default icon (empty means no icon shown)
        "icon": "",
        // Default colour theme
        "color": "default",
        // Widget size (1 = small, 2 = medium, 3 = large)
        "size": 2,
        // Position of the label relative to the widget
        "labelOrientation": "bottom",
        // Text alignment for the label
        "labelAlign": "center"
      },

      // Apply different styles when the count reaches certain thresholds
      "styleWhenGreaterThanOrEqualTo": {
        // When value ≥ 1 → show green style
        "1": {
          "icon": "fa-duotone fa-circle-arrow-down",
          "color": "green",
          "textColor": "green"
        },
        // When value ≥ 20 → show yellow style
        "20": {
          "icon": "fa-duotone fa-circle-arrow-right",
          "color": "yellow",
          "textColor": "yellow"
        },
        // When value ≥ 40 → show red style
        "40": {
          "icon": "fa-duotone fa-circle-arrow-up",
          "color": "red",
          "textColor": "red"
        }
      }
    },

    // Filter applied to exclude specific values in field 12439
    "filter": [
      {
        "subject": "12439",
        "type": "array",
        "operator": "none_of",
        "ignoreCase": true,
        "value": ["582208", "582210"]
      }
    ],

    // Controls how many records are scanned and which layout is referenced
    "searchParams": {
      "layoutId": 583495,
      "pageSize": 200
    },

    // Unique widget ID
    "id": "9ff81f7b"
  }
}- Click Add Widget to save it.
- The widget now appears on your dashboard. Drag the corners to resize it, and drag the widget to move it.
- Repeat the steps above to add additional widgets.
- Click Save to save your layout.
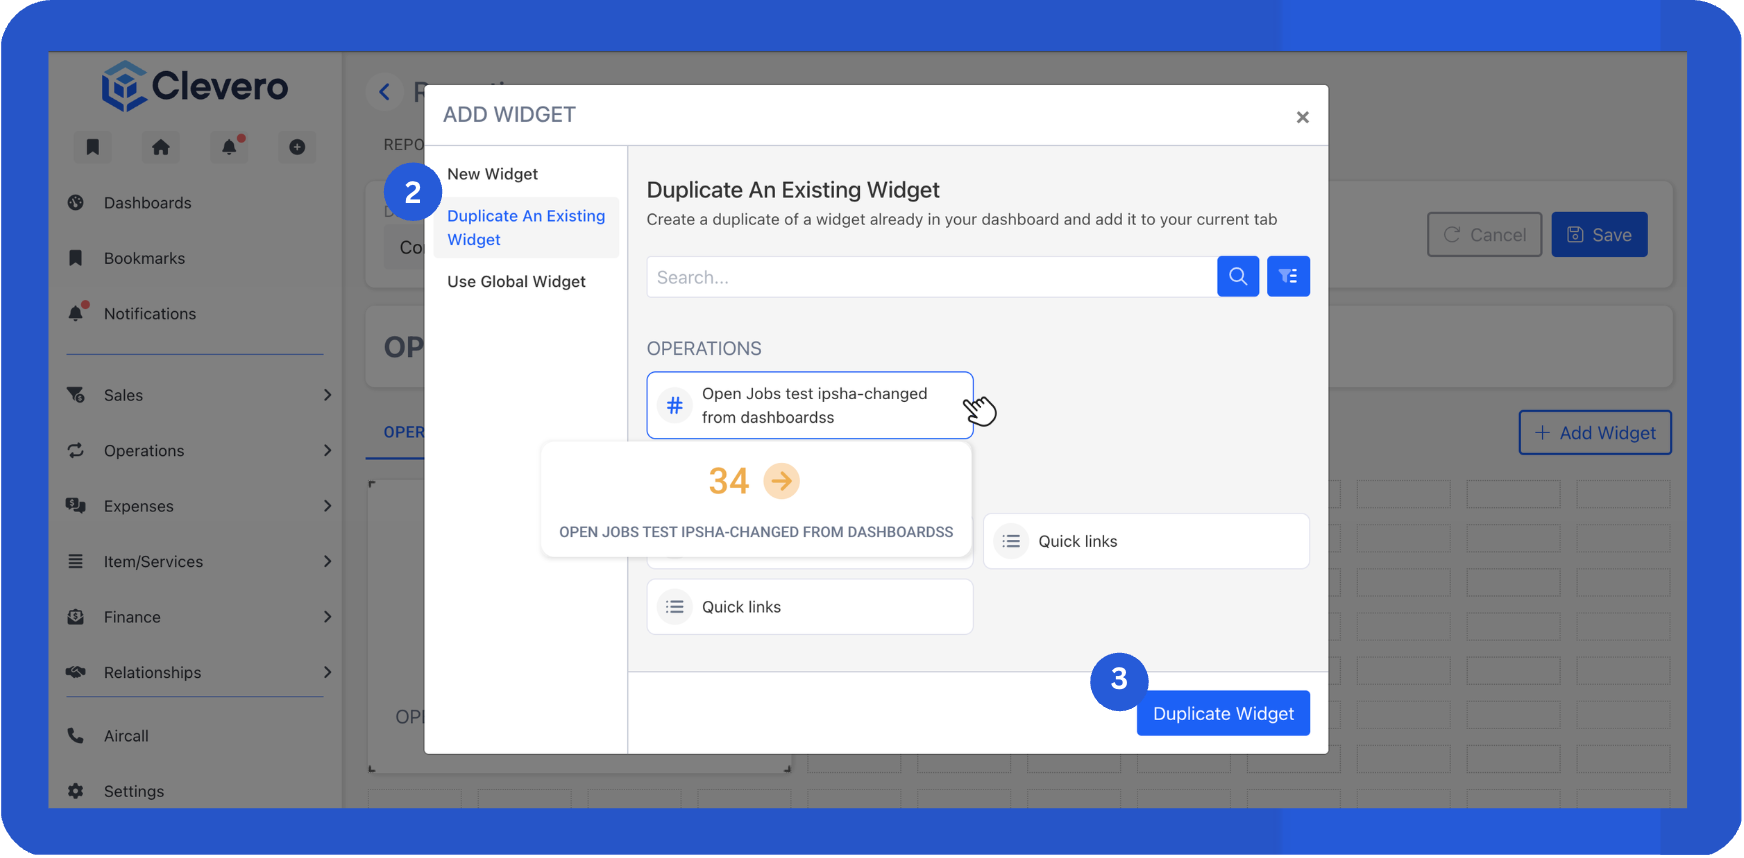
Duplicate an Existing Widget
- Click + Add Widget.
- Select Duplicate an Existing Widget.
- Choose a widget that’s already on your dashboard, then click Duplicate Widget.
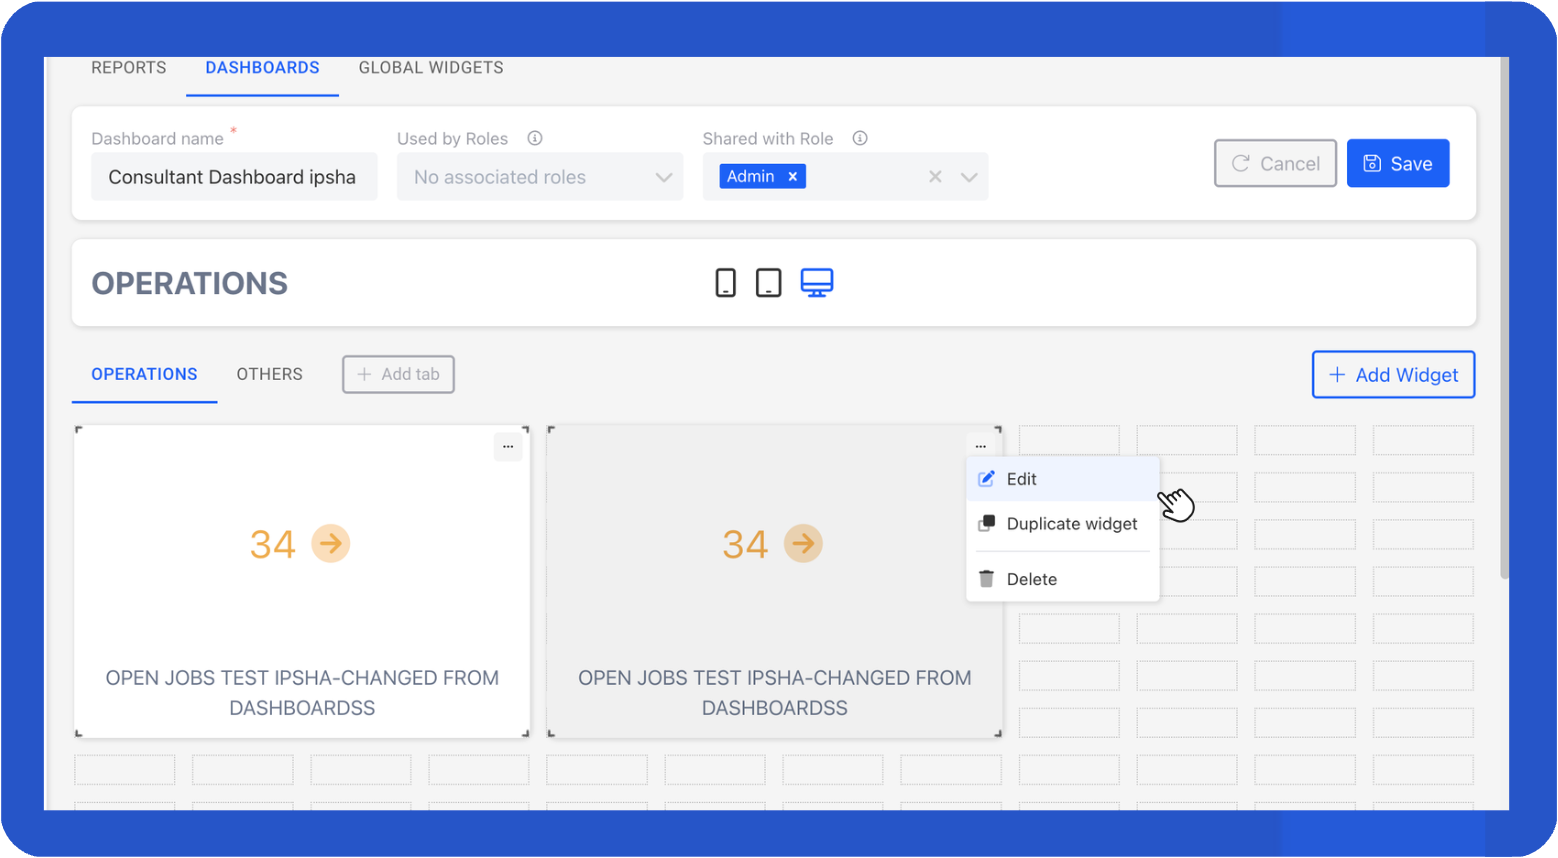
- The duplicate appears in the layout. Select the three-dot menu in the top-left corner and choose Edit to update its configuration.
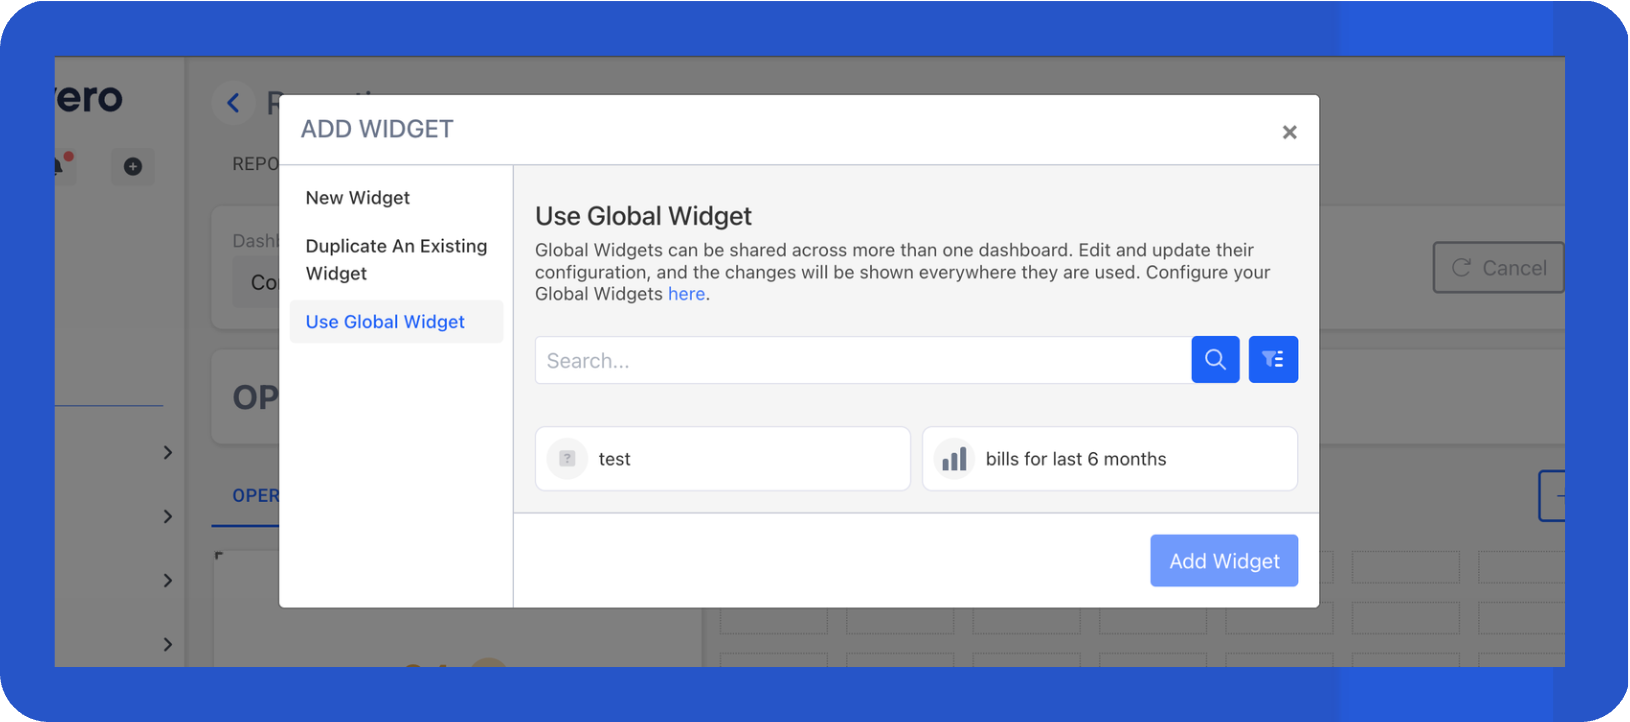
Use a Global Widget
Global Widgets can be reused across multiple dashboards. When you update a Global Widget, the changes automatically flow through everywhere it’s used.
Here’s how to create one:
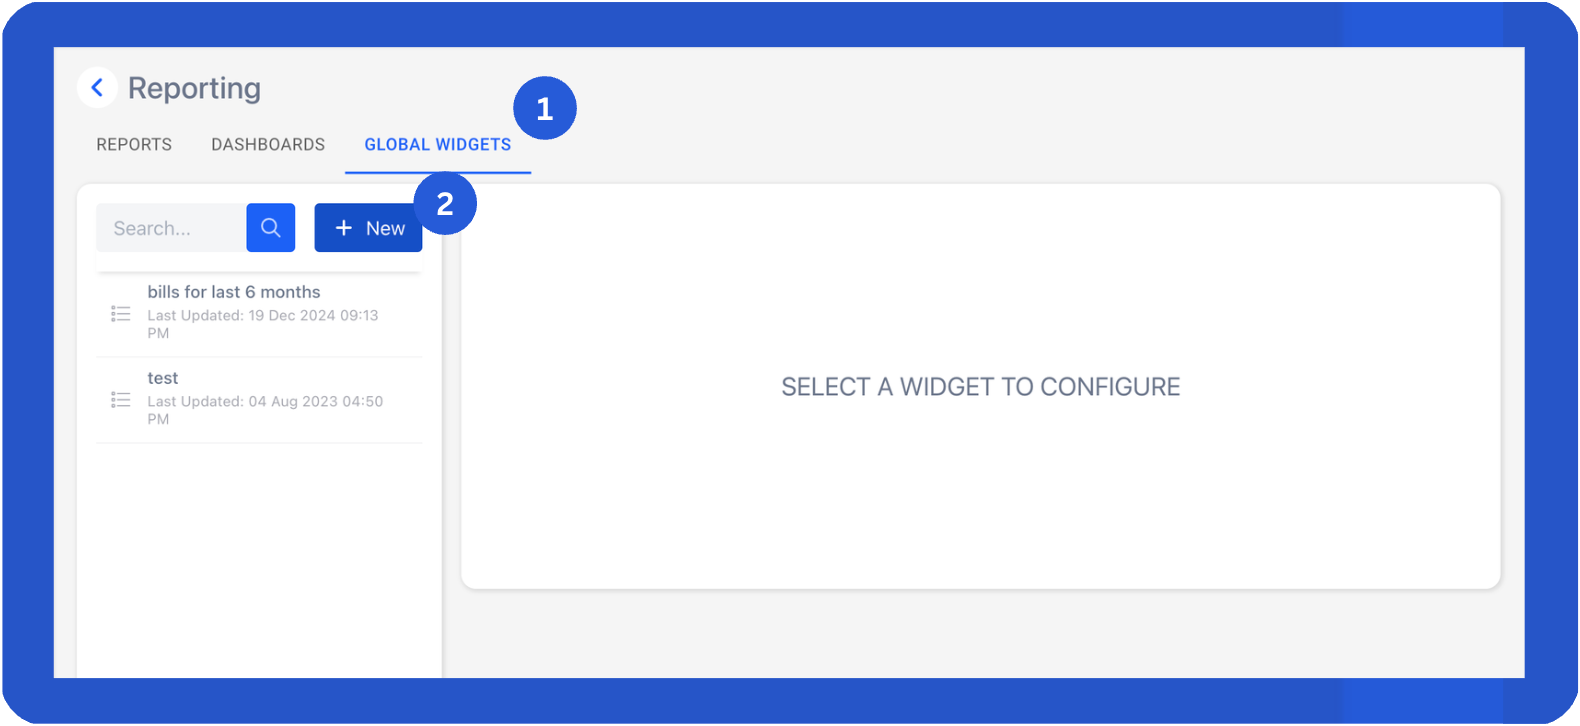
- Open the Global Widgets tab.
- Click + New.
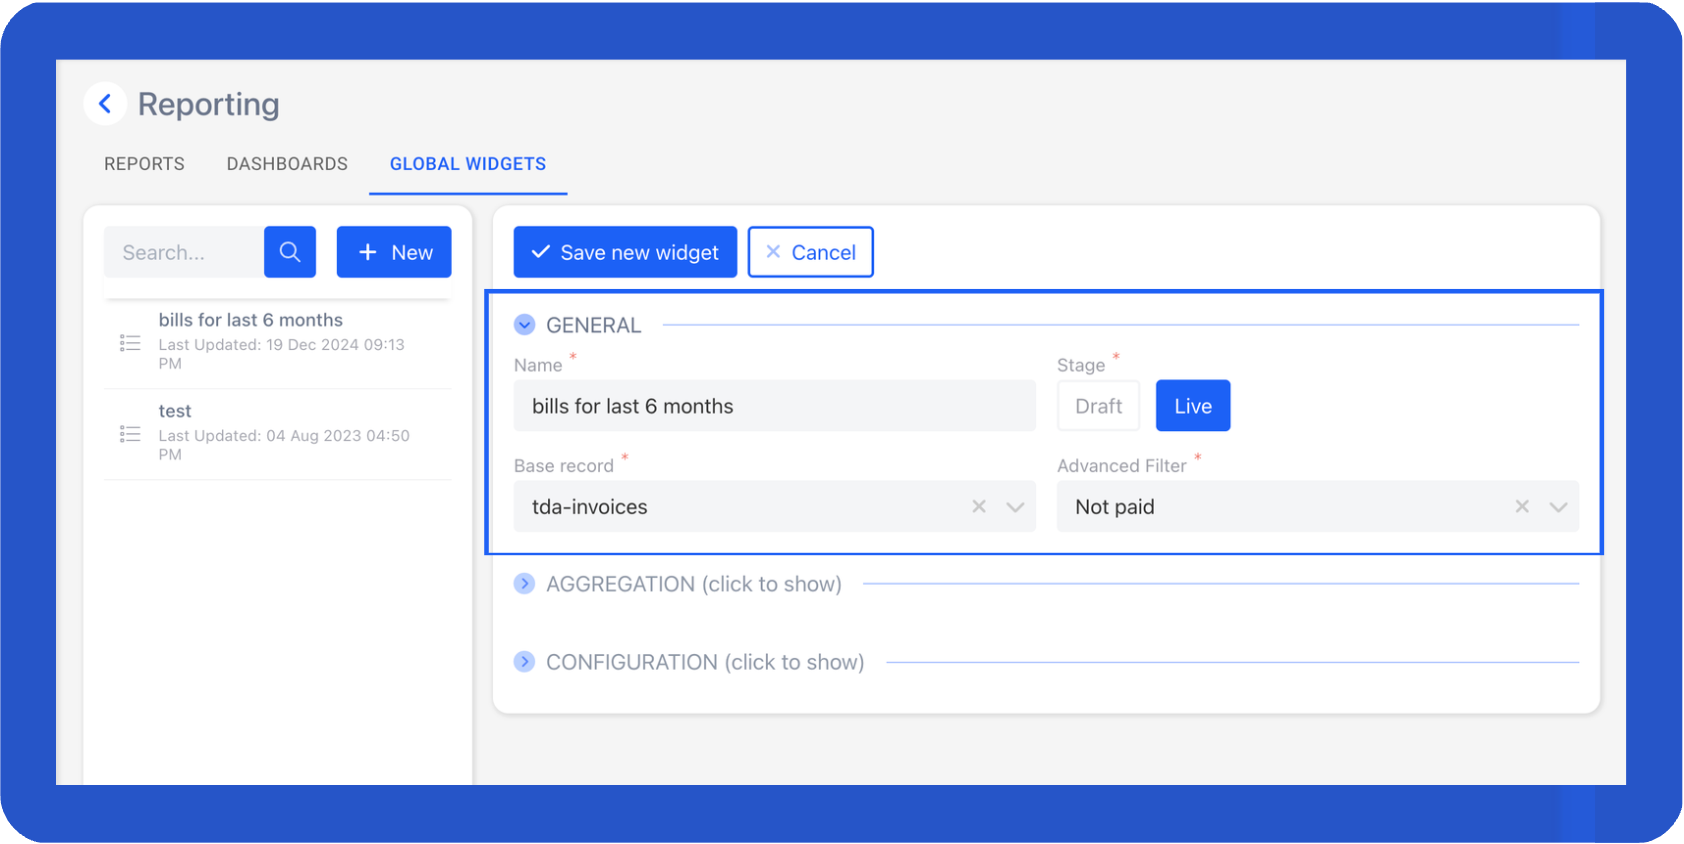
- In the General section, complete the fields.
- Name: This is the widget’s internal name (not the display title).
- Stage: Choose Live to make the widget available across all dashboards, or Draft if it’s still in progress.
- Base Record: Select the record that supplies the widget’s data.
- Advanced Filter" Choose filters that automatically apply to the widget.
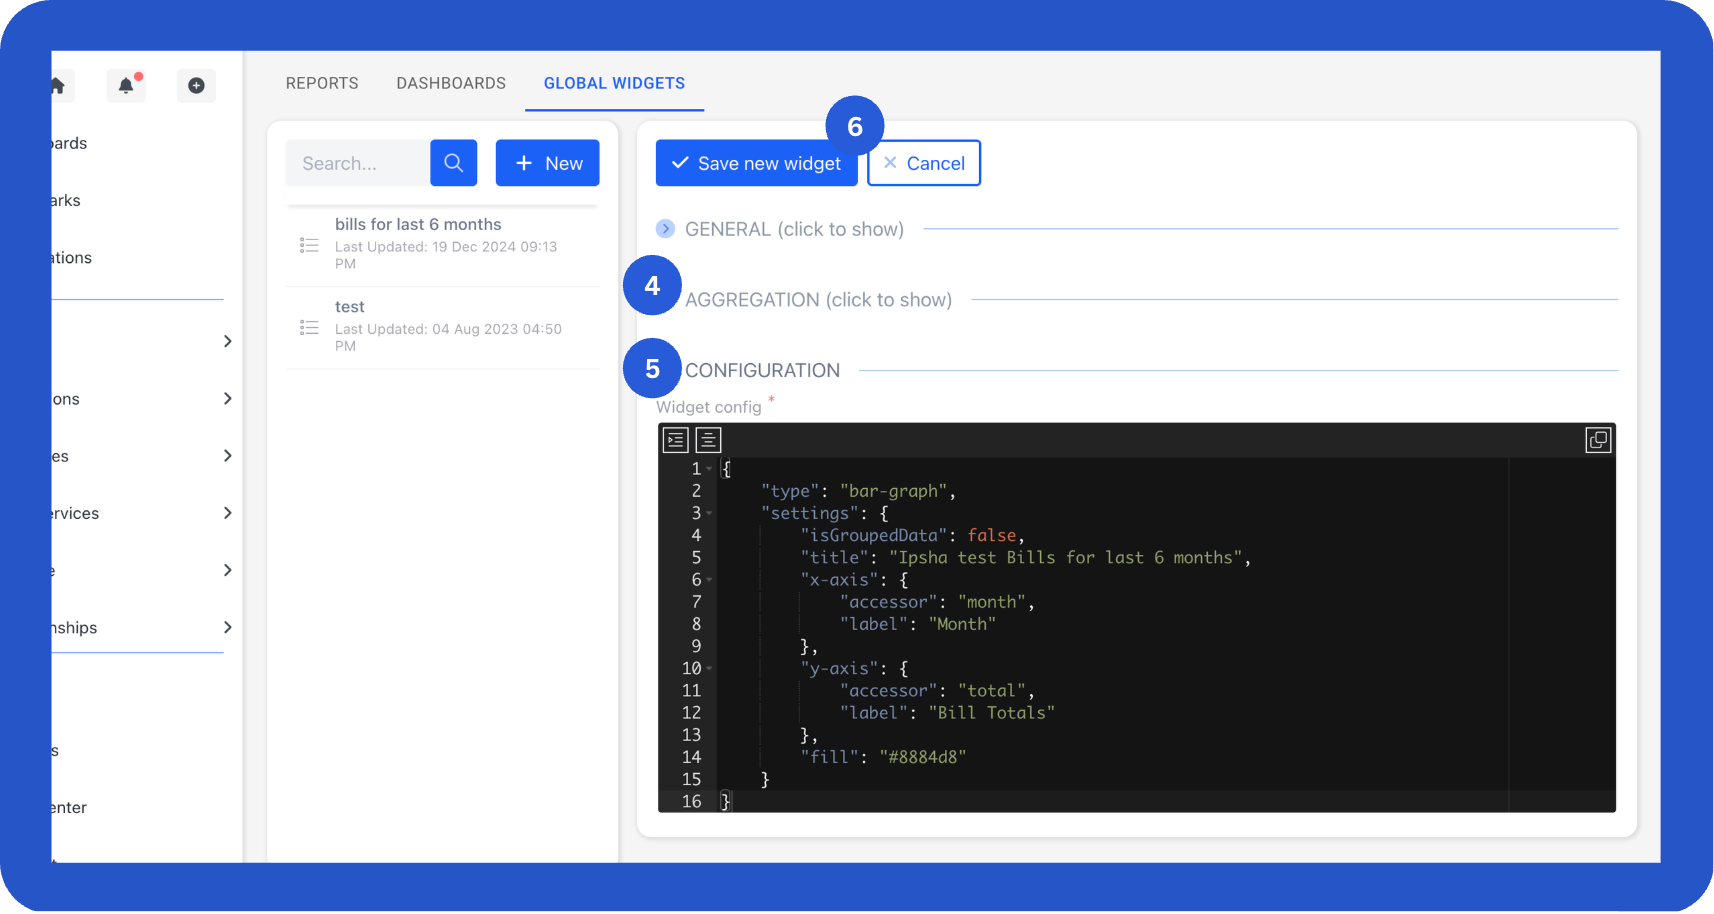
- Use the Aggregation section to define how the data groups, summarises, and sorts. For example:
{
    "groupBy": [
        {
            "column": "date",
            "fn": "DATE_FORMAT",
            "config": {
                "type": "M"
            }
        }
    ],
    "functions": [
        {
            "column": "total",
            "fn": "SUM",
            "alias": "total"
        },
        {
            "column": "date",
            "fn": "DATE_FORMAT",
            "config": {
                "type": "M"
            },
            "alias": "month"
        }
    ],
    "sort": {
        "sortBy": "date",
        "order": "asc"
    }
}- Use the Configuration section to set styling and display options.
InfoSee the Record Widgets for more information about managing and configuring widgets. You can also reach out to us for assistance.
- Click Save New Widget to finalise it.
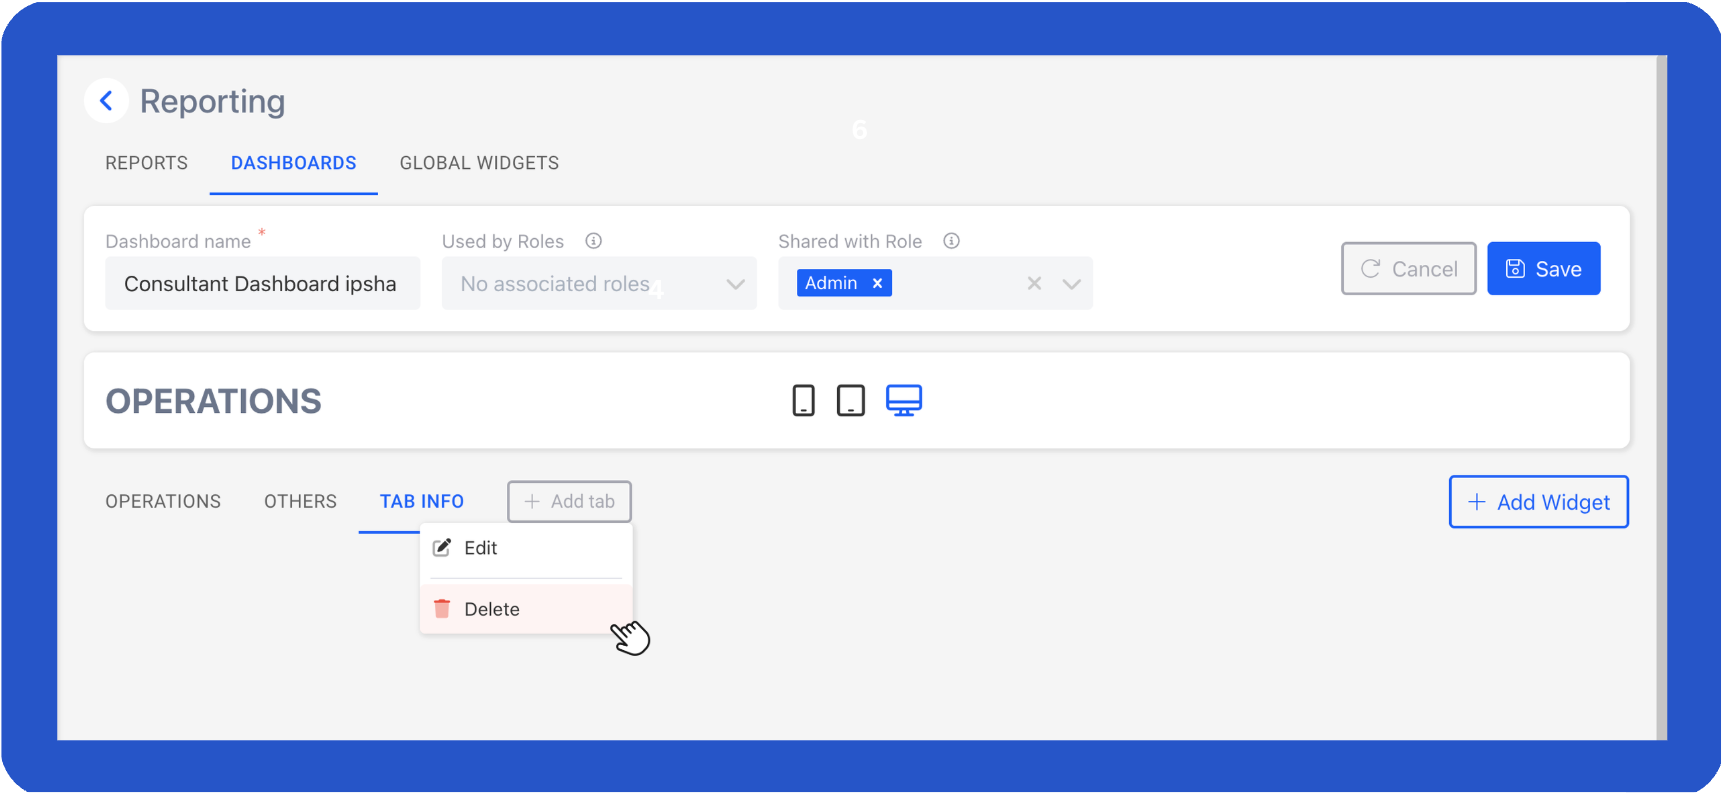
(Optional) Step 3. Create Tabs
Tabs help you organise large dashboards with lots of information.
- Click + Add Tab each time you want to create a new tab.
- Rename the placeholder label to the desired tab name.
- To delete a tab, right-click on the tab name and select Delete.
📌 Need Help?
