Create a New Online Form
📝 Submit forms online to streamline how you collect information.
Online Forms are digital forms configured through the Clevero system and can be embedded in a web page or sent to the user via a link. Any information submitted through a form will be automatically stored in the system.
Step 1: General Information
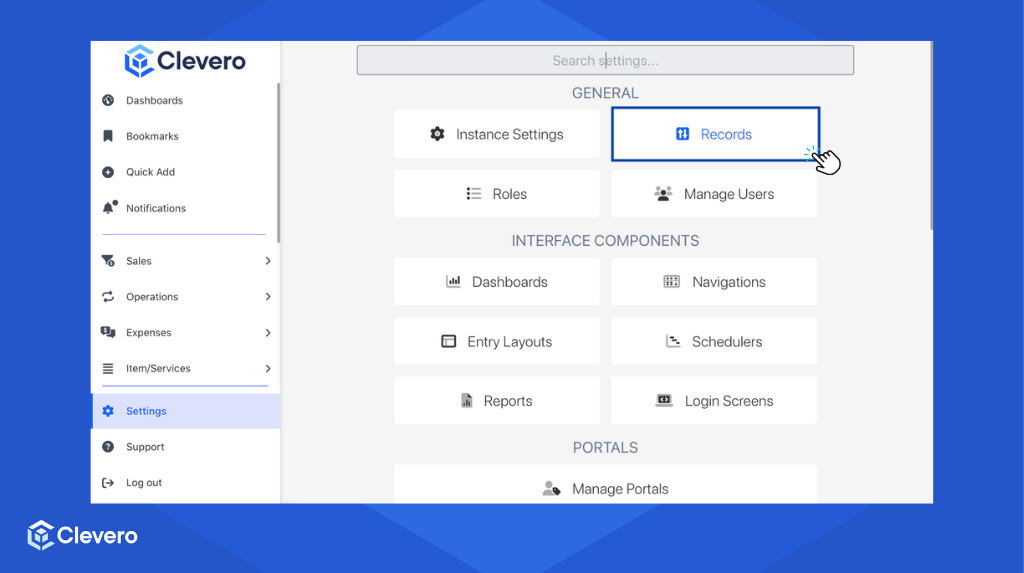
- Go to "Settings" > "System Settings".

- Select the "Records" menu.
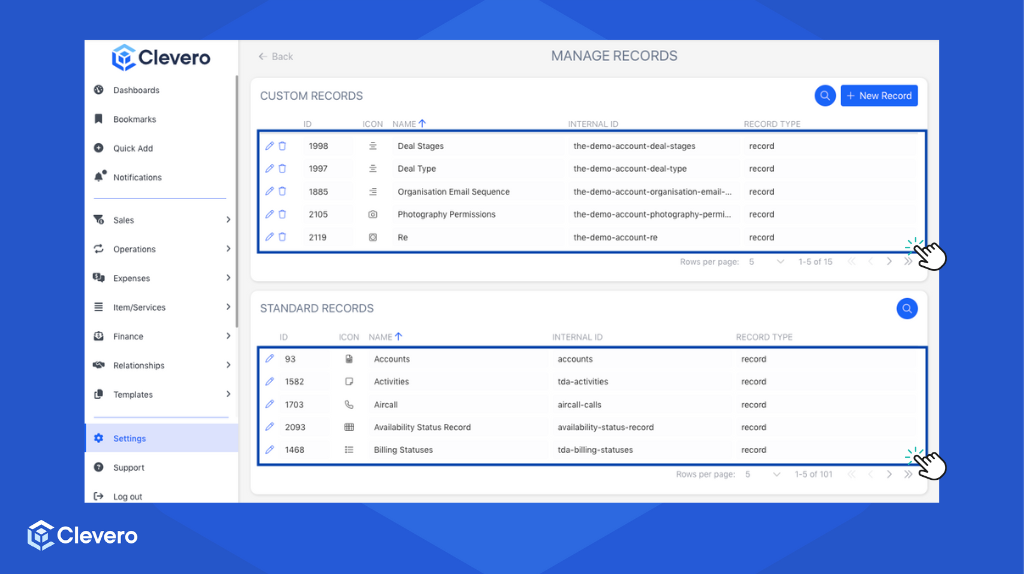
- Choose the specific record for which you want to create a form.
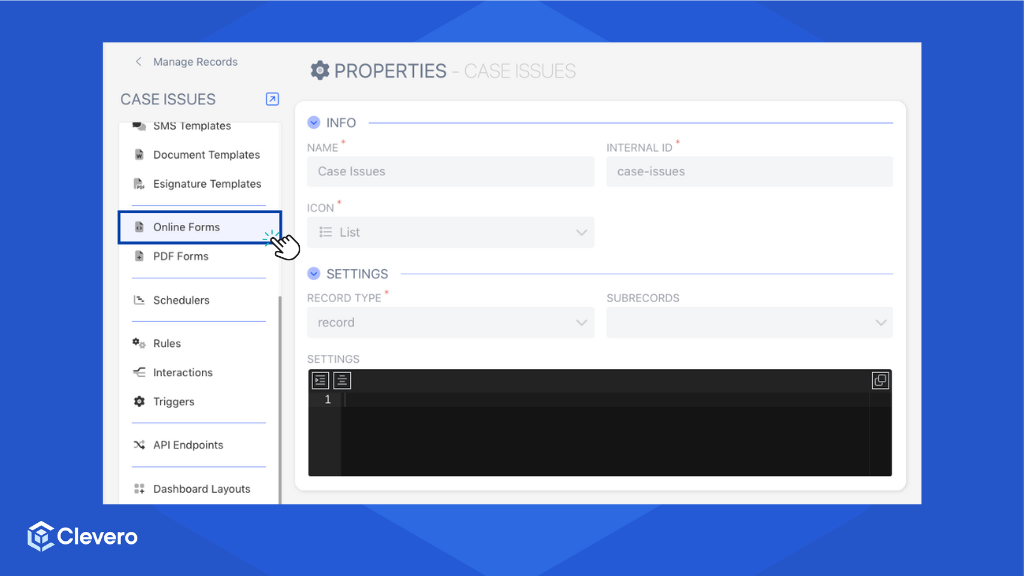
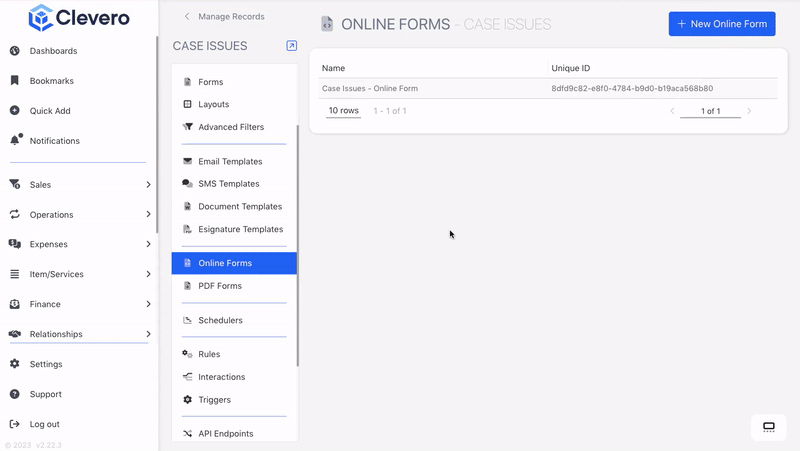
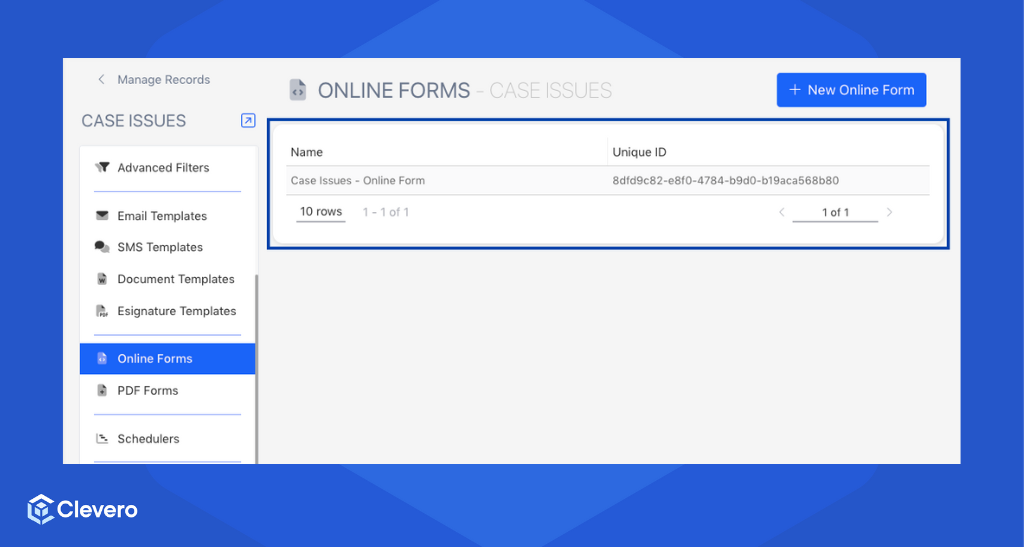
- On the sidebar, select the "Online Forms" option.
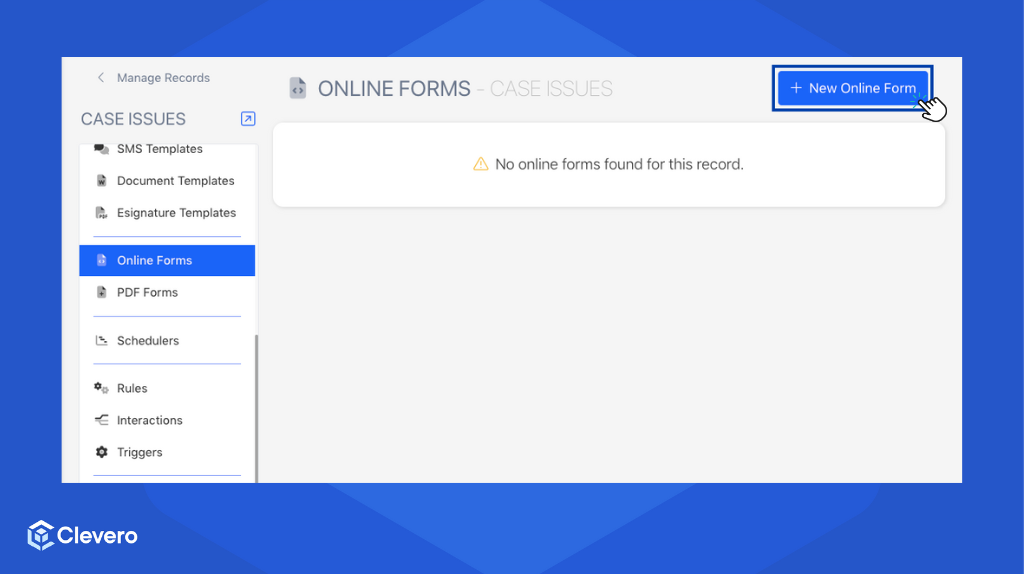
- Click the "+ New Online Form" button to create a new Online Form.
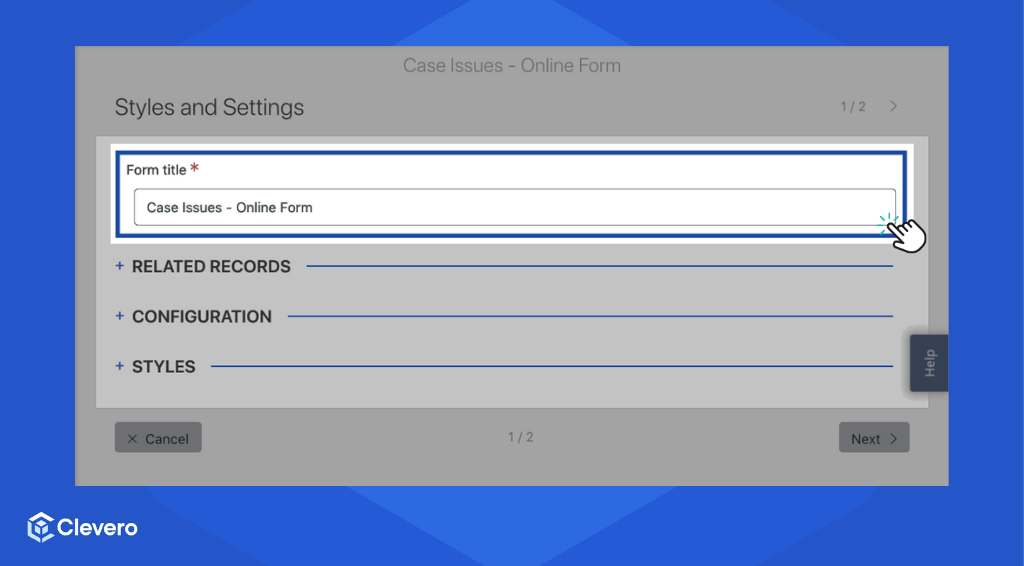
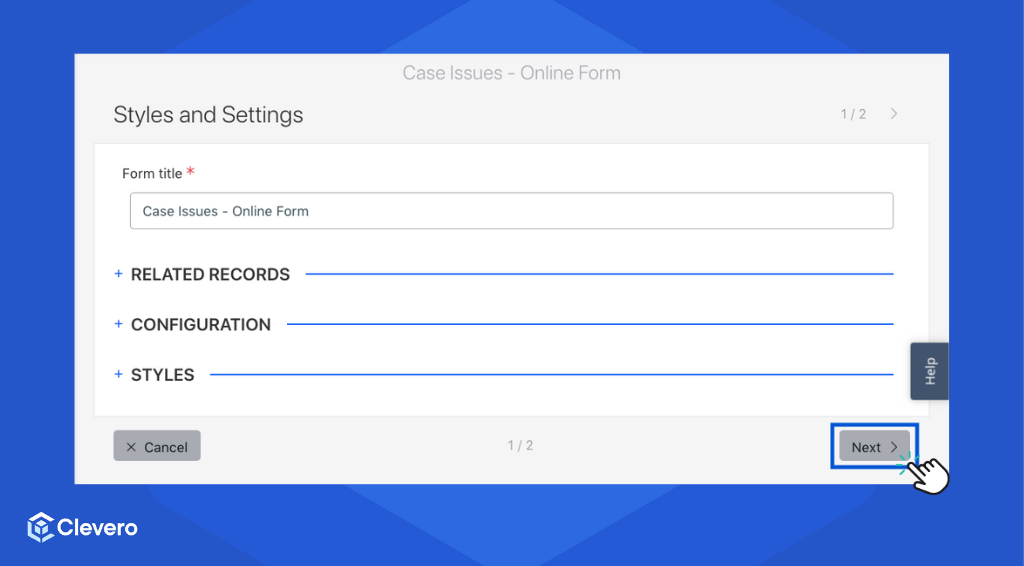
- Add the form title.
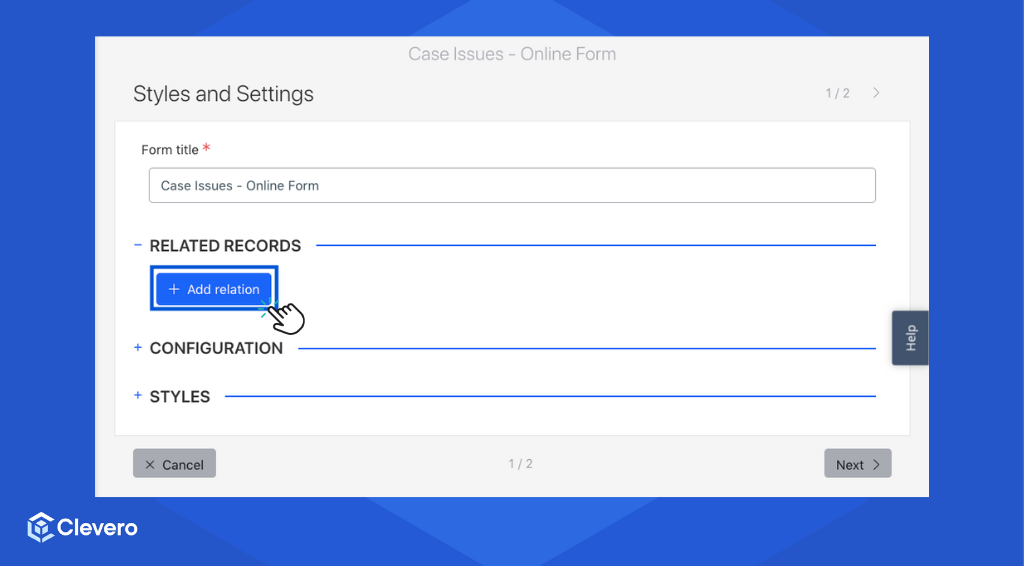
Step 2: Choose Related Records
Note:This is an optional step.
A related record allows you to include fields from another record in this Online Form. The record below will also be created when the case issue form is submitted.
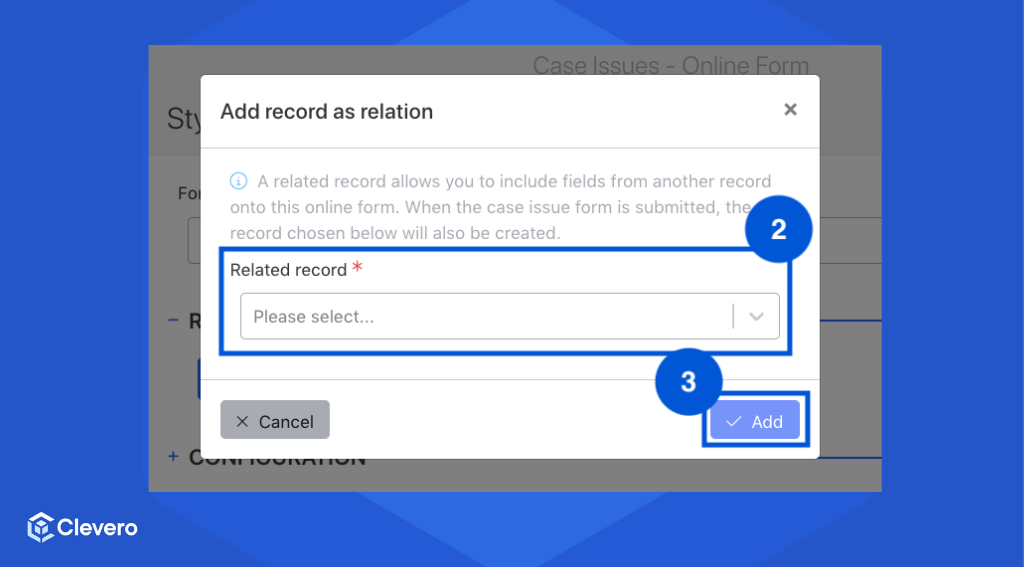
- Click the "+ Add relation" button.
- Select the related record.
- Click the "Add" button.
Step 3: Set Up Configuration
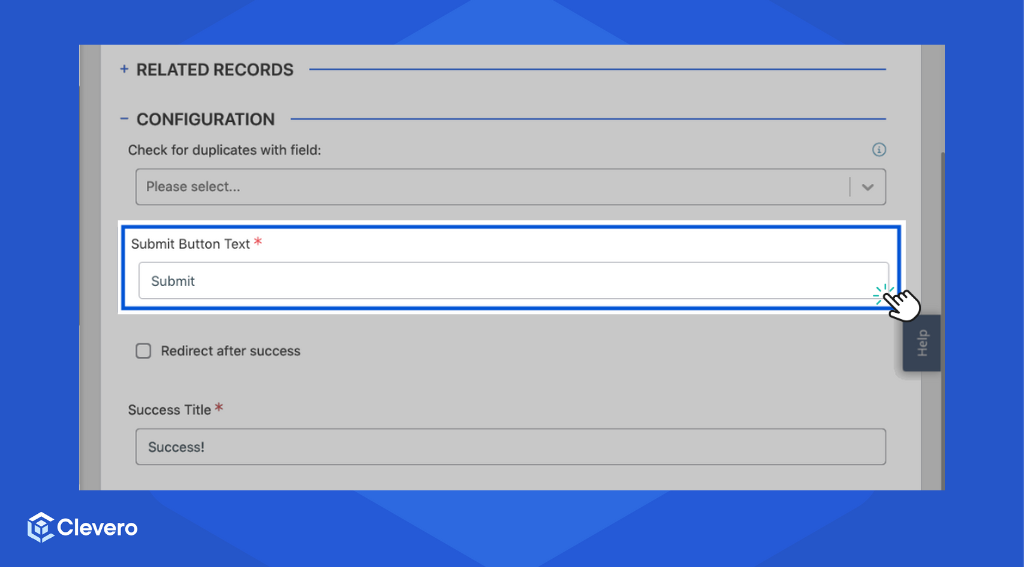
- When you specify Related Records, this option can be used to check for duplicate fields. If this field is set, no two entries with the same value in this field can be added via this Online Form.
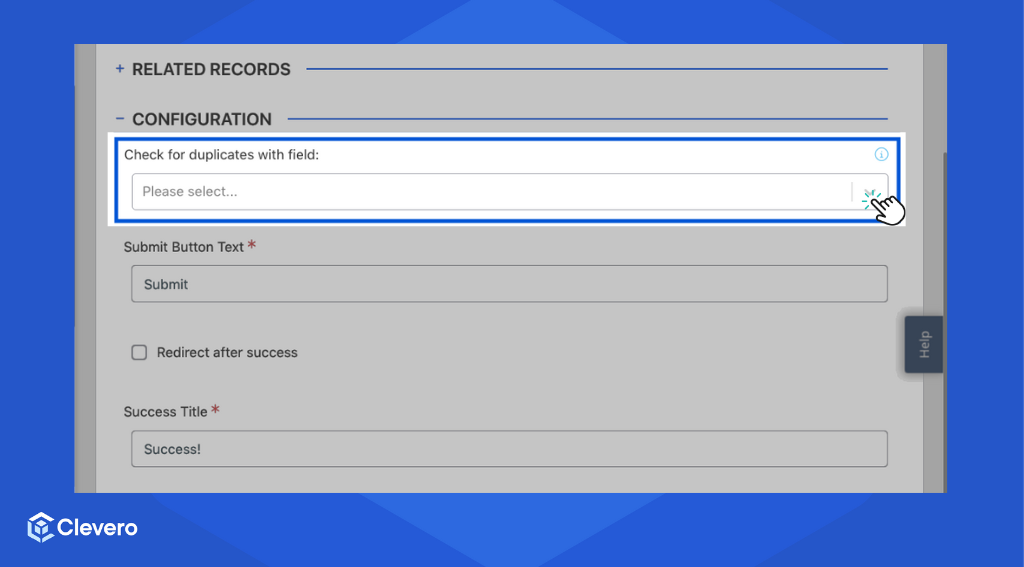
- Specify the desired text for the submit button that users will click to submit the form.
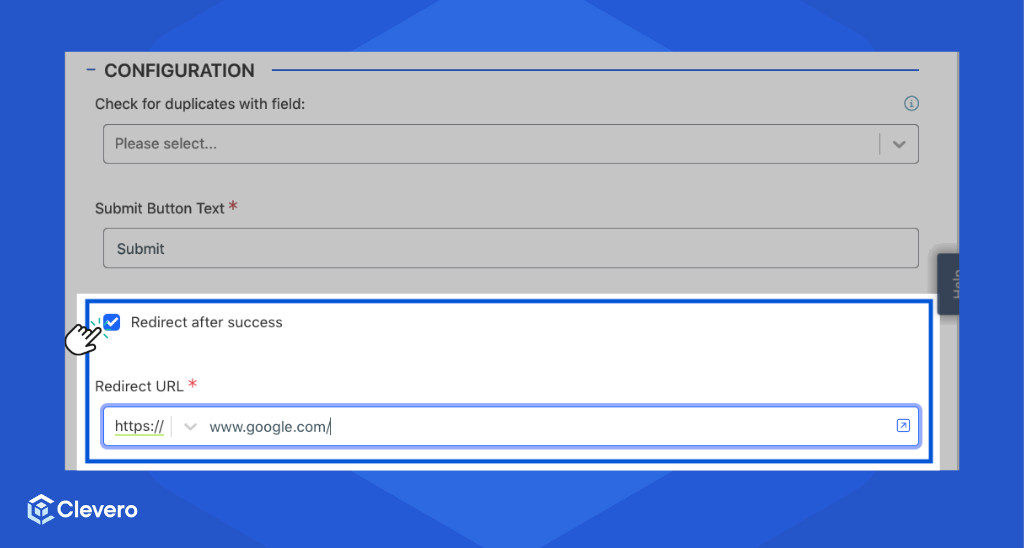
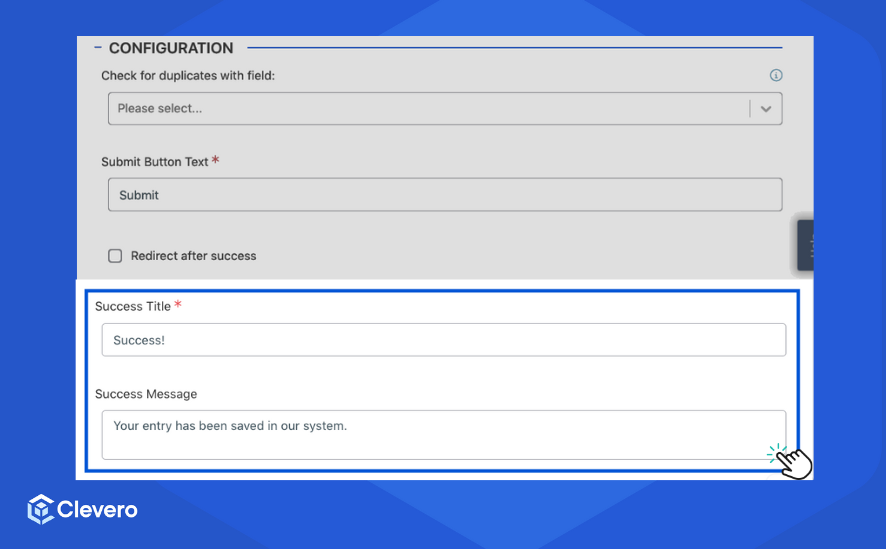
- You have two options to determine the final screen display when the user submits the form:
- Option 1: Redirect to a specific URL upon successful submission.
- Option 2: Display a success message on the same page after submission.
Step 4: Customise Styles
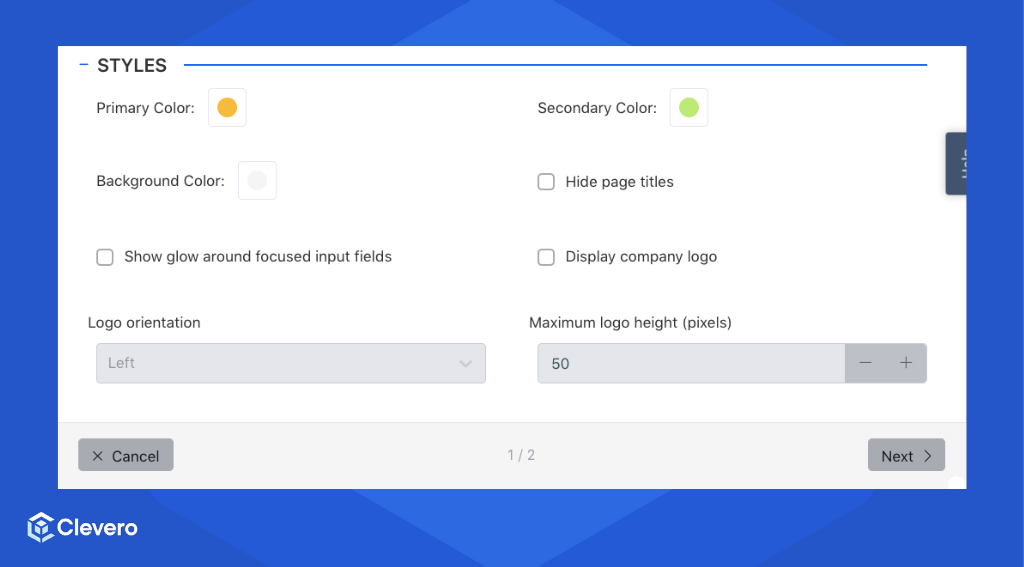
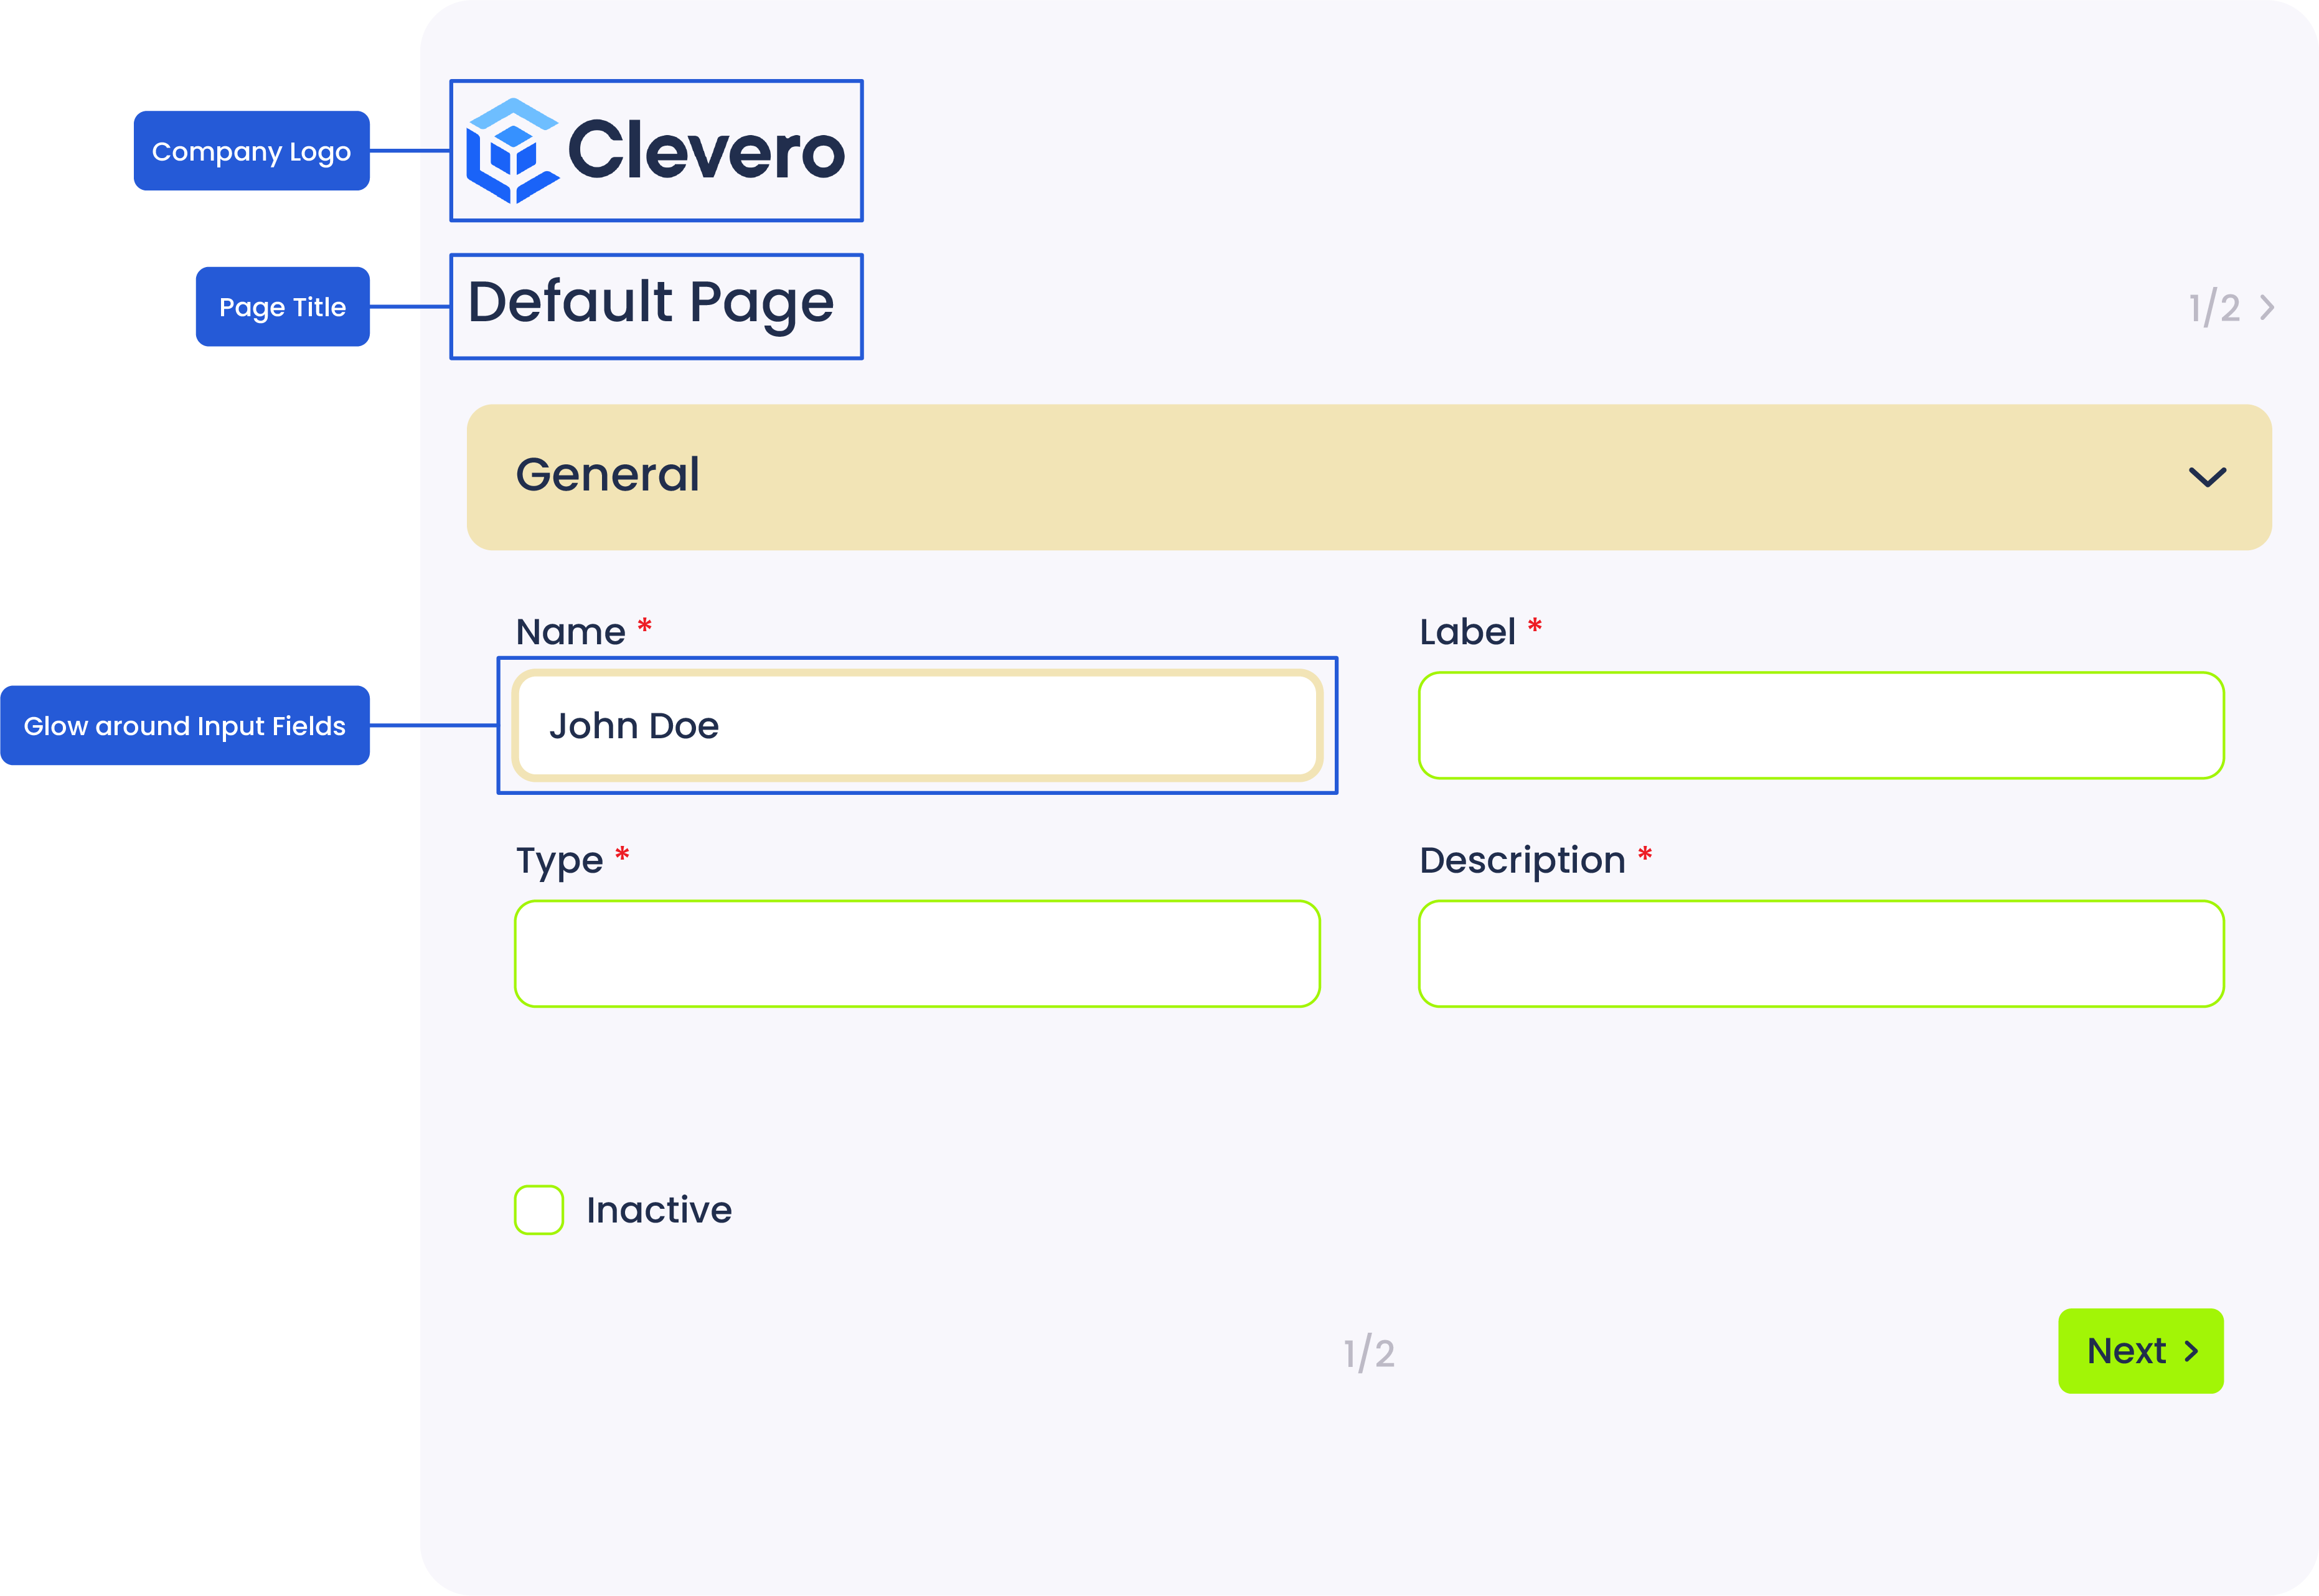
- Configure the Form Colors:
- Primary Color: The main colour represents the submit button, page sections, and the glow effect around input fields when a value is entered.
- Secondary Color: This colour is applied to the glow effect around input fields and the next and back buttons.
- Background Color: Set the background colour for the form.

- Configure additional options:
- Enable the "Hide page titles" option to hide each page's titles.
- Enable the "Show glow around focused input fields" option to highlight the input fields with a colour when they are selected.
- Enable the "Display company logo" option to showcase your company's logo on the form. Additionally, you can customise the logo's orientation and size per your preference.
- Click the "Next" button to proceed.
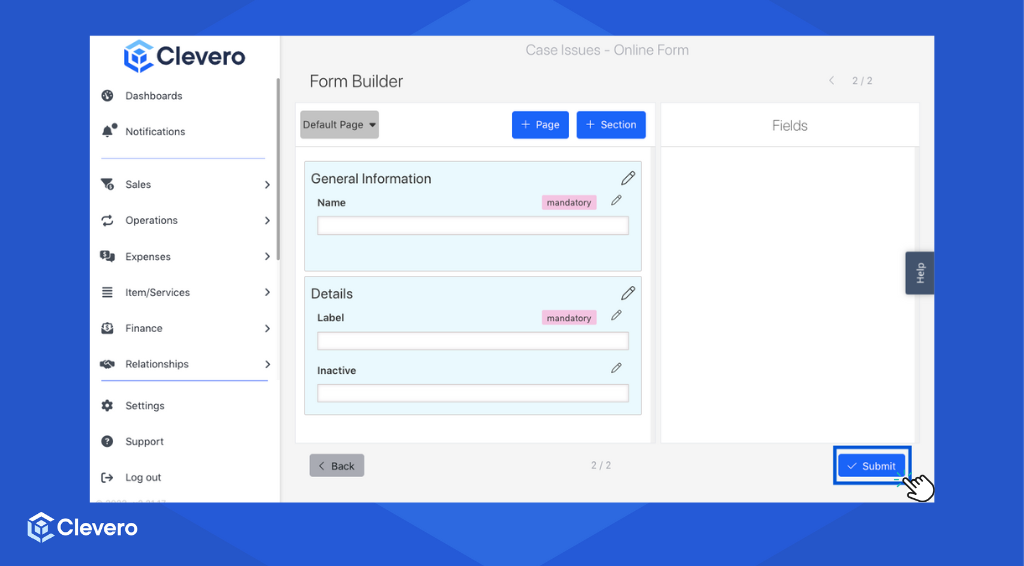
Step 5: Form Builder
This form builder allows you to customise the appearance of your form.
- Easily arrange the form's structure by dragging and dropping the available fields into the provided blank space.
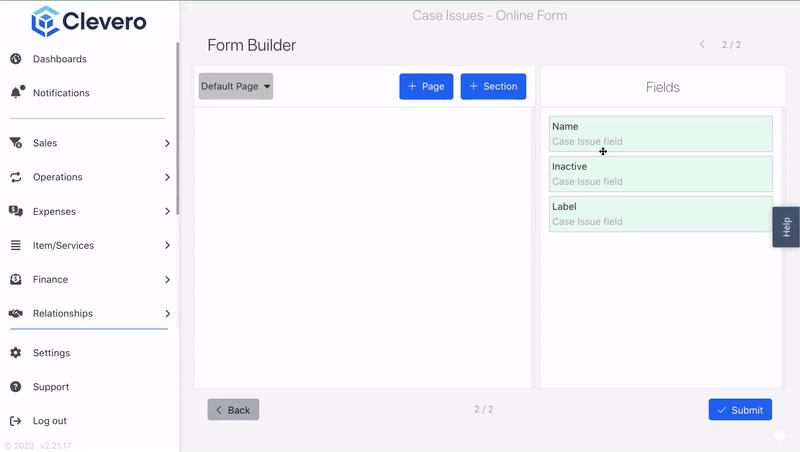
- To edit the field, click on the pencil icon (✎). You can set a new label, description, placeholder, and mandatory/read-only options here.
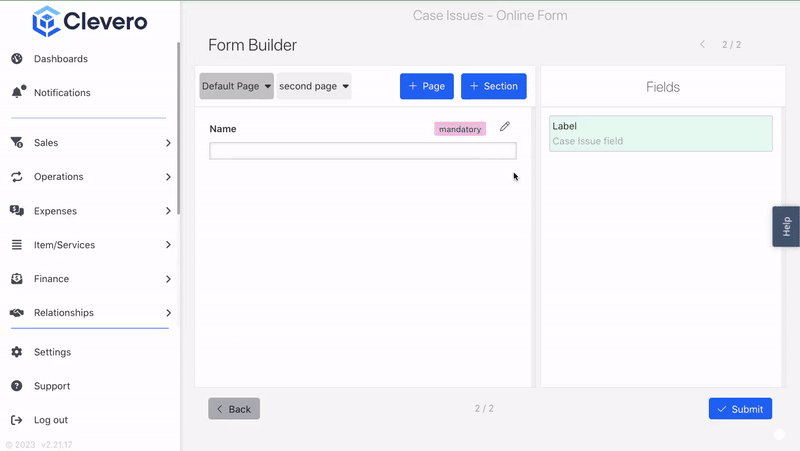
- Click on "+ Page"to create multiple pages for the form.

- Organise your form by adding sections within each page. Click on "+ Section" to include a section.

- Once you are set, select "Submit" to save your changes.
- Select the form > click on the form's URL to view the form.
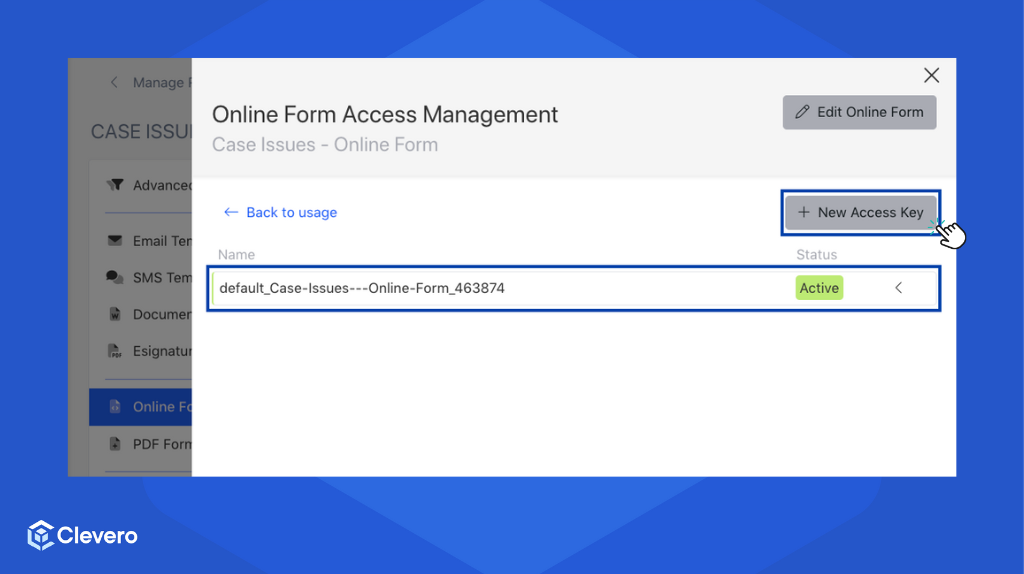
2. Manage Access Key
An Access Key acts as a unique identifier, granting individuals access to the form based on the key you provide. The best part? You can have multiple access keys, each with its customised settings. Let's dive into how you can manage them:
- Select the desired form you want to work with.
- Click on the "Manage →" button.
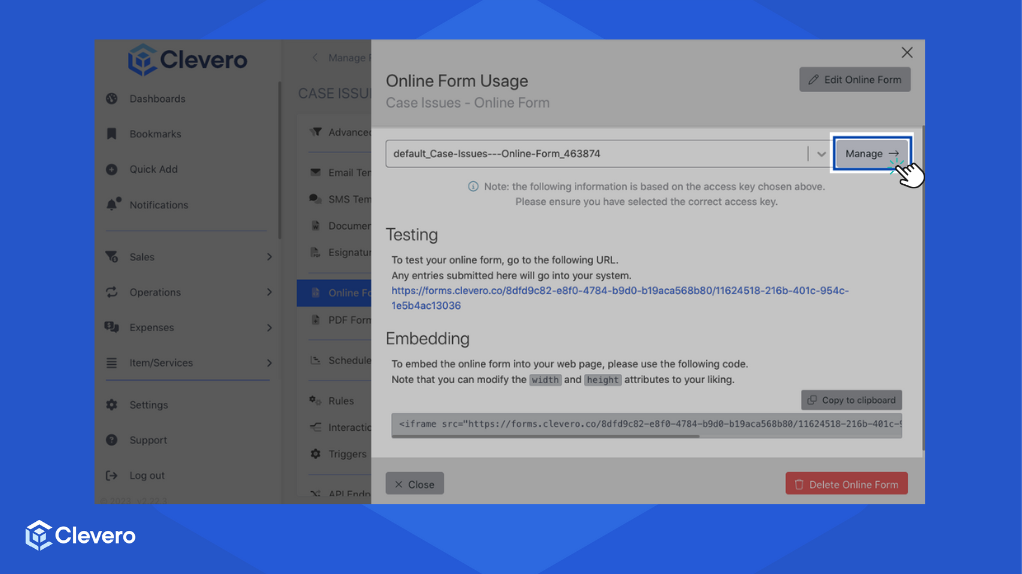
- Click the "+ New Access Key" button to create a new access key or edit the existing ones.
- Start by setting a unique name for your access key. This way, you can easily differentiate between various keys if you have multiple ones in play.
- Decide whether you want your access key to expire. If you want it to last forever, tick the "never expire" checkbox.
- Determine the maximum number of uses for your online form. Tick the "unlimited uses" checkbox if you want to welcome an infinite number of entries.
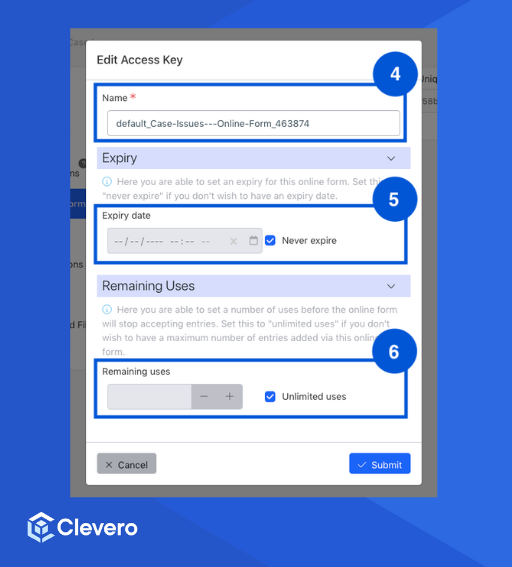
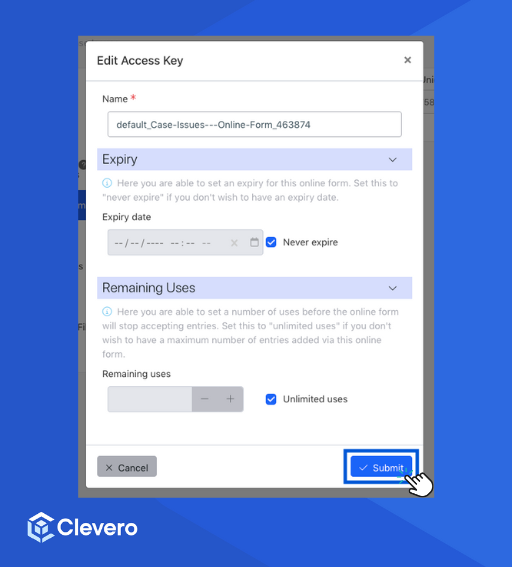
- Click the "Submit" button, and voilà! Your access key settings are now in place.
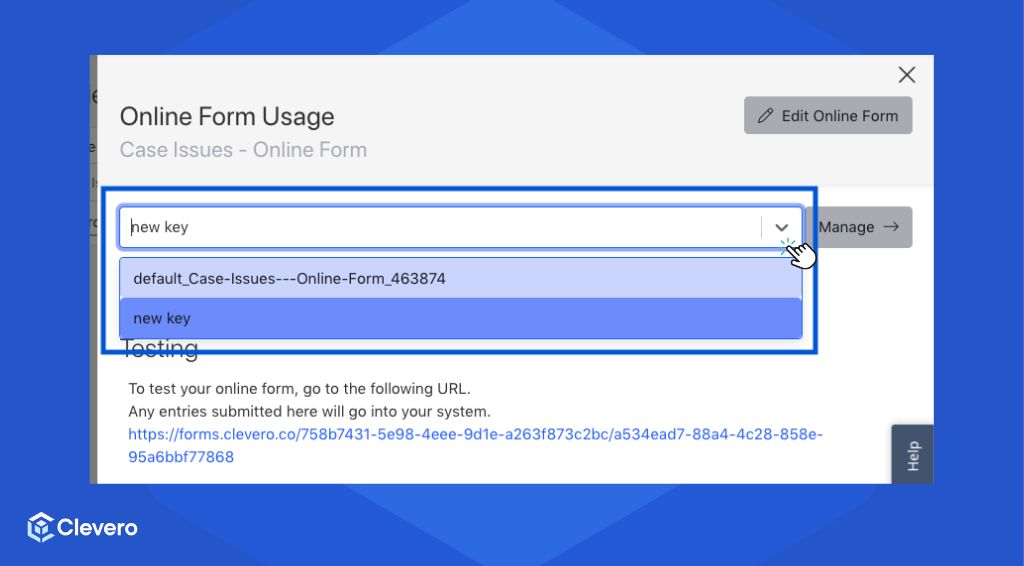
- Click on the dropdown to use a different key.
3. How to Use the Online Form?
This section provides instructions on how to use the online form effectively.
- Start by selecting the specific form you wish to work with.

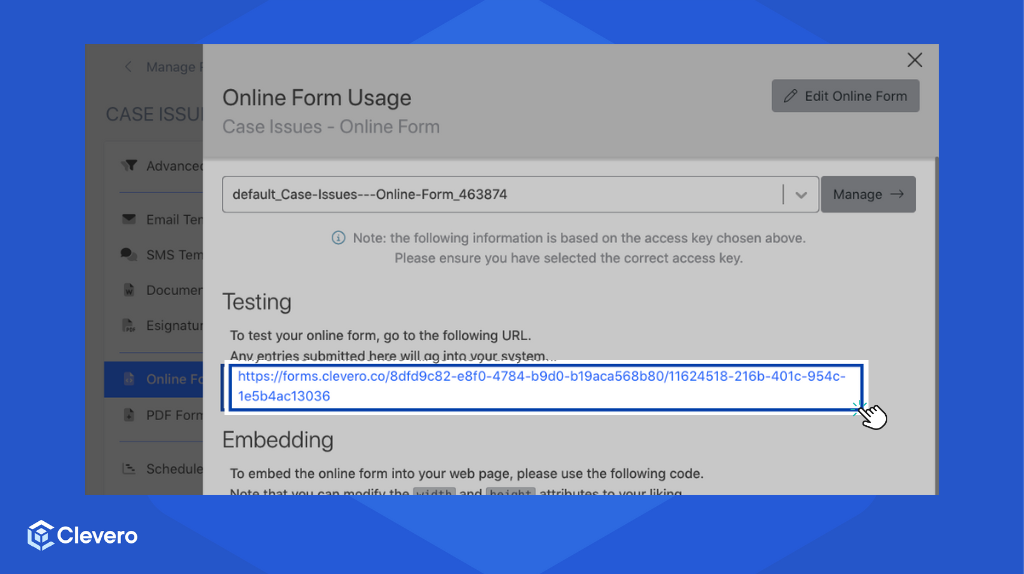
- To test the functionality of your Online Form, access the provided URL. All entries submitted through this URL will be stored in your system.
- Please embed the online form into your web page using the following code. Feel free to customise the width and height attributes per your desired specifications.
<iframe src="FORM URL" height="400" width="300" title=""></iframe>
Info:For more details on how to configure and add embedding options, please see the Embed Online Form section.
📌 Need Help?
