2. Create Records and Fields
- Set up an Instance of Clevero
- Create Records and Fields
- Create an Entry Layout
- Create a Navigation
- Create a View of Records
Overview
Records are the foundation of your solution. Each record represents a type of data you want to manage, like Customers, Deals.
For this guide, we're going to create:
- Record: Customers → Fields: Name, Email, Phone
- Record: Contacts → Fields: First Name, Last Name, Full Name, Phone, Email, Customer
- Record: Deals → Fields: Deal Name, Customer, Main Contact, Expected Close Date, Details
Video Walkthrough
Step by Step
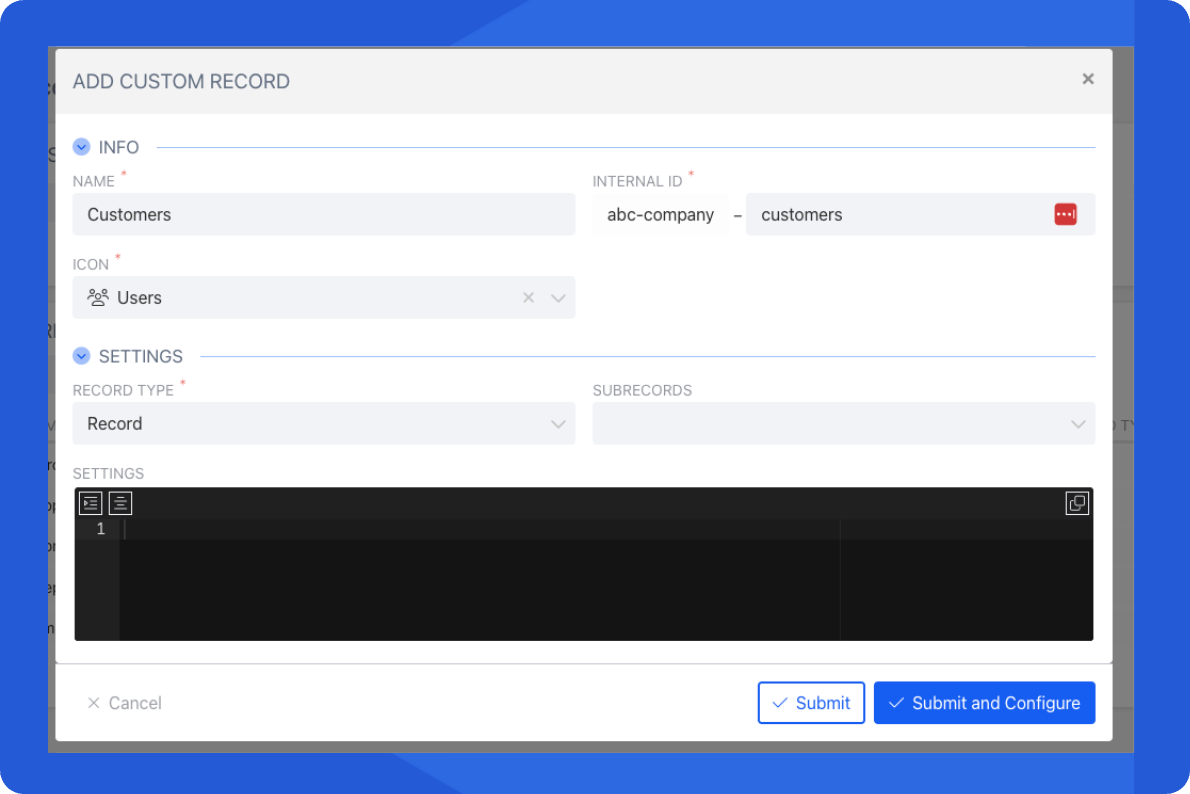
Step 1 - Create a New Record
- Open ⚙️ Settings → System Settings (bottom-left of your screen).
- Select Records from the menu. This section shows all existing records in your instance.
- Click + New Record (top-right corner).
- Enter a Name and choose an Icon.
- Click Submit and Configure to create the record.
Step 2 - Add Fields to Your Record
- From the Records, select Fields in the left-hand menu.
- Click + Add Field (top-right) to begin adding fields.
- Enter:
- Field Name (e.g. Name)
- Data Type (e.g. Text)
- (Optional) Placeholder, Tooltip, Default Value
- Click Save to add the field.
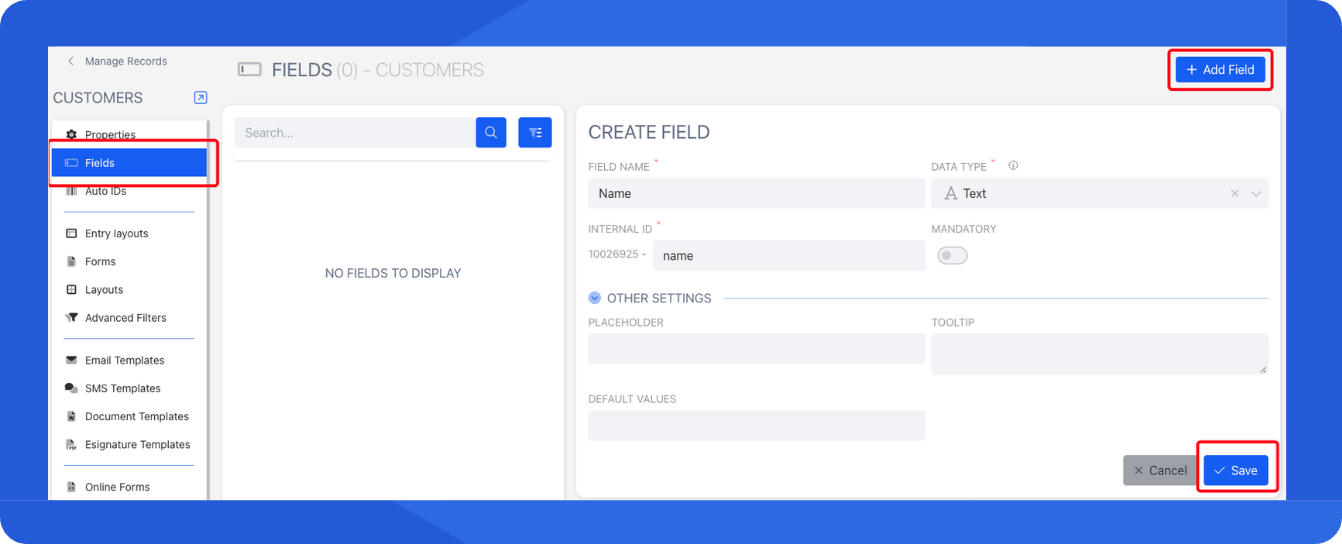
- Repeat this process for any additional records/fields you want in your CRM.
InfoTo get a better understanding see: Creating Custom Records
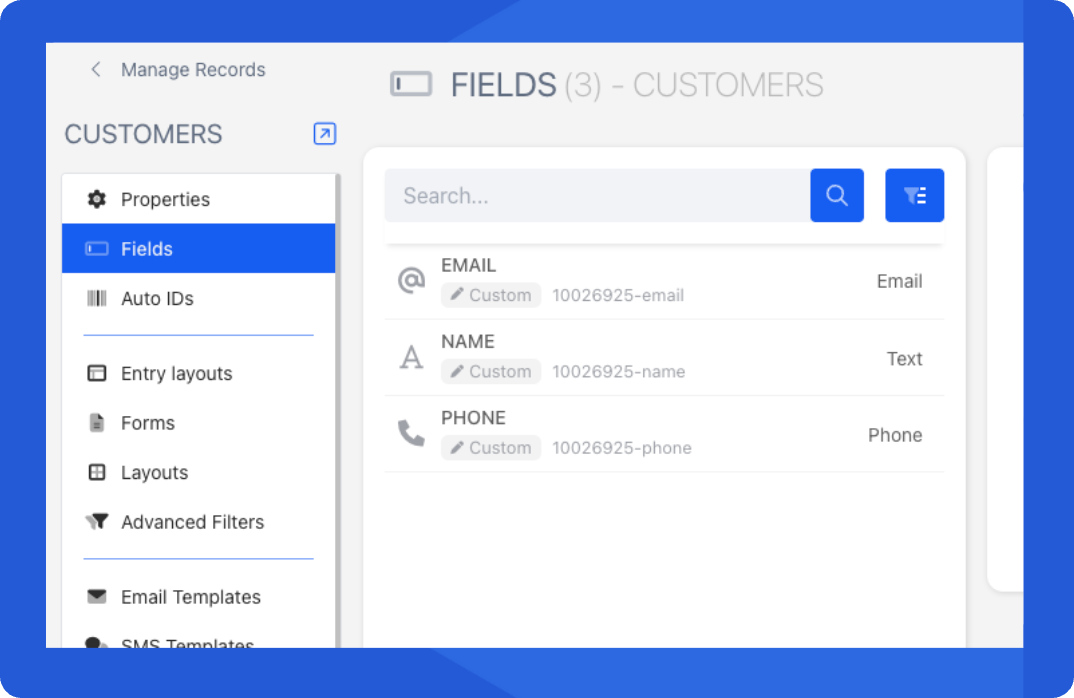
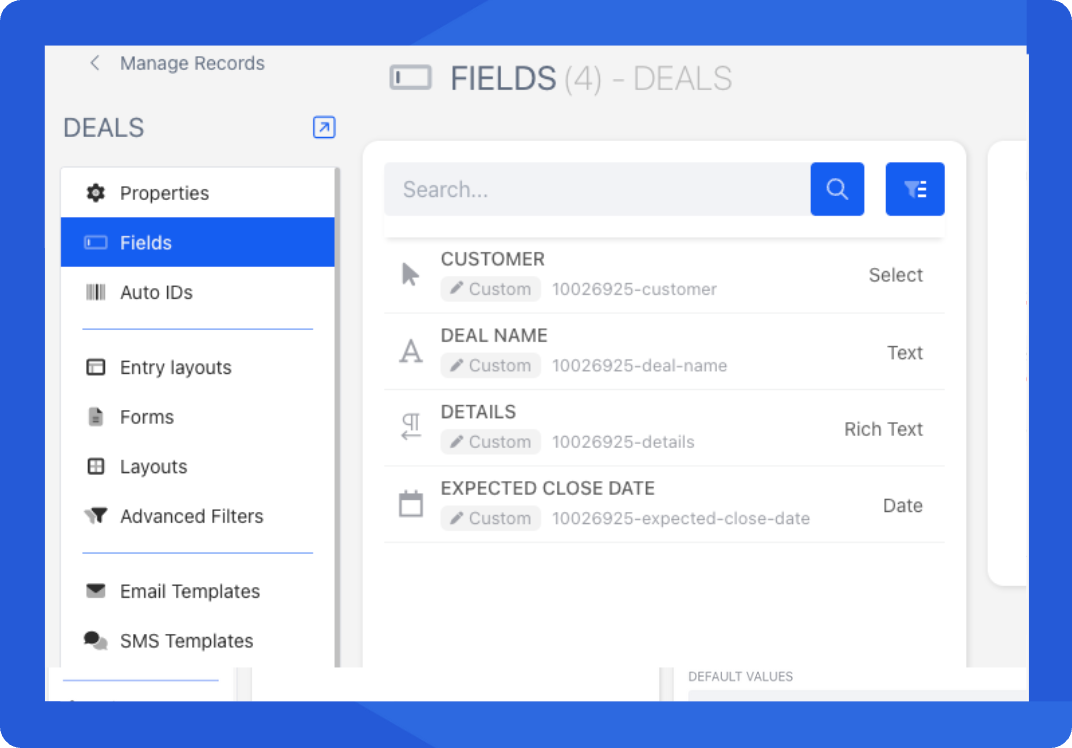
Step 3 - Example Records
We're going to go ahead and add more fields and records. Here’s how your setup should look after adding fields:
Our Customers record with 3 fields
Our Contact record with 6 fields

Our Deals record with 4 fields
Step 4 - Link Your Records
Now let’s connect them so your CRM works as one system:
➡️ Deals → Customers → track which customer each deal belongs to
➡️ Contacts → Customers → see all people under each customer
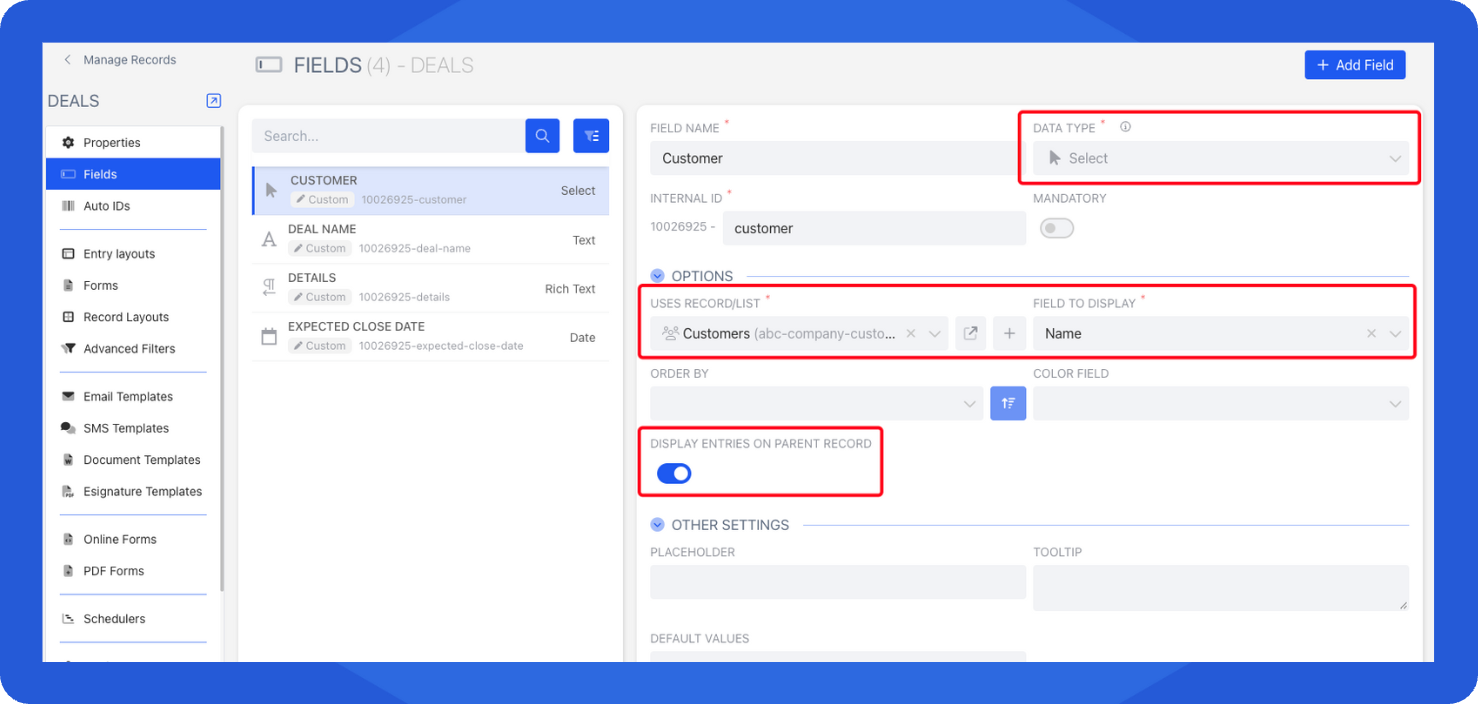
Select your selected field, and configure:
| Setting | Description |
|---|---|
| Data Type | Field types that link records together include Selects, Multiple Choice, Multi Select, and Radio Buttons. |
| Uses Record/List | Determines which list should be displayed in that field. |
| Field to Display | The field value that will appear in the dropdown or buttons when rendered. |
| Display entries on parent record | Toggle ON to show related entries (e.g., Deals/Contacts) on the Customer record. |
InfoFor more details, learn more in Creating Fields