Sub-records
📌 Structured data for capturing supplementary information on records.
Overview
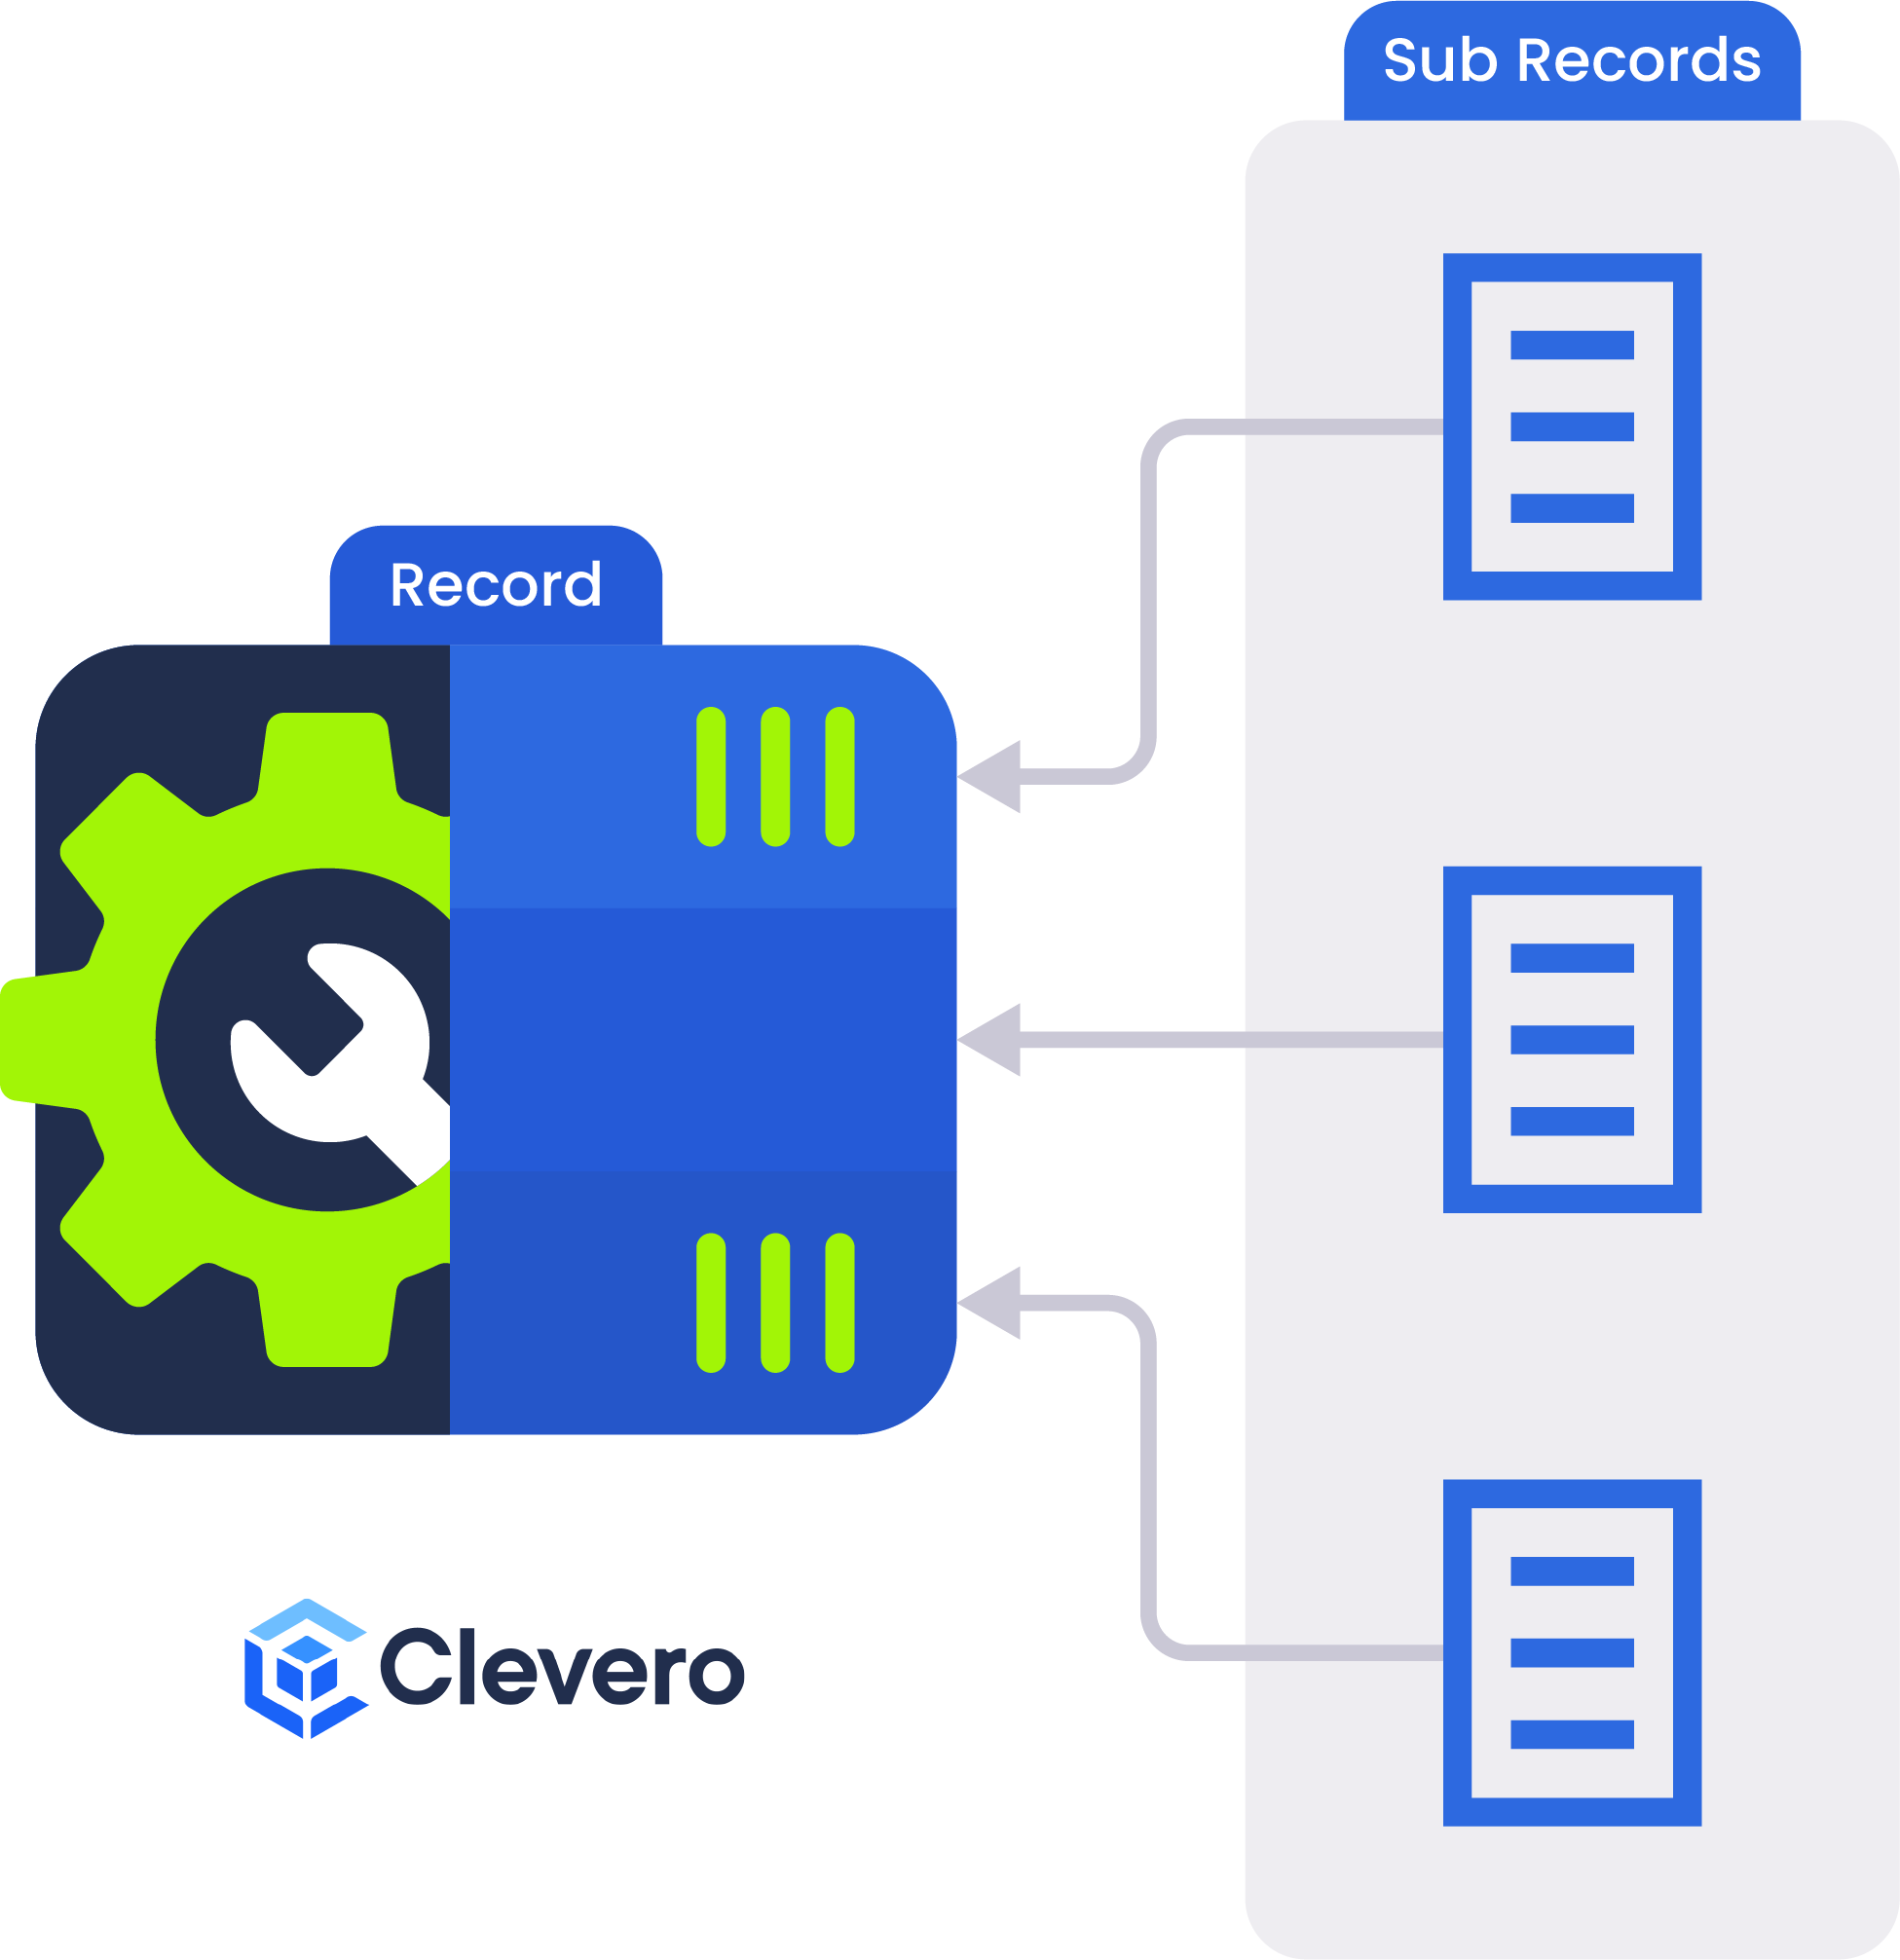
Sub-records are a supplementary data structure used to capture related information in a structured tabular format.
Sub-records are not designed to be used independently. They only exist within a Record’s context. In other words, a Sub-record must be added to a Record because it depends on that Record to define where and how its data is stored and displayed.
For example, an Invoice record may contain sub-records for individual Order Items, each listing item details such as description, quantity, and price.
When to Choose Records Over Sub Records?
Choosing between records and sub-records is like selecting the perfect tool for the job. It depends on your data's complexity, accessibility, and relationships. So, take a moment to evaluate these factors and make an informed decision that empowers your data management.
Use Records for the data that has a simple structure. But, use Sub-records for a more complex data requires & hierarchical organization.
Use Sub-records if the data needs to stand alone or has unique properties. But, use Records if the data is always tied to and accessed through the parent.
Use Sub-records if you're dealing with a manageable number of Sub-records per parent record. But, use Records if you expect many sub-records.
If your data has complex relationships, Records with associations provide the flexibility you need. But if your relationships are easy to manage, use Sub-records.
Creating a Sub-record
Step 1. Create the Sub-record
To create or modify a record, follow these steps on the Record Management page of System Settings:
- Go to "Settings" → "System Settings".
- Select "Records".
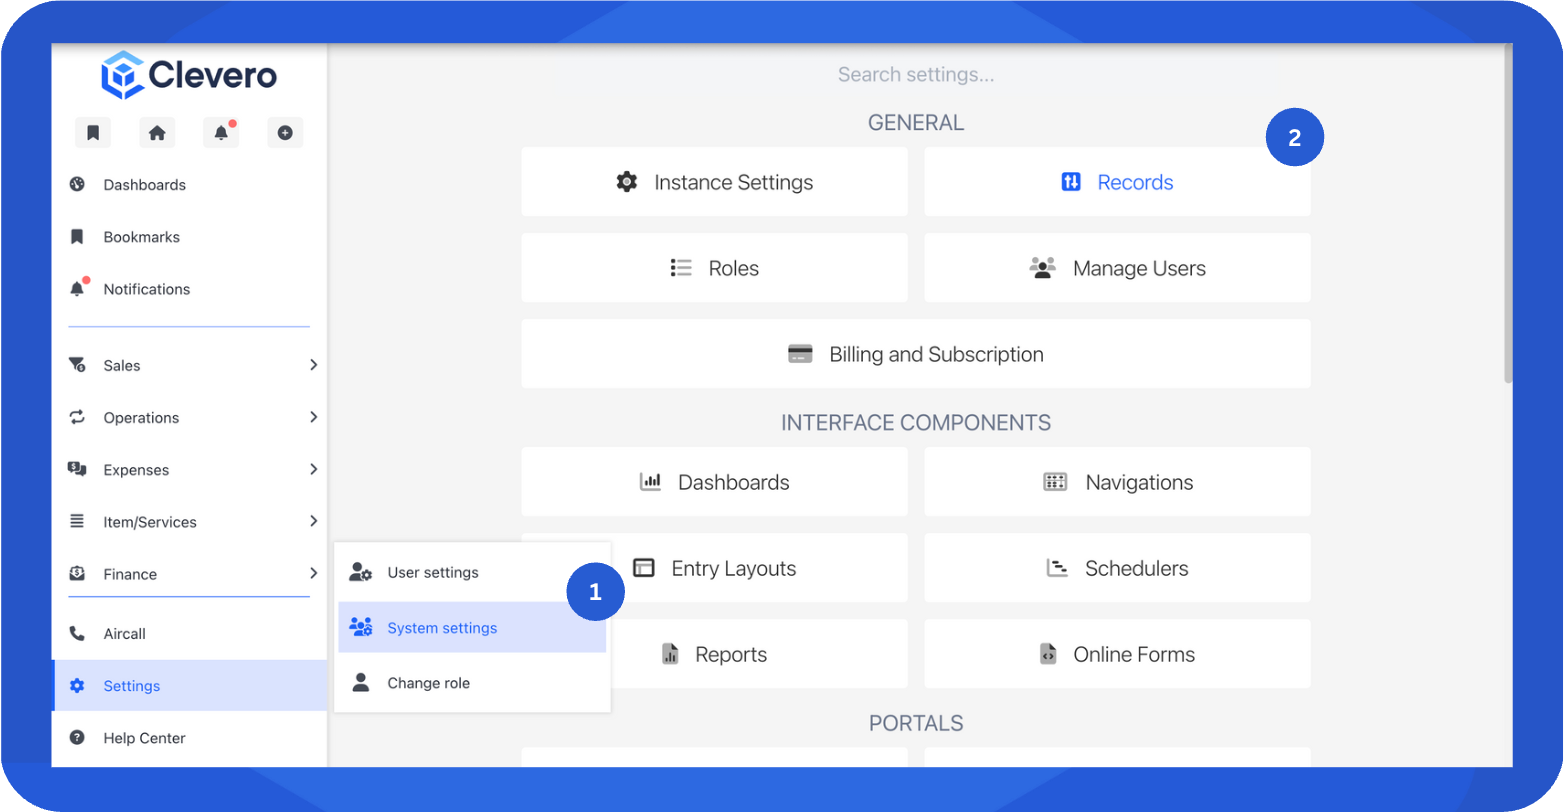
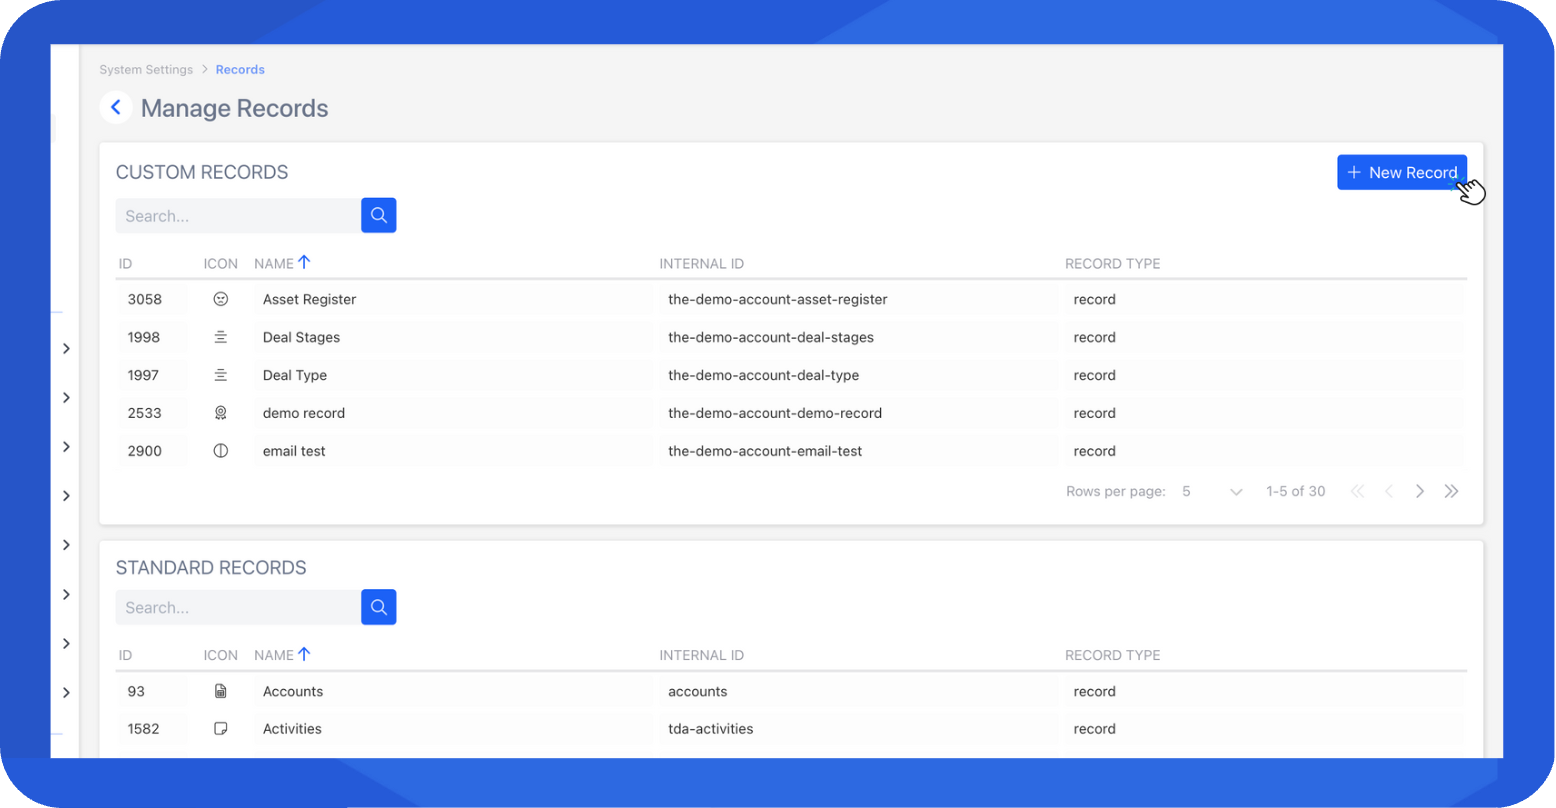
- Select "+ New Record".
- Fill in all required fields. Here's a description of each:
- Name: The label or title of your record (for example, Invoices or Monthly Sales Report).
- Internal ID: An auto-generated unique identifier used by the system to recognize the record. You can modify it manually if needed.
- Icon: A symbol that visually represents the record.
- Set the "Record Type" to "Subrecord".
- Click on the "Submit" button to create the Sub-record.

- You’ll see the sub-record listed under the Custom Records section.

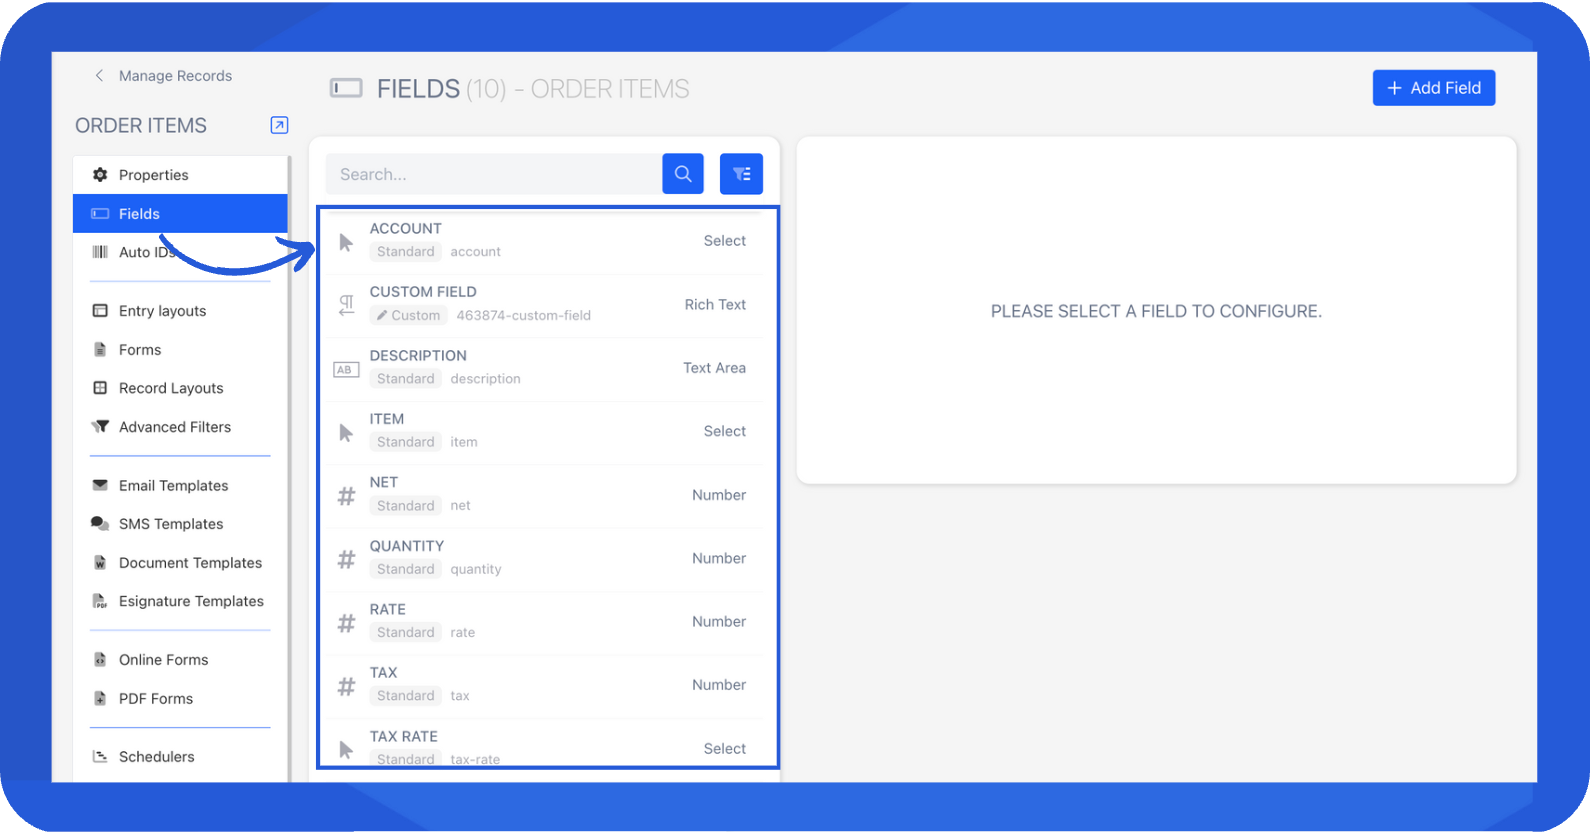
- Next, define the fields for your sub-record.
InfoFor detailed steps on creating fields, see the Creating Fields guide.
Step 2. Add the Sub-record to a Record
Once the sub-record is created, you can add it to the parent record.
NoteYou can only add sub-records to Custom Records. You can’t modify Standard Records.
- Go to Settings → System Settings.
- Select "Records".
- Open the parent record (For example, Sales).
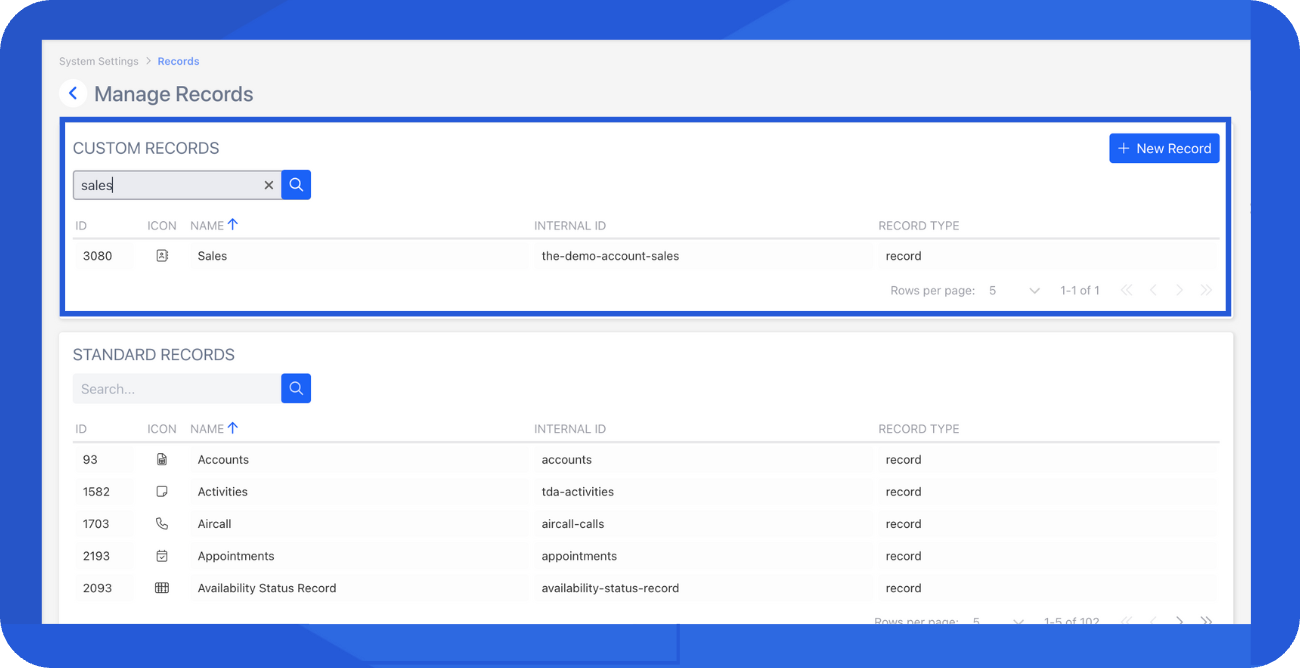
- Under Record Type, ensure it’s set to Record.
- In the Sub-records section, add the sub-record you created (e.g., Order Items).
- Click Submit to save the changes.

If the Sub-record doesn’t appear in the list, try refreshing the page.
Step 3. Add the Sub-record to the Entry Layout
To make sub-records visible and interactive within the parent record, add them to the Entry Layout using the steps below:
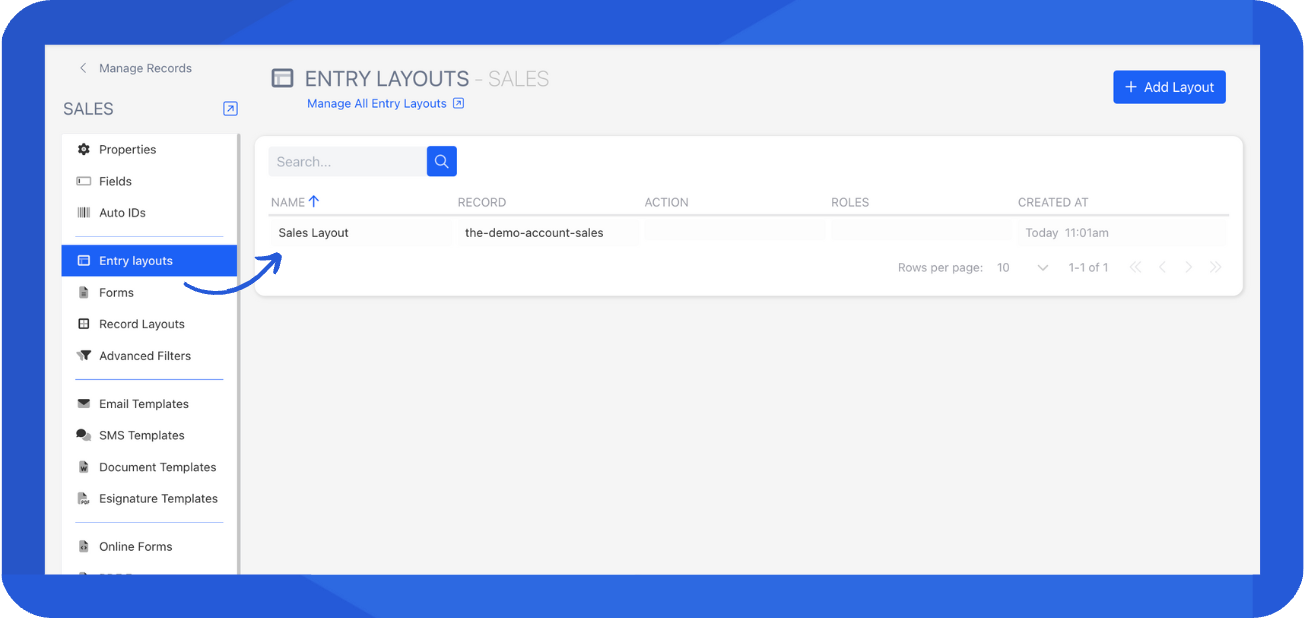
- Go to Entry Layout in the side navigation. Select the existing layout you use.
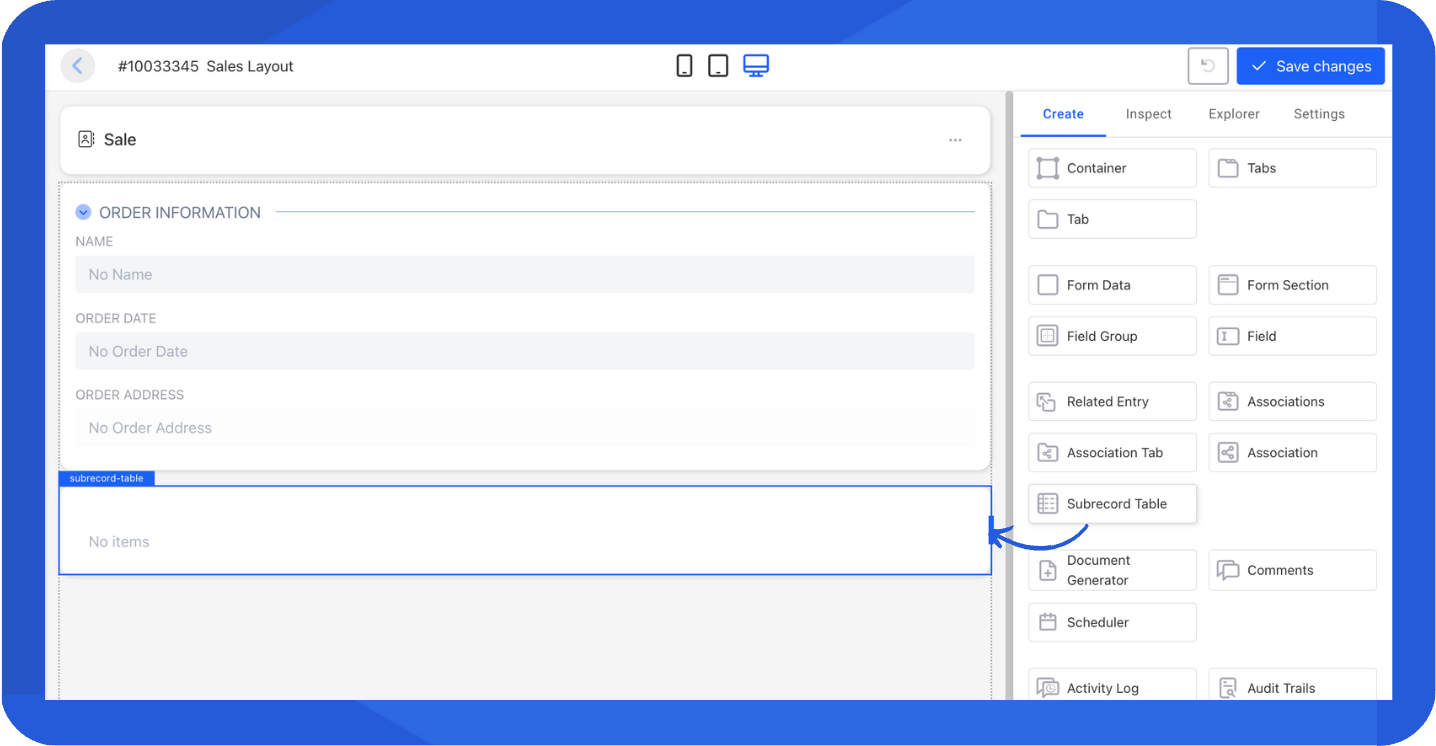
- Drag and drop a Sub-records component into the layout. Adjust placement as needed.
- In the Inspect tab, select the sub-record you just created (e.g., Order Items).
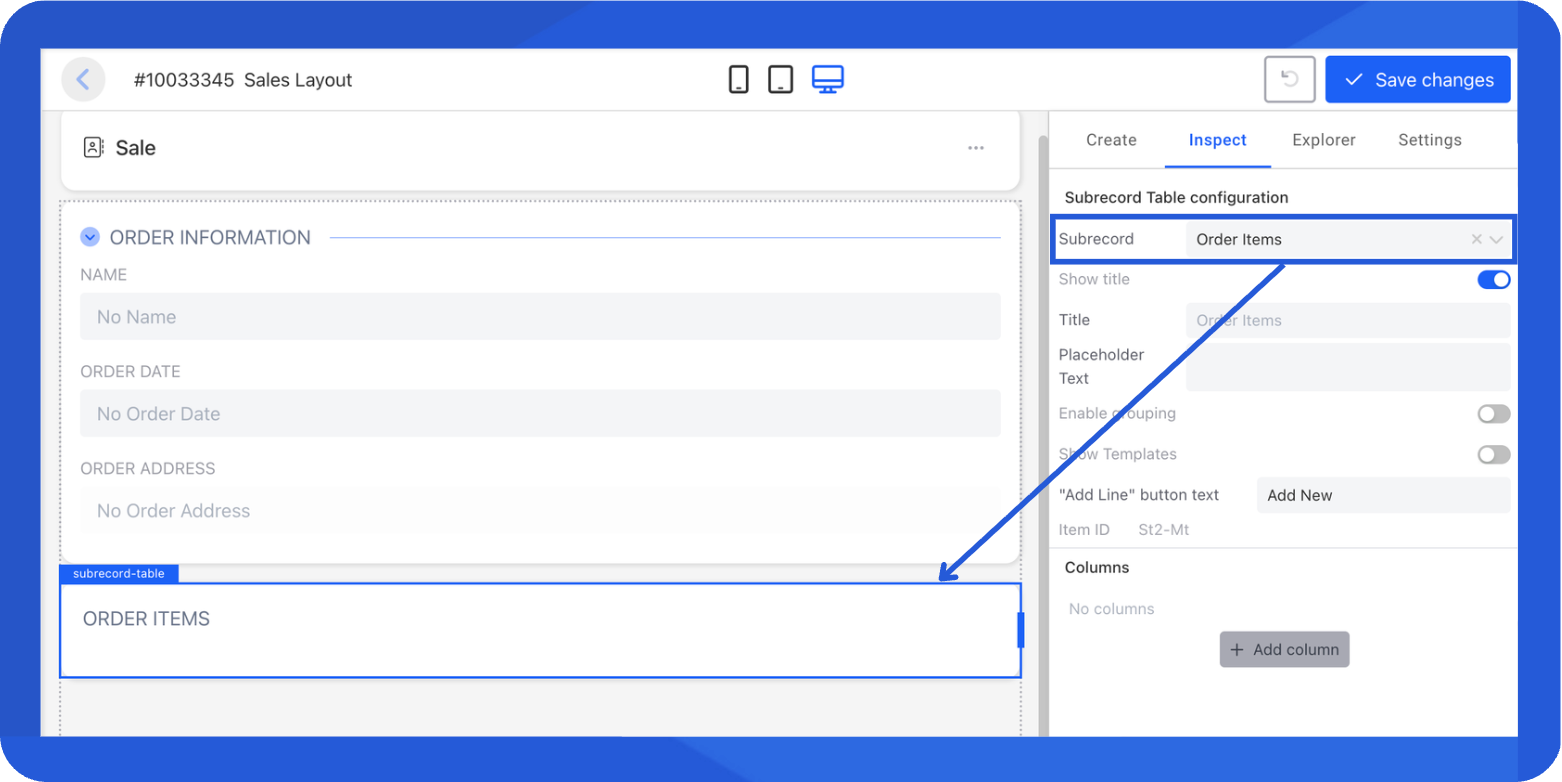
- Configure the sub-record settings.
- Title: The default title follows the sub-record name, but you can customise it as well.
- Show title: Enable this toggle to display the title in the table.
- Show template: Enable this to display and activate the Add and Update options for data in the sub-record table.
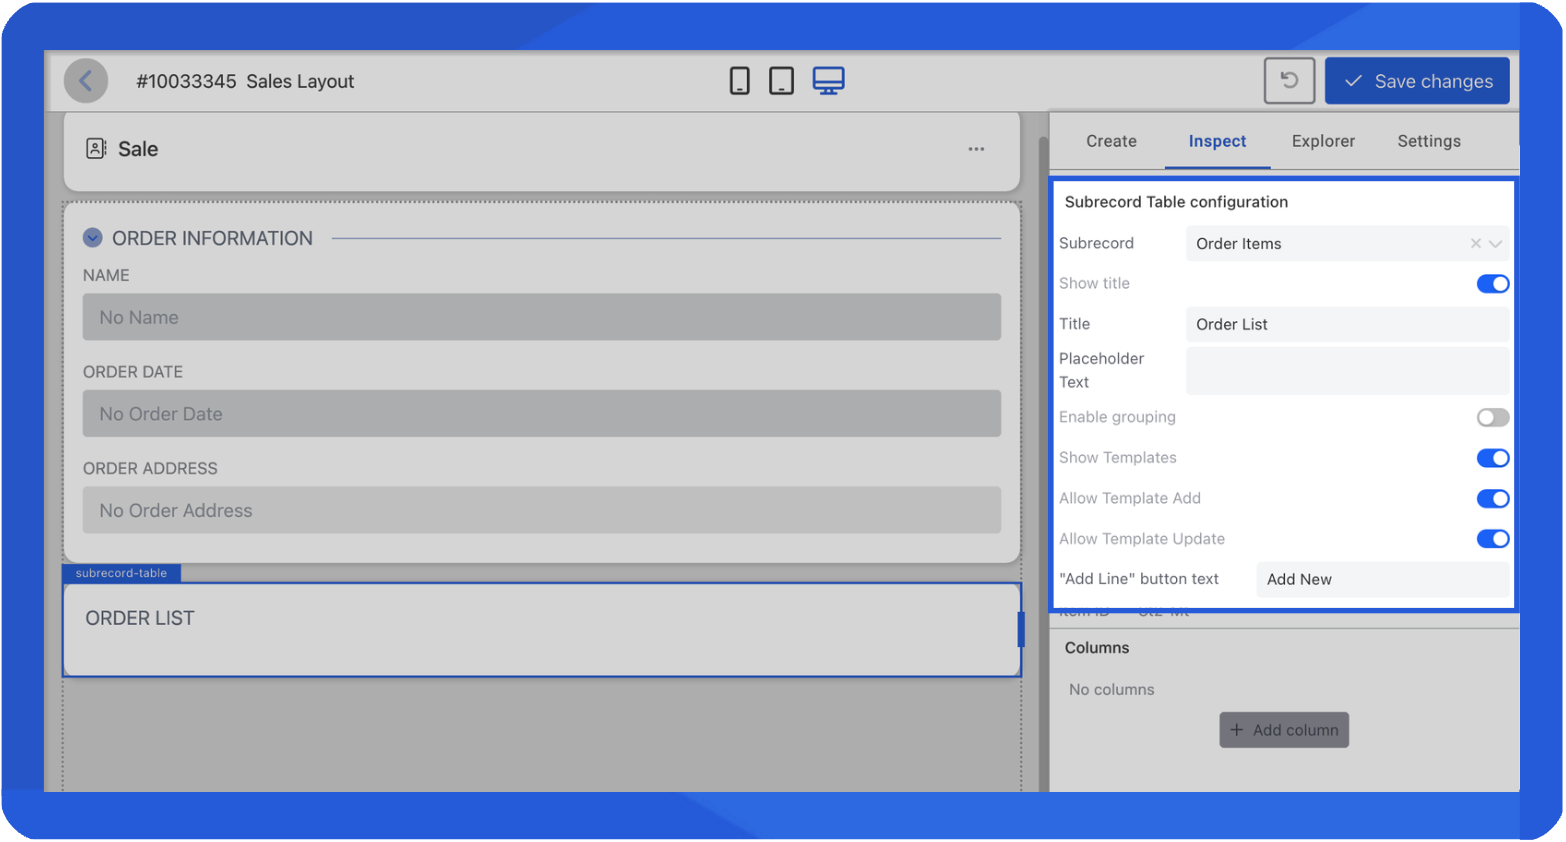
- Add columns to the table.
- Choose a field from the existing options, or click the + icon to create a new field directly.
- Optionally set a custom label (if you want a different display name) and define the column width.
- Drag and drop the fields to arrange the column order.
- Click Save Changes to save the layout.
📌 Need Help?
