Self Service Scheduler
The Self-Service Scheduler lets you create and manage meeting links that invitees can book directly from a shared scheduling page. It supports two scheduling types:
- One-on-One Scheduling — Allow invitees to book time with a specific team member.
- Round Robin Scheduling — Automatically distribute meetings among a group of team members based on predefined rules.
This guide covers how to set up and manage One-on-One Scheduling.
Prerequisites
Before setting up the scheduler:
- Check that all users are registered in the instance by going to System Settings → Manage Users.
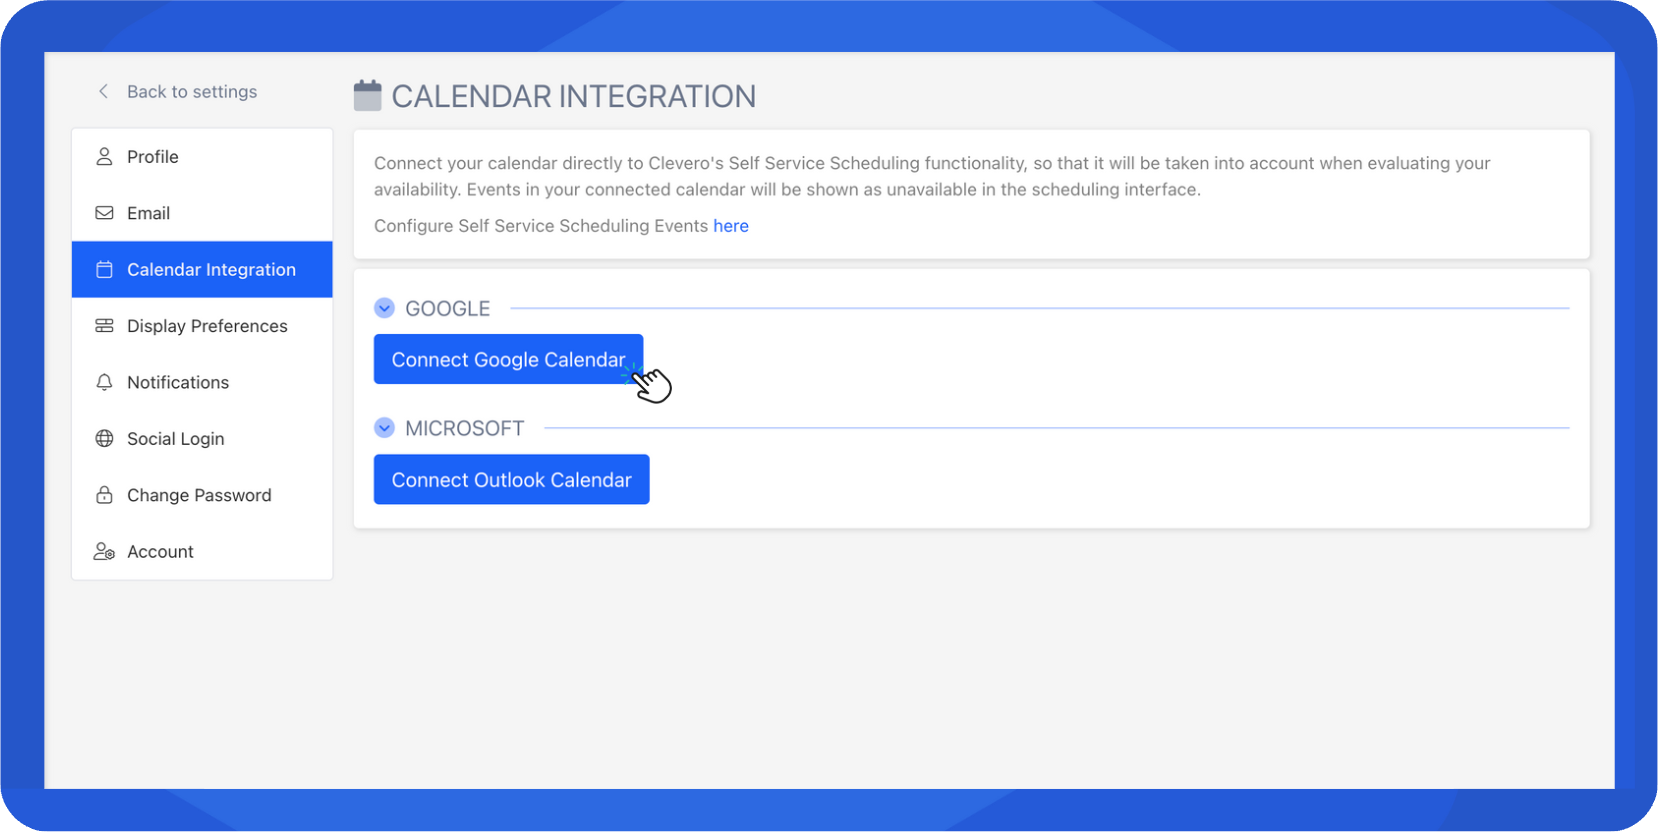
- Integrate your account with Google Calendar to receive booking notifications and automatically sync meetings:
- Go to System Settings → User Settings → Calendar Integration.
- Select Connect to Google Calendar.
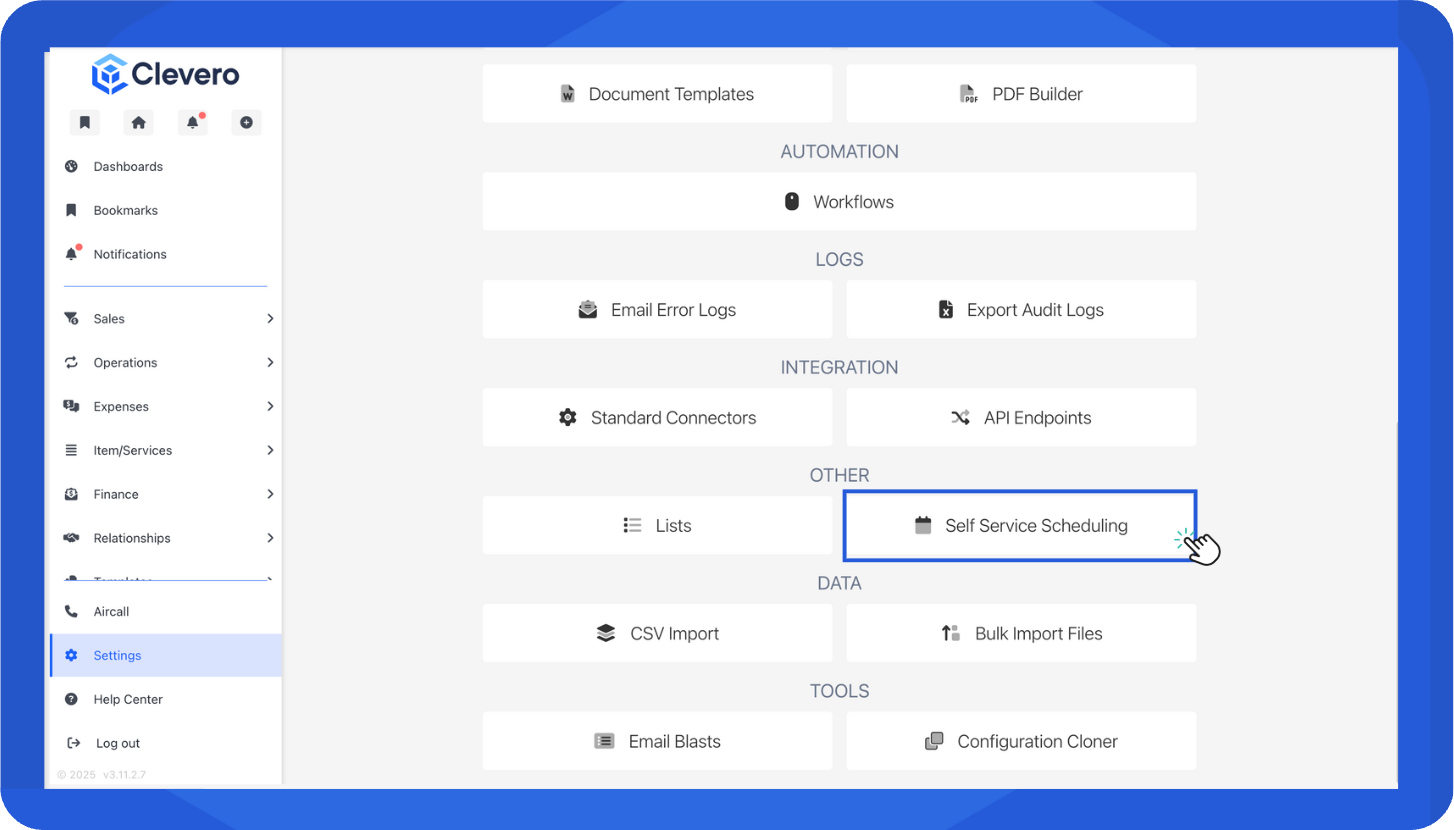
- Go to System Settings → Self Service Scheduling.
One-on-One Scheduling
The One-on-One Scheduler lets invitees book time directly with a selected employee.
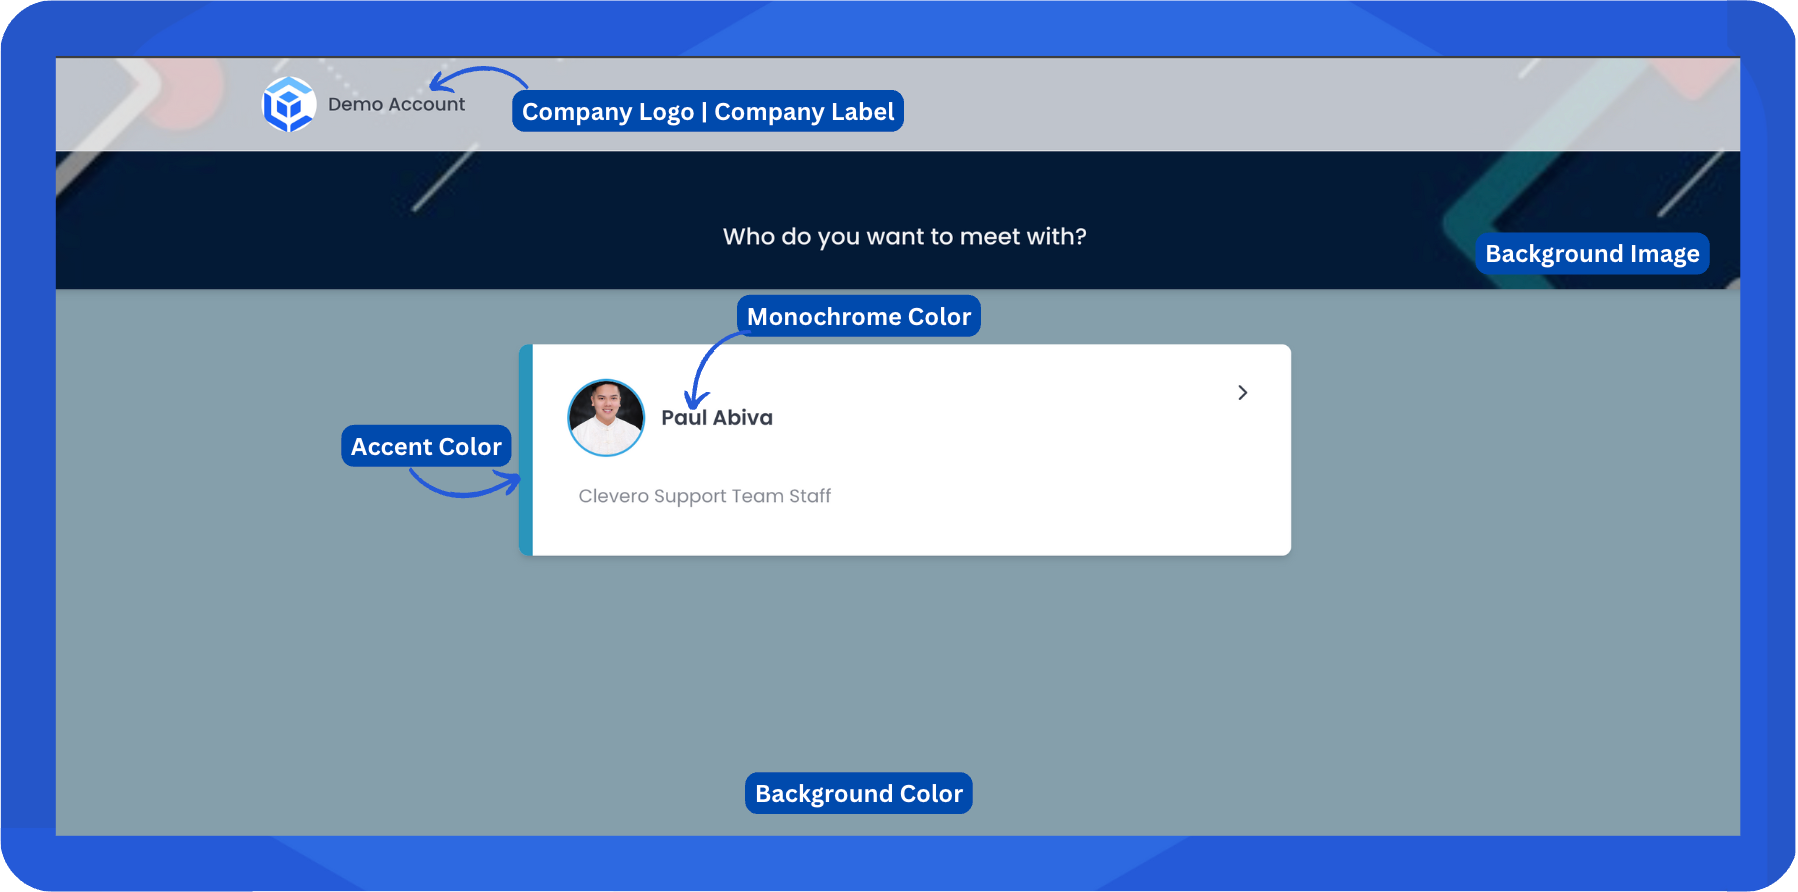
Step 1. Set the Branding Theme
The branding theme defines how your scheduler page appears to invitees. You can customize:
- Company Label: The company name displayed on the page
- Company Website: The website link shown to invitees
- Accent Color: The highlight color used for buttons and links
- Background Color: The page background color
- Monochrome Color: The text or neutral color theme
- Company Logo: The logo displayed on the page
- Background Image: The image displayed behind the scheduler
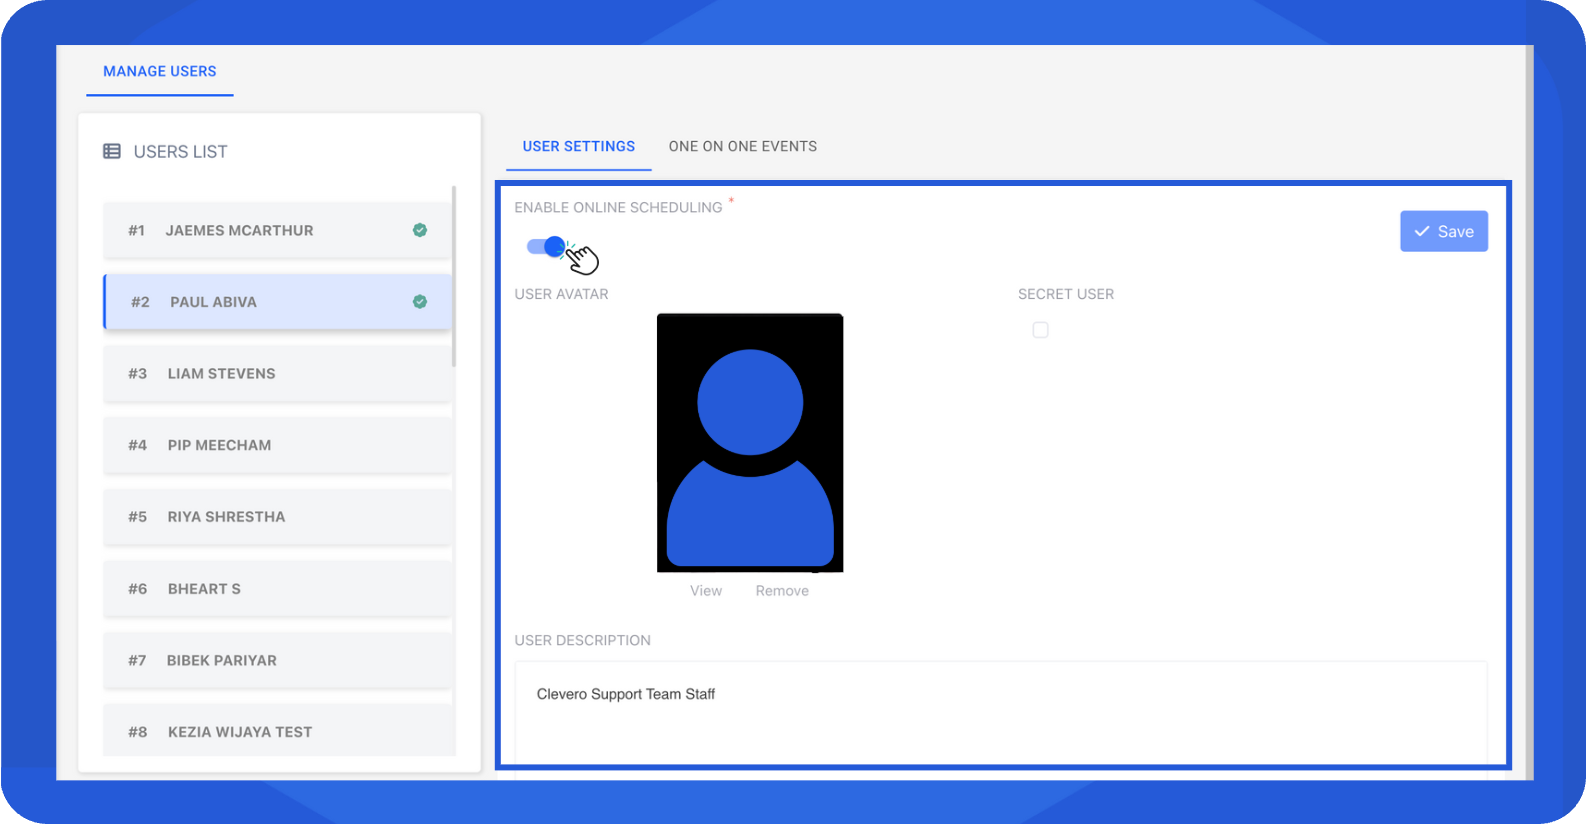
Step 2. Configure User Settings
- In the User List, select a user.
- Open the User Settings tab. From here, you can:
- Update the user’s profile picture and description.
- Enable the Enable Online Scheduling toggle to activate the One-on-One scheduling feature for this user.
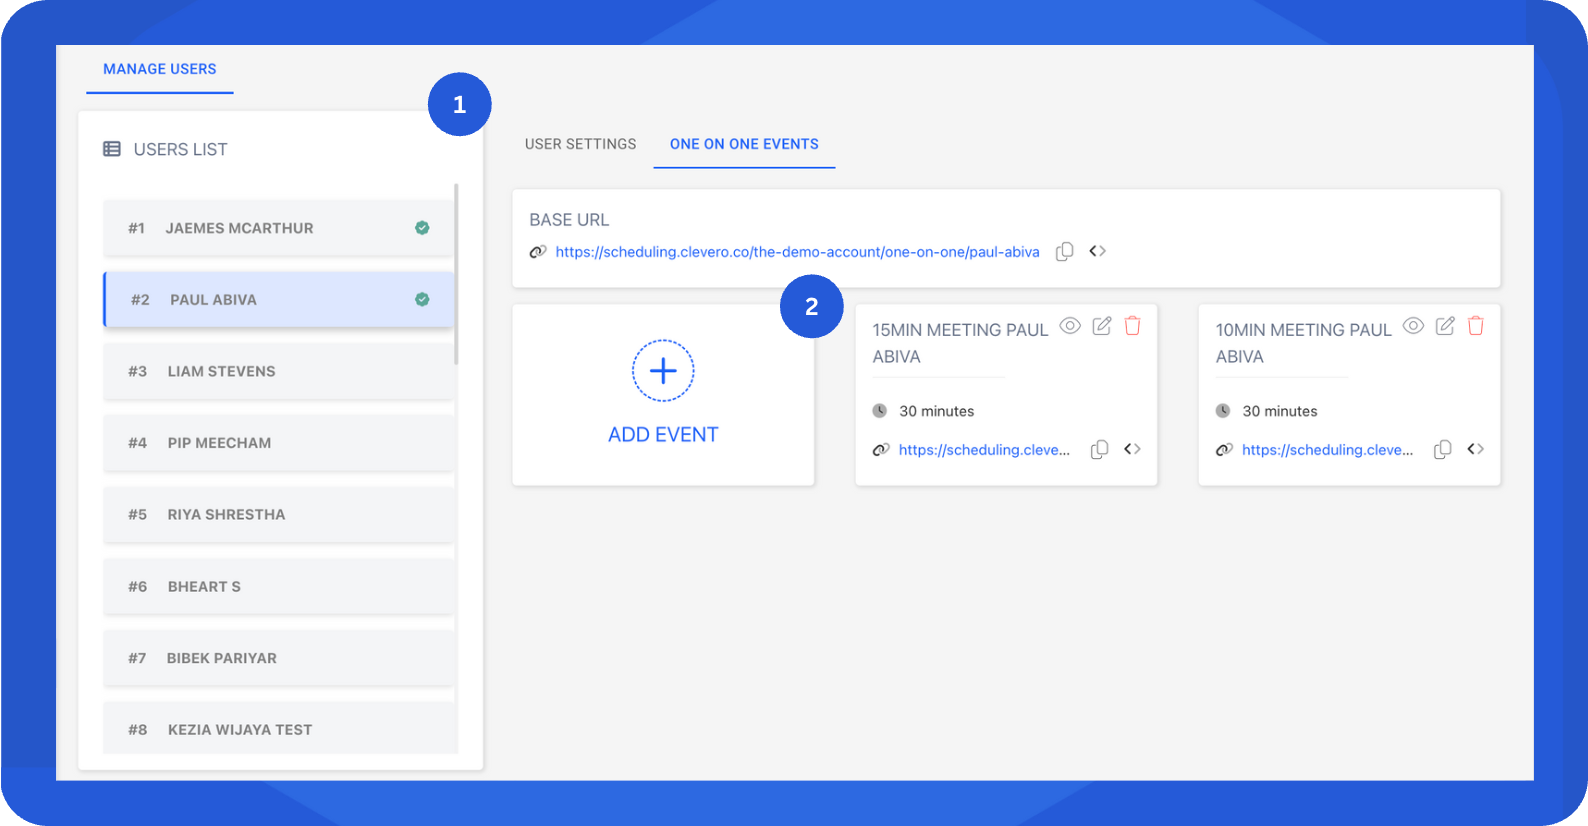
Step 3. Create a One-on-One Meeting
- In the User List, select a user.
- Open the One-on-One Events tab and click Add Event.
- Fill in the required information as follows:
General Information
| Field | Description |
|---|---|
| Name | The meeting name (e.g., “15-Minute Check-In”) |
| Location | Choose between Virtual, Phone, or In-Person |
| Description | Optional details about the meeting |
| Unique Identifier | Internal reference name (e.g., 15-minute-meeting) |
| Employee | Select the employee this event belongs to |
Booking Options
| Field | Description |
|---|---|
| Duration | Length of the meeting |
| Availability | Days and times when invitees can book (based on the user’s working hours) |
| Minimum Notice (hours) | Prevents invitees from booking too close to the start time |
| Reschedule Minimum Notice (hours) | Minimum notice period to reschedule |
| Days Into Future | Maximum number of days ahead the meeting can be booked |
| Allow Cancellation | Check to let invitees cancel appointments |
| Cancellation Minimum Notice (hours) | Minimum notice before cancellation |
Other Options
| Field | Description |
|---|---|
| Secret Event | Hides the event from the public scheduler |
| Additional Details Title | Specify extra information you want from invitees |
| Create Event in Connected Calendar | Automatically create events in your Google Calendar |
Confirmation Settings
| Field | Description |
|---|---|
| Success Message | Message shown after booking confirmation |
| Instructions Upon Successful Booking | Follow-up notes for invitees (e.g., meeting details) |
| Redirect URL | Redirects invitees to a calendar link or confirmation page |
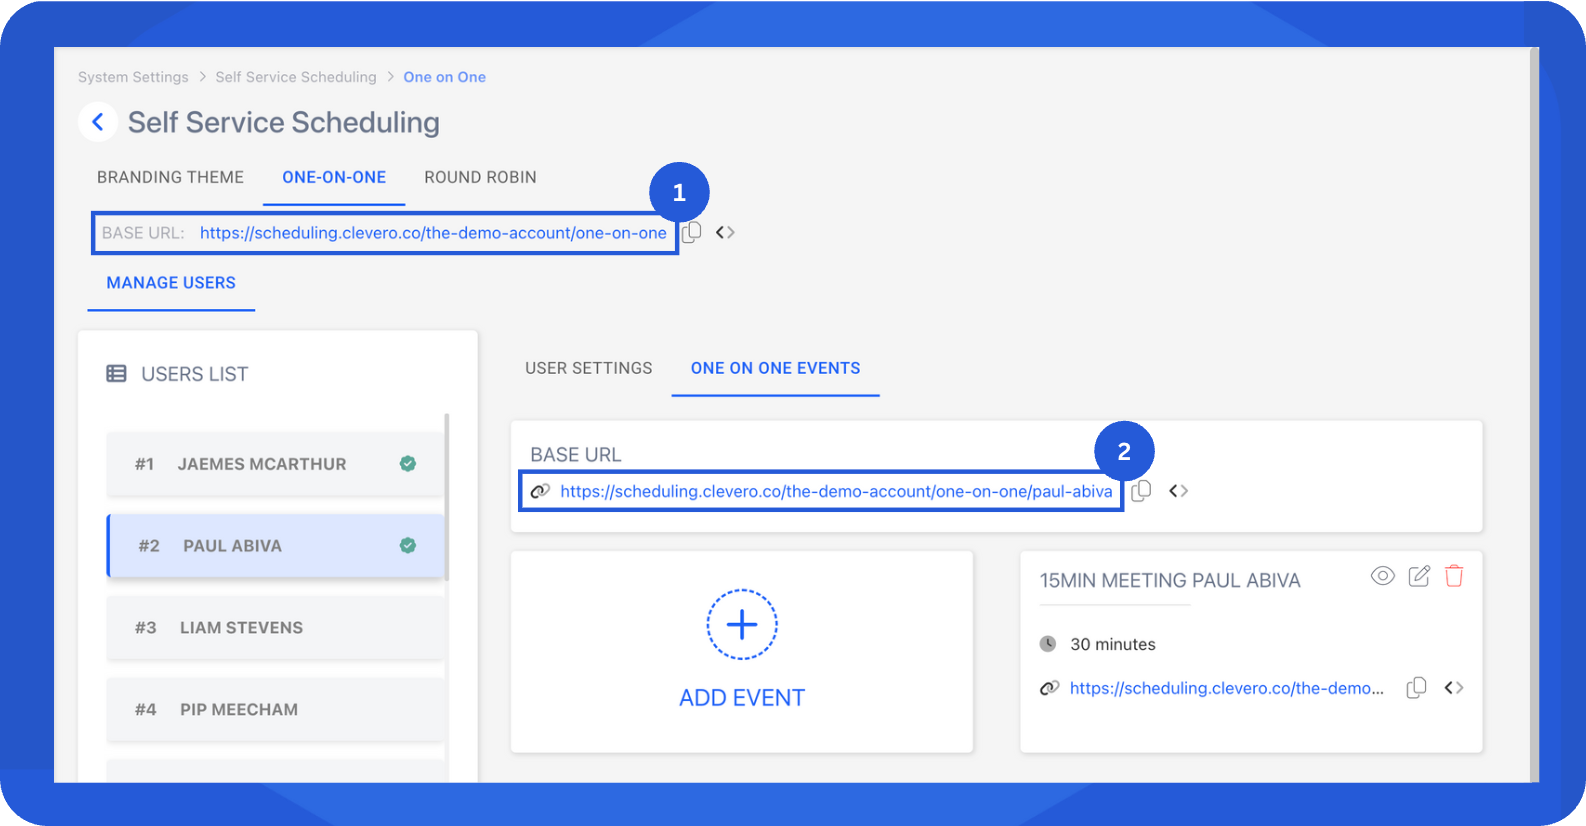
Step 4. Share the Scheduler Link
After creating the One-on-One meeting, you share the link in two ways:
- Global Scheduler Link
At the top of the scheduler page, you’ll find a Base URL that includes all meetings and events from every user. Use this link when you want to share a single booking page for the entire organization.
- User-Specific Scheduler Link
Each user has their own Base URL under the One-on-One Events tab. This link displays only that user’s available meetings. Use it when you want invitees to book directly with a specific team member.
Step 5. Example of the Scheduling Page
Here’s what the scheduling page looks like when an invitee selects a time slot and confirms the booking.

Invitee selecting an available time slot

Booking confirmation page
📌 Need Help?
