How to Configure Associations
There are times when an entry contains associations (for example, an Enquiries record with Activities). You may want those associations to display or sort in a specific way by default.
Watch the guided demo below to configure the association through the Entry Layout.
You can also follow the same steps using the written guide below.
Step 1. Create or Edit an Association
- Go to Settings > System Settings.
- Open the Records menu and select the record you want to configure.
- From the sidebar, select Entry Layouts.
- On the Entry Layout page, add a new association or select an existing one.
- In the Inspect tab, choose the record you want the association to link to (e.g., Invoices).
- Choose how you want the columns to display:
- Record Layout (recommended): uses an existing layout.
- Custom Config: manually configure which fields/columns to display.
Step 2. Set Default Fields and Values
You can define default values for fields in the associated record to streamline data entry.
- Select a field from the association.
- Specify the default value for that field.
- Click the + button to add additional default fields and values.
These default values are automatically applied when creating a new associated record.
Step 3. Adjust Basic Options
Within the association tile settings, you can configure:
- Number of rows: control how many rows display by default (e.g., only show 10 if there are many).
- Placeholder text: set a placeholder for the empty fields.
- Disable Add: hide the “Add” button if you don’t want users to create new associated records from this view.
- Disable Quick Add: hide the quick-add row option for associations like Activities or Tasks.
- Hide ID Column: remove the system ID column if it isn’t relevant to users.
Step 4. Configure Entry Layouts for Add/View
You can control which Entry Layout appears when adding or viewing an associated record. This is useful when users need a lightweight form instead of the full record entry.:
- Add Entry Layout Id: Create a simplified layout for quick data entry. Example: when adding a Support Request, only show essential fields like “Title” and “Details.”
- View Entry Layout id: Define a layout with only the information you want visible at a glance.
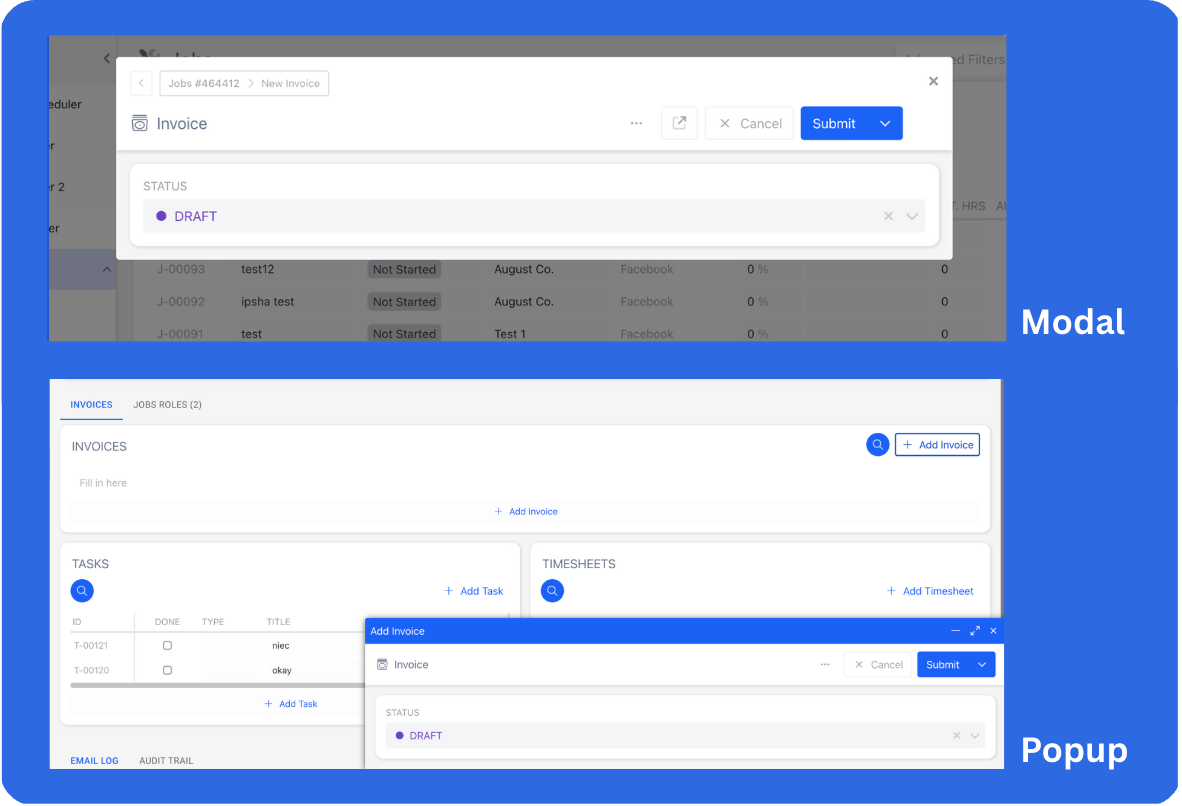
Step 5. Choose Modal or Pop-up Display
When opening an associated record, you can decide how it displays:
- Modal (default): Opens a centered overlay.
- Popup: Opens in a small window at the bottom-right corner.
You can combine this with a quick Add/View layout.
For example, when adding a new contact to an organization, instead of showing all fields (e.g., date of birth, industry), you might only need first name, last name, and email. A quick pop-up with just these fields keeps the process faster.
Step 6. Configure Sorting
Set the default sorting order for the association. For example, you can sort Invoices by Linked Job (Descending) to show the oldest unpaid invoices first so you know what to prioritise.
📌 Need Help?
