Step 4. Create a Custom Record
👨🏻💻 Use Clevero's record management features to organize your data better.
In this step, we will guide you through creating a custom record, from setting up the fields to configuring the layout. Follow the steps below:
Creating a Record
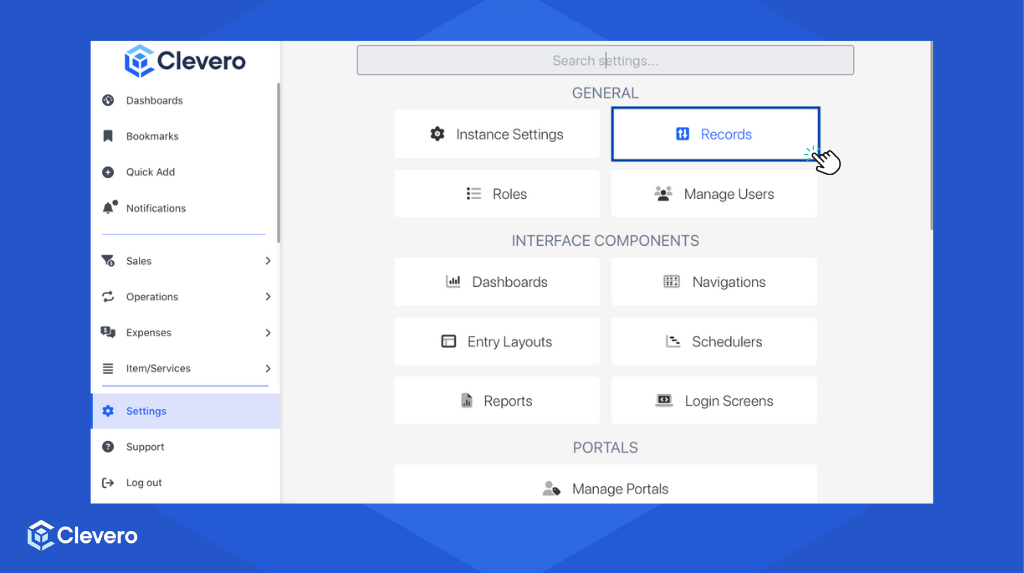
- Go to "Settings" > "System Settings".

- Click on "Records".
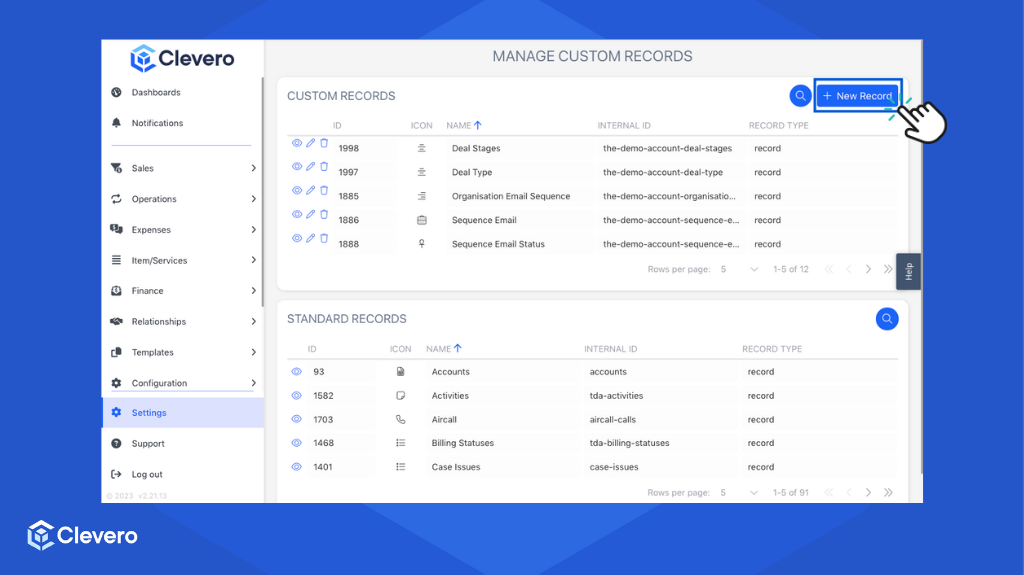
- Select "New Record".
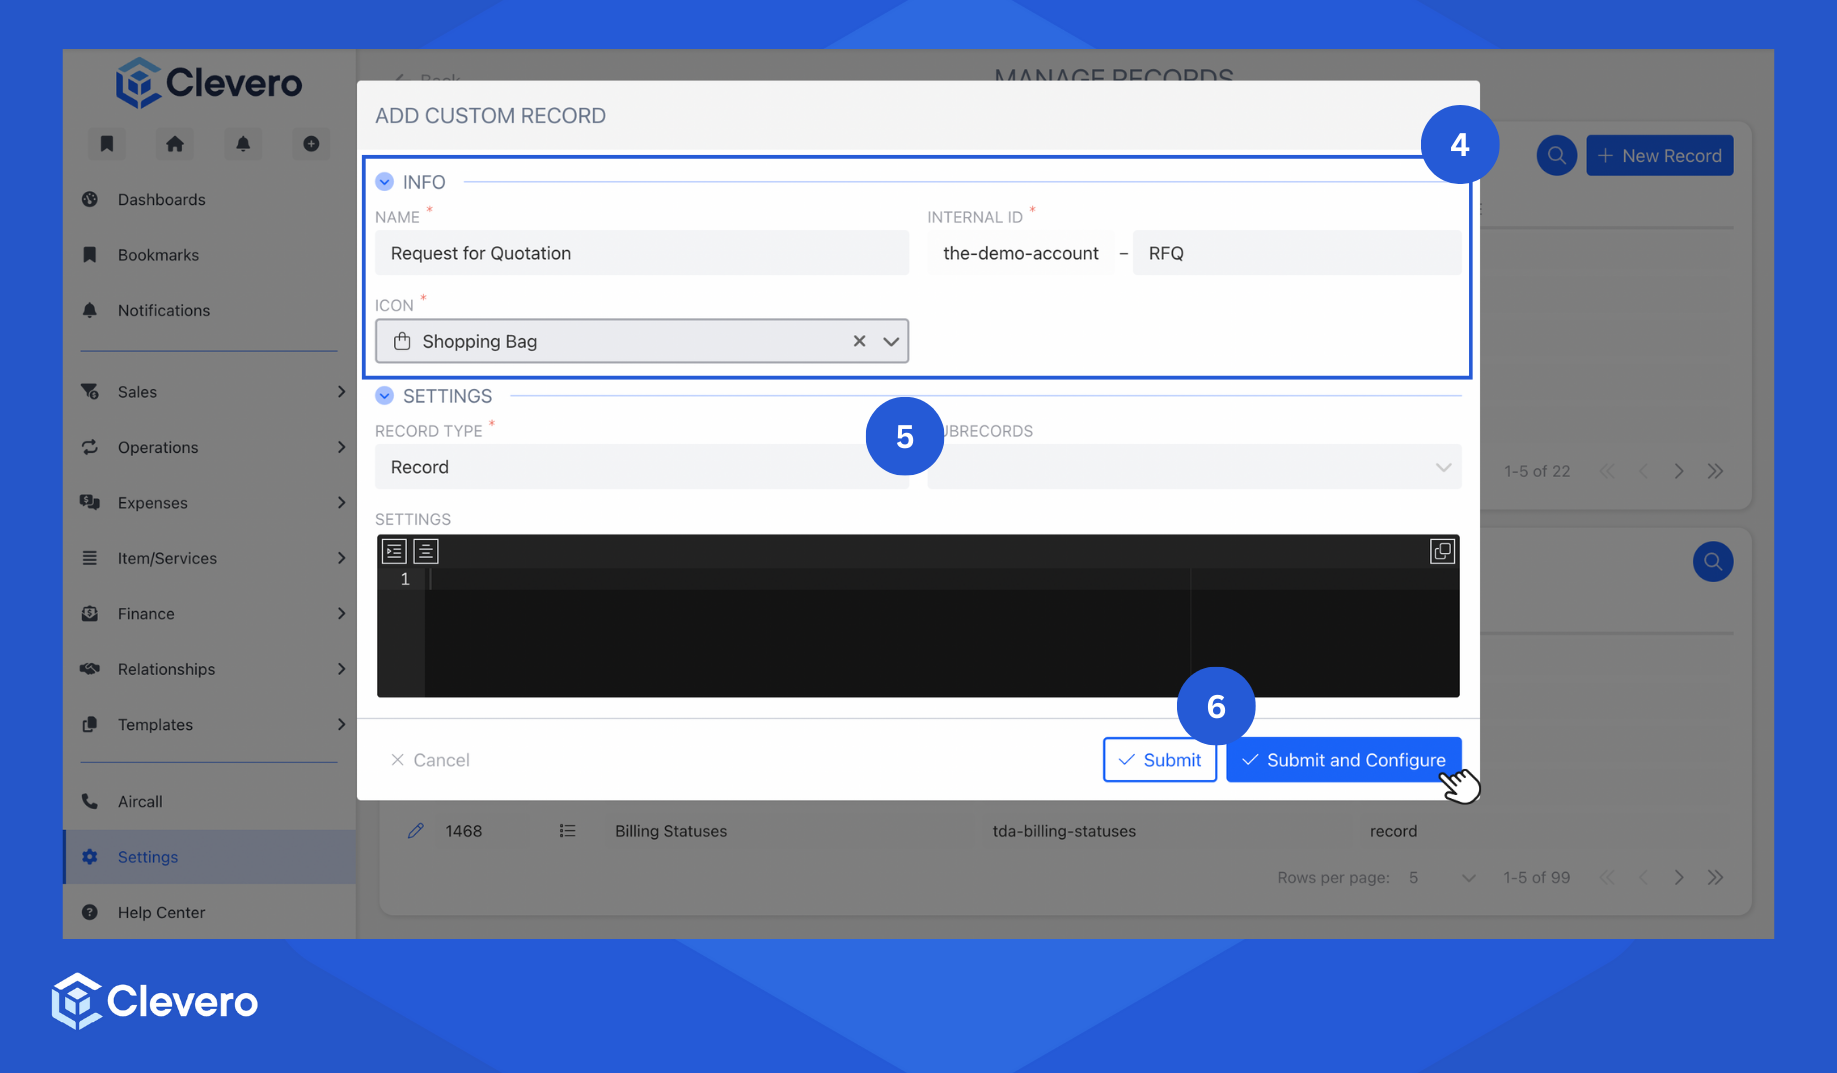
- Fill in all required fields.
- Set the "Record Type" to "Record".
- Click "Submit and Configure" to save your changes and set up another configuration.
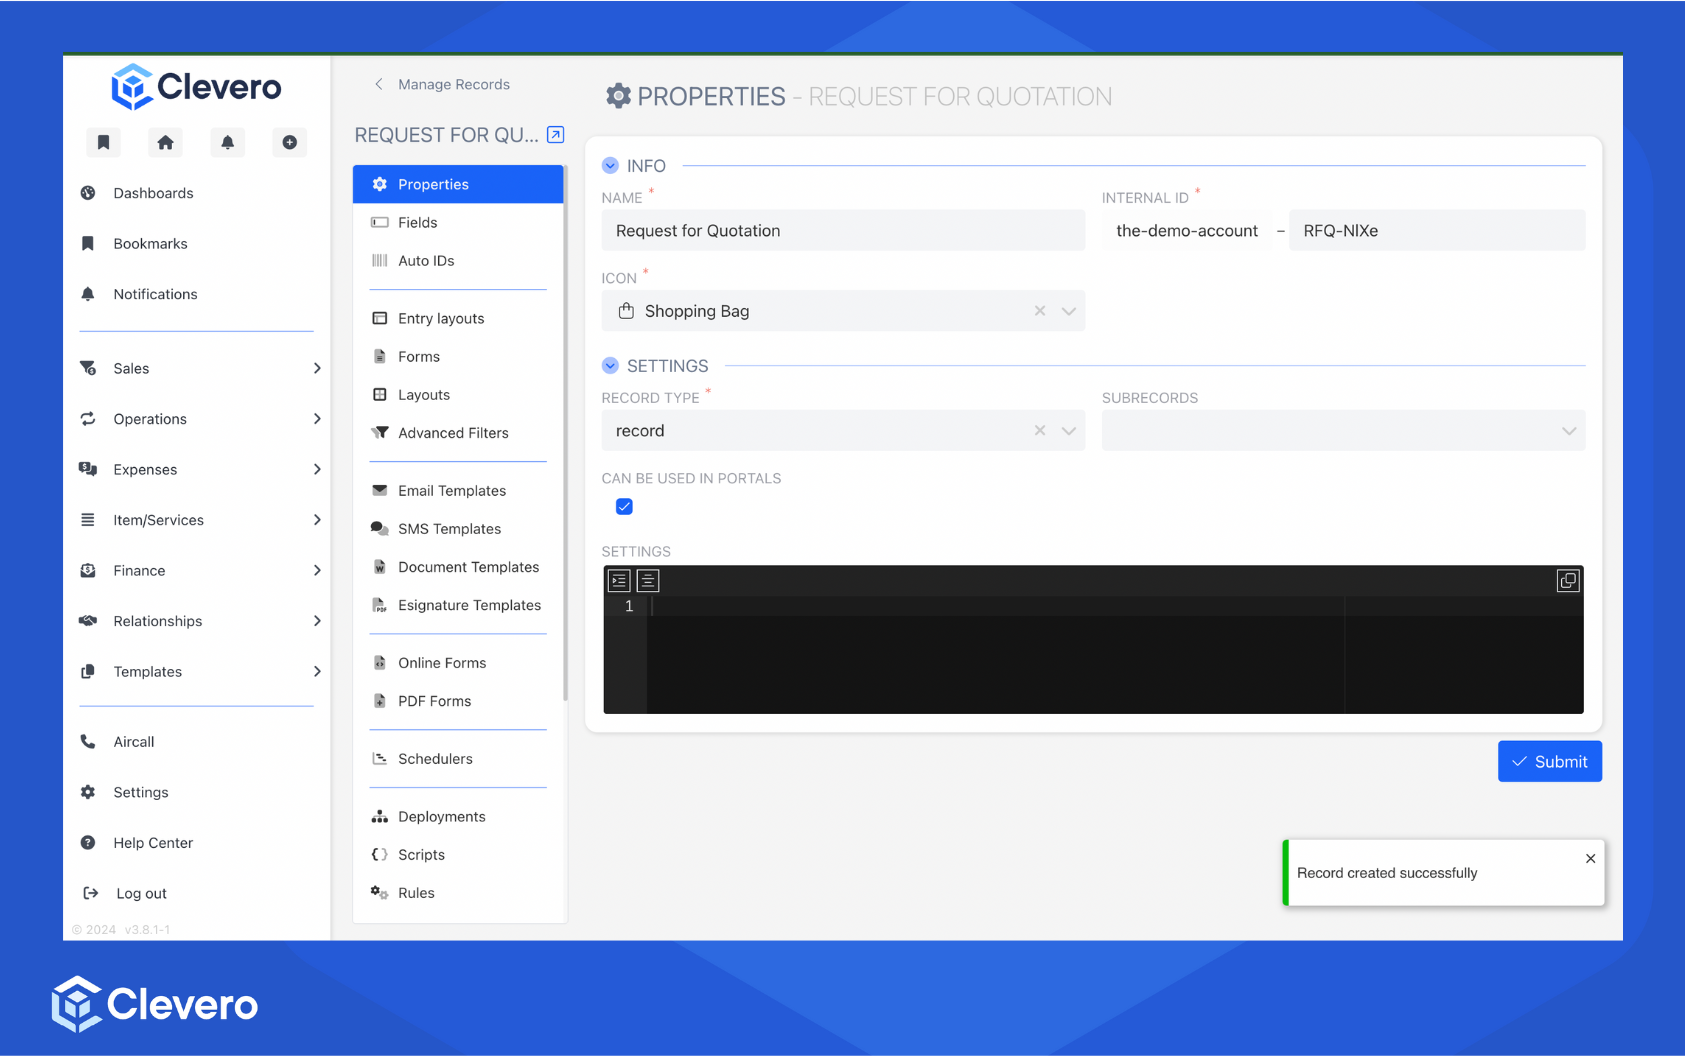
- You have successfully created a record, and it will redirect to the Record's configuration.
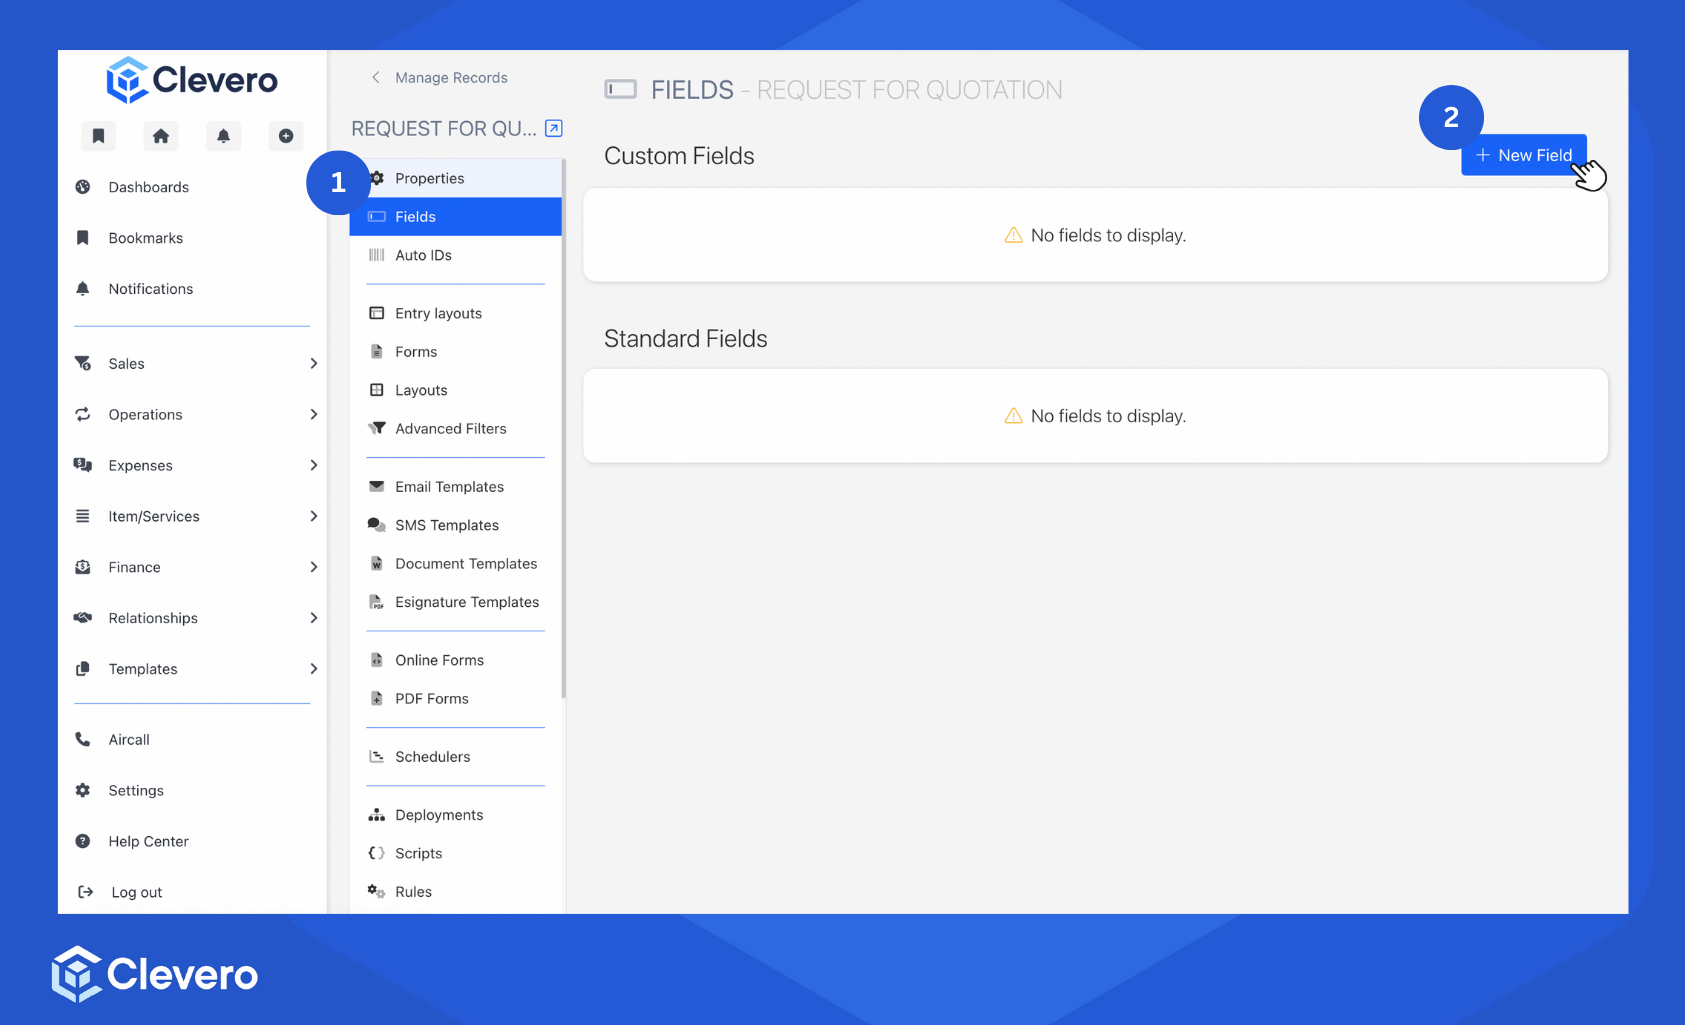
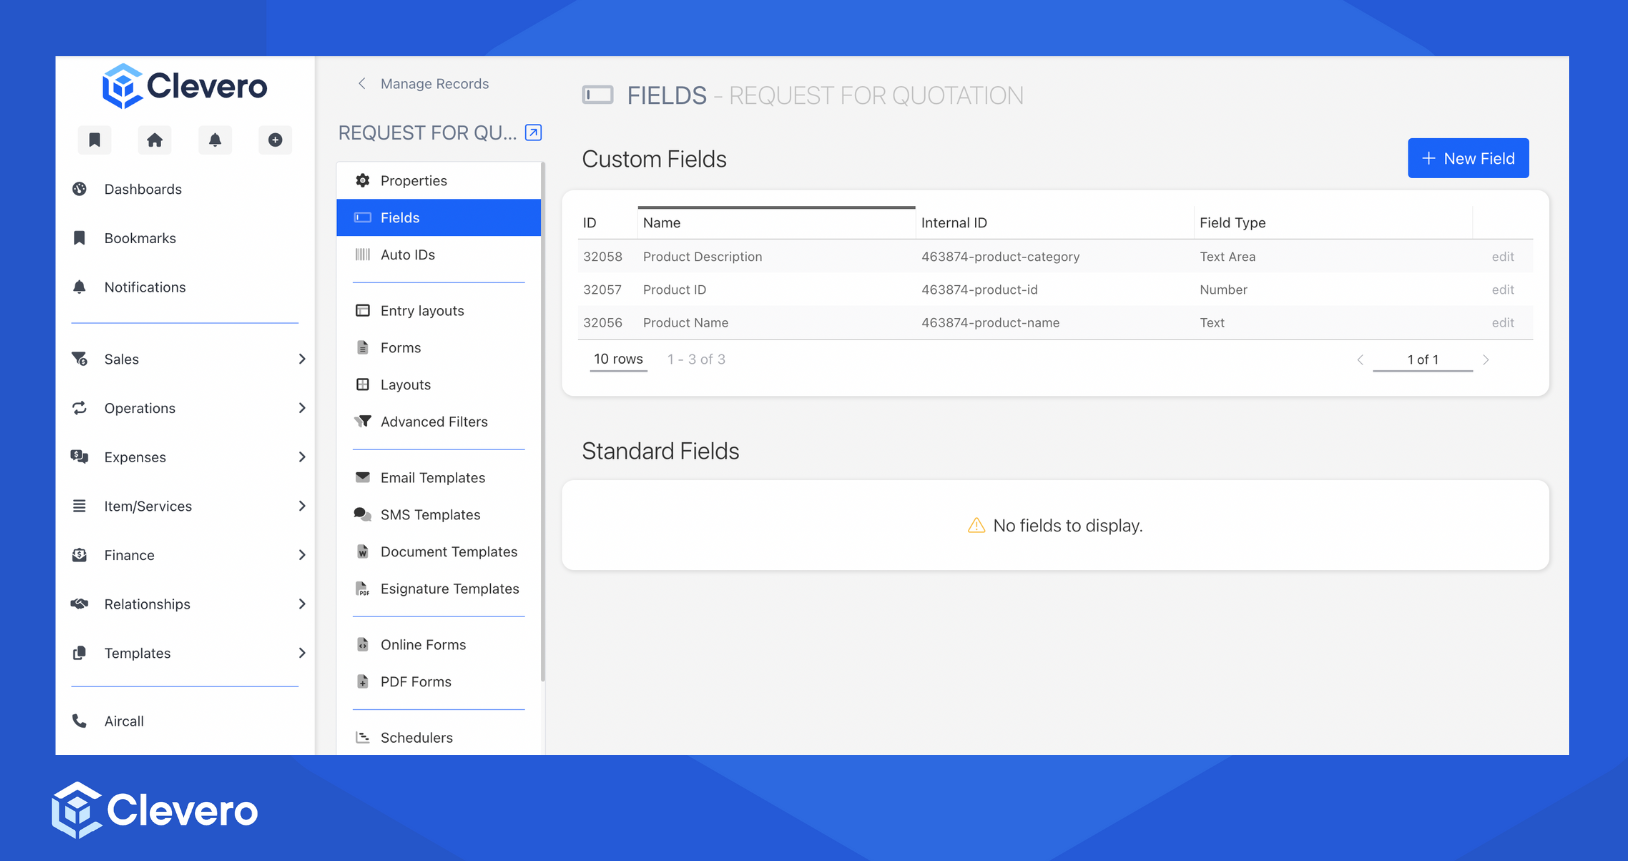
Creating Fields
- Select the Fields option from the sidebar.
- Click on the "+ New Field" button.
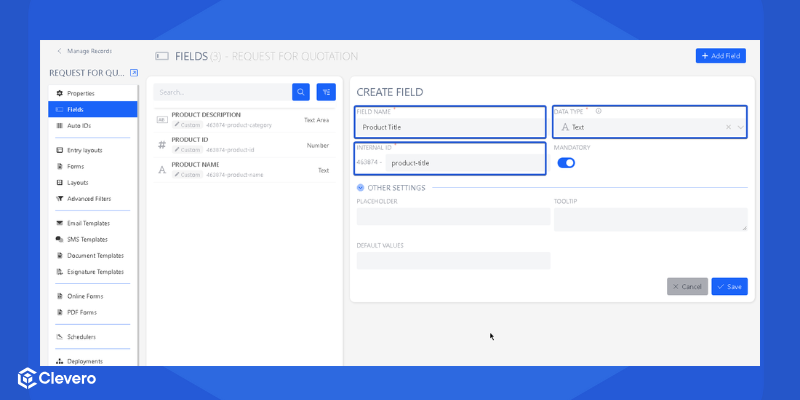
- Specify the following required fields:
- Field Name: This refers to the field's name, used to identify the data it represents.
- Data Type: The data that can be stored in the field. Learn more about the various data types we offer in the Directory of Fields.
- Internal ID: An auto-generated unique identifier assigned to the field. You can also modify it manually if needed.
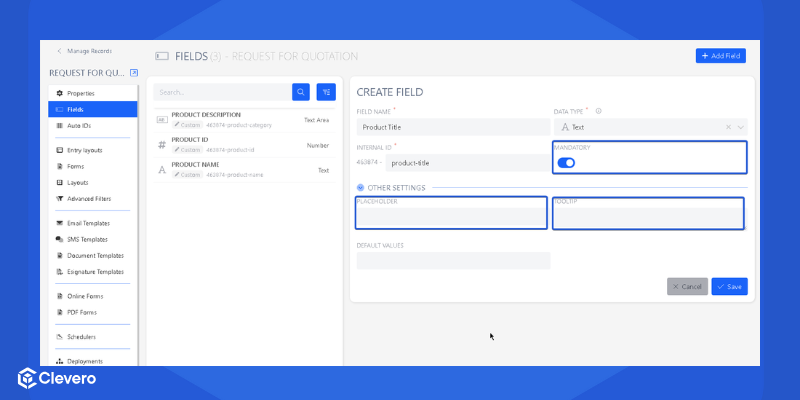
- We also provide some optional settings, such as:
- Mandatory: A required field that indicates that a field or input must be filled out or selected before proceeding.
- Placeholder: A text displayed in a field or input area that guides users on what should be entered into the field.
- Tooltip: Additional information or details provided about a specific item.
- If necessary, set a predefined value to populate the field if no other value is specified automatically.
- Click on the "Save" button to save the changes.
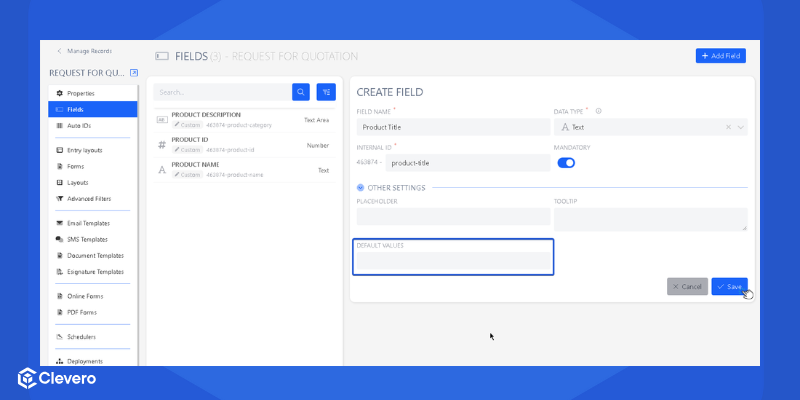
- You have successfully created a field. Repeat steps 2–6 to create another field.
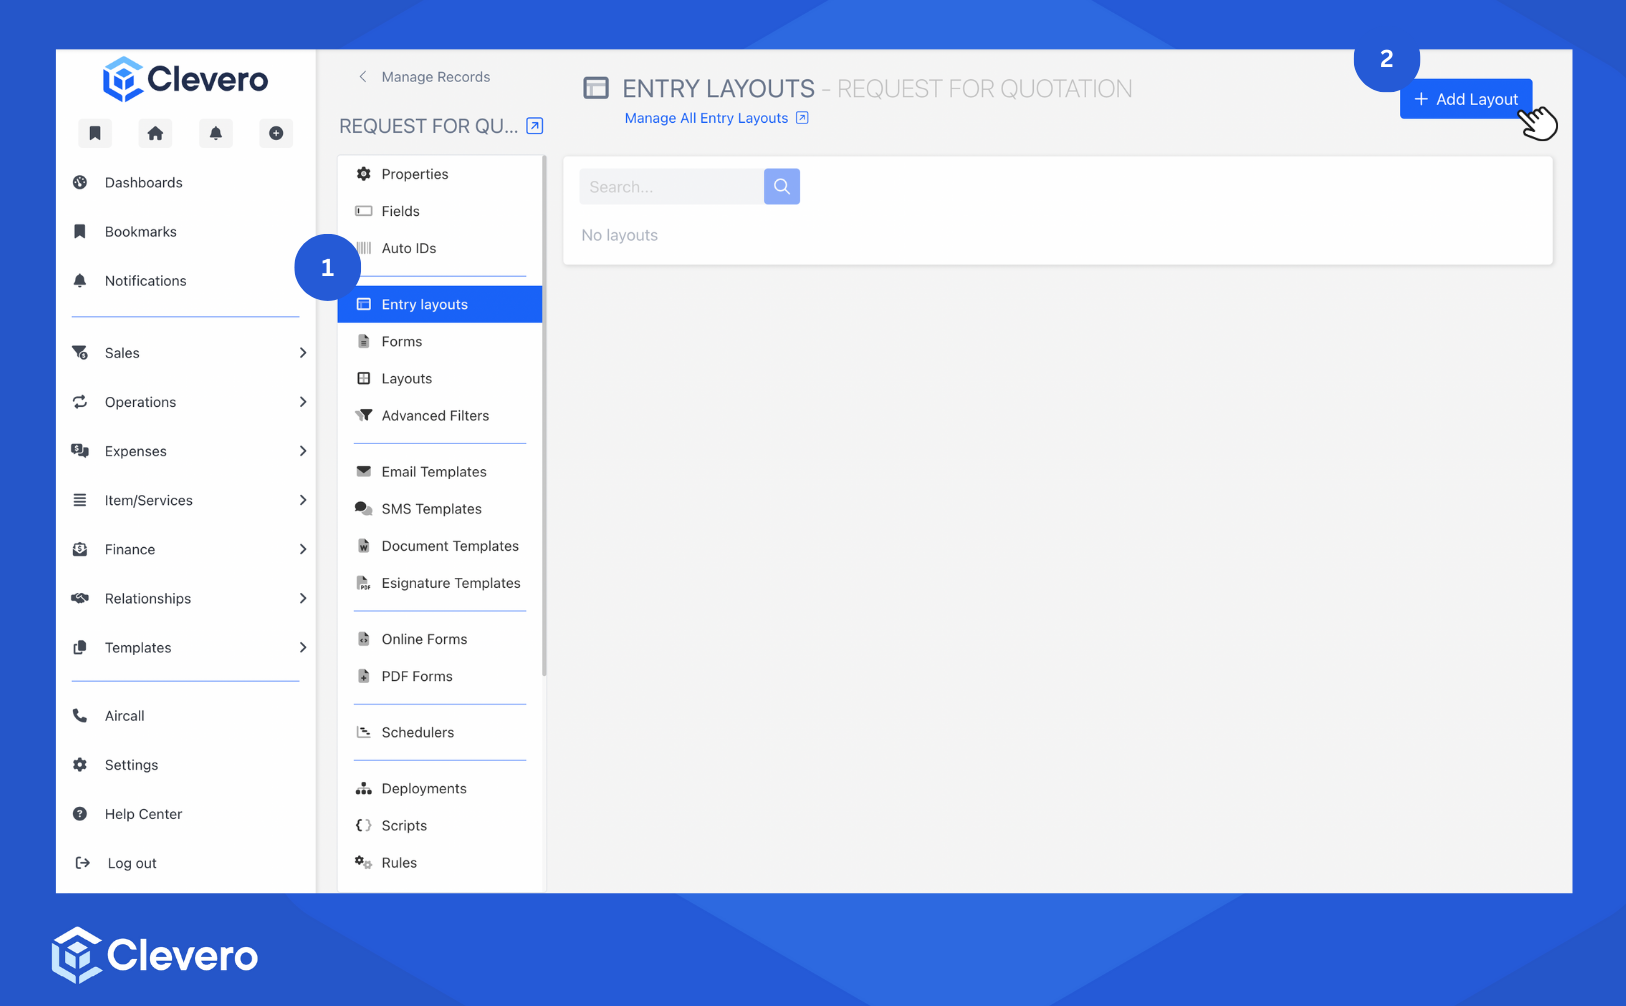
Setting Up an Entry Layout
- Select the Entry Layouts option from the sidebar.
- Click the "+ Add Layout"
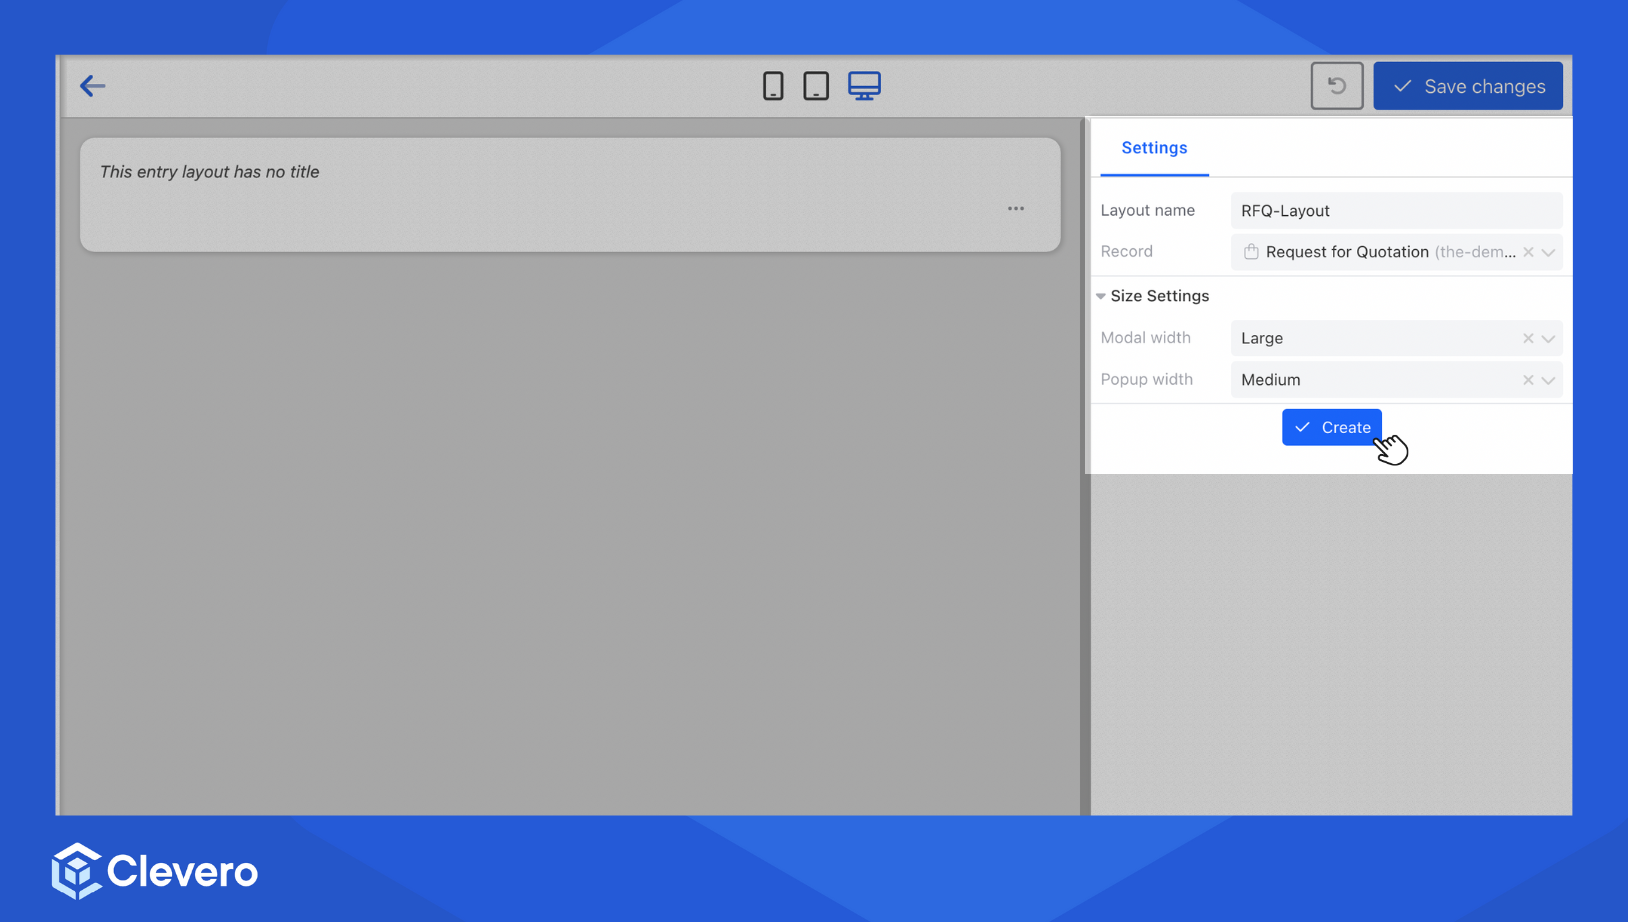
- Set up the settings:
- In the Settings section, provide a name for the layout and select the record to link it with the existing record.
- Specify how you want the content to be displayed via Modal and Popup widths. You can learn more about the Modal here.
- Click the "Create" button to proceed to the next step.
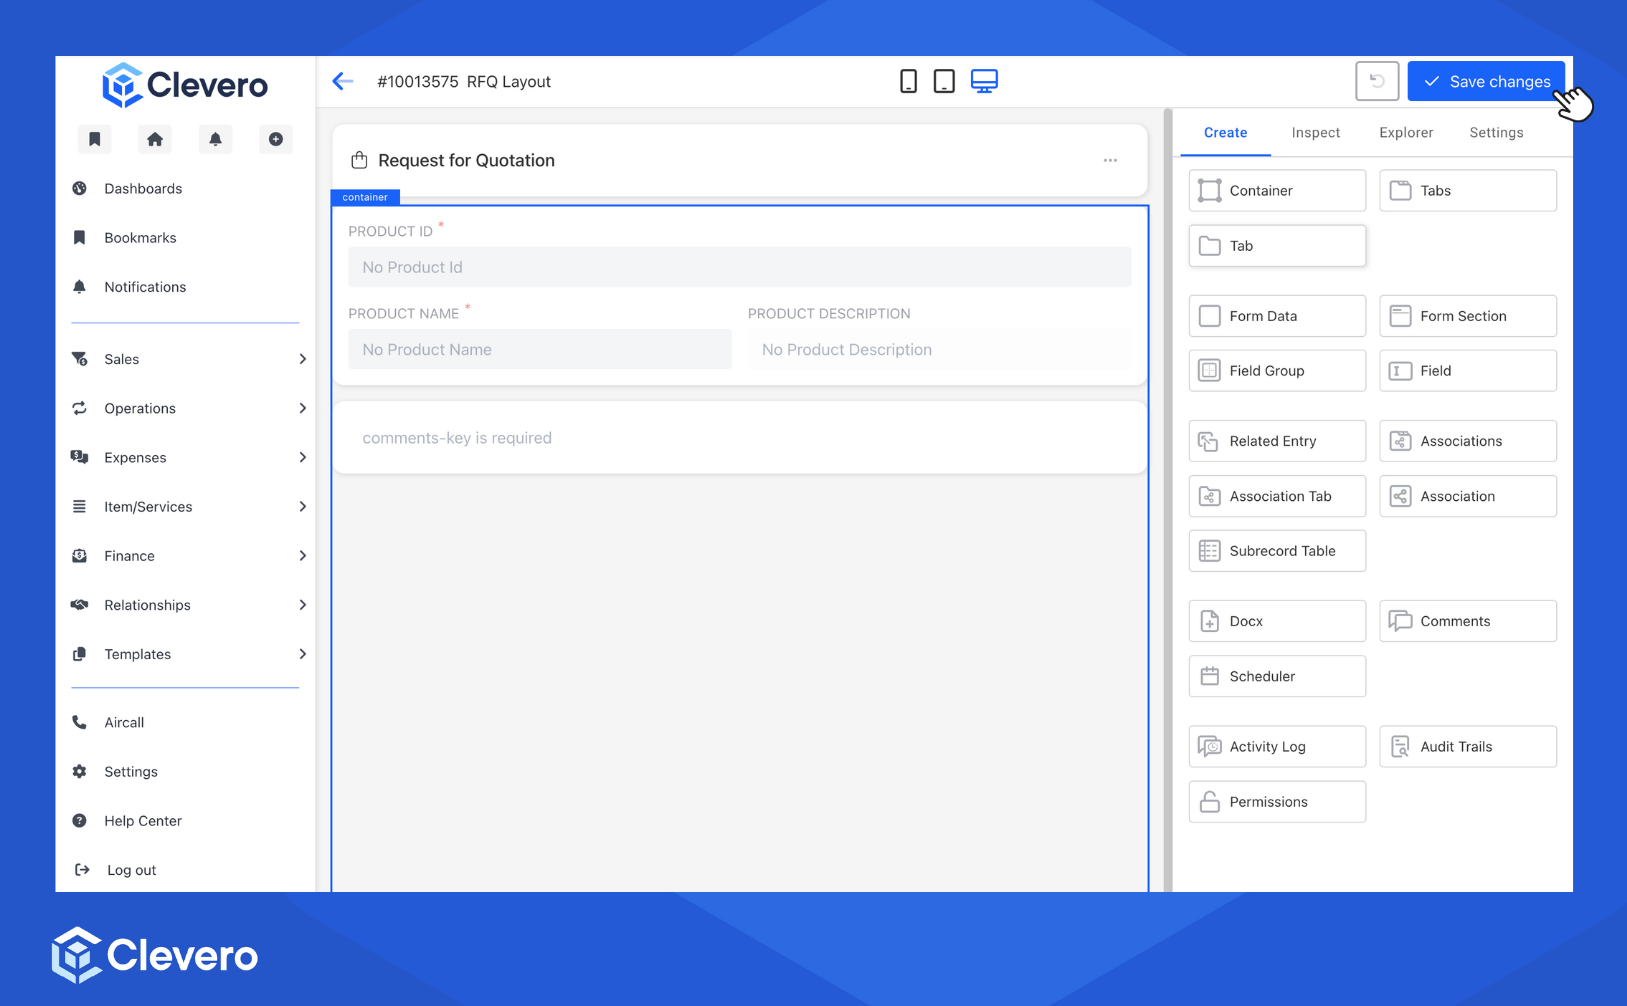
- Add Component: To begin designing your layout, access the Create tab and utilise the drag-and-drop functionality to add the components onto the canvas.
- Configure Component: To rename labels or configure additional settings, click on the component > switch to the Inspect tab.
- Delete Component: To delete a component, hover over it and right-click on it. Then, select the Delete option.
- Preview Layout: You can preview the layout on different display options by clicking the icon at the top.
- Click the "Save Changes" button to save the layout.
Setting Up a Table Layout
WarningThe default view is visible to all users. To make sure it works for everyone, create a default setting that works for all users. If you need a personalized experience, copy the default view or create a new view as needed.
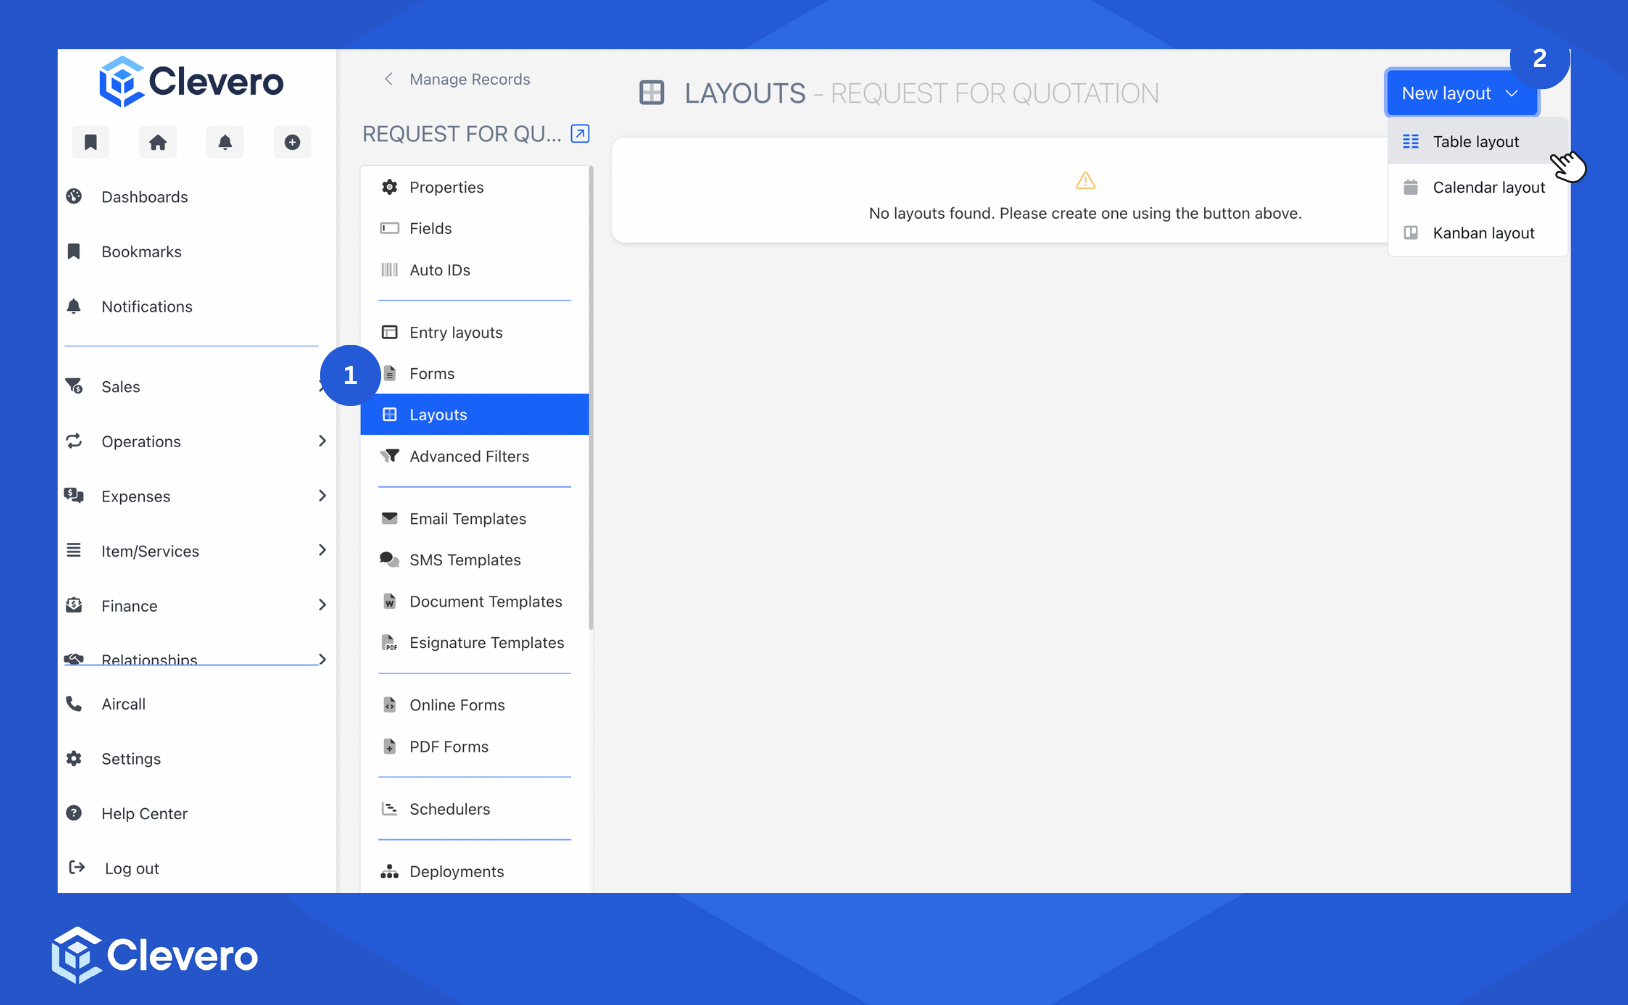
- Select the Layouts option from the sidebar.
- Click the "New layout" > "Table layout".
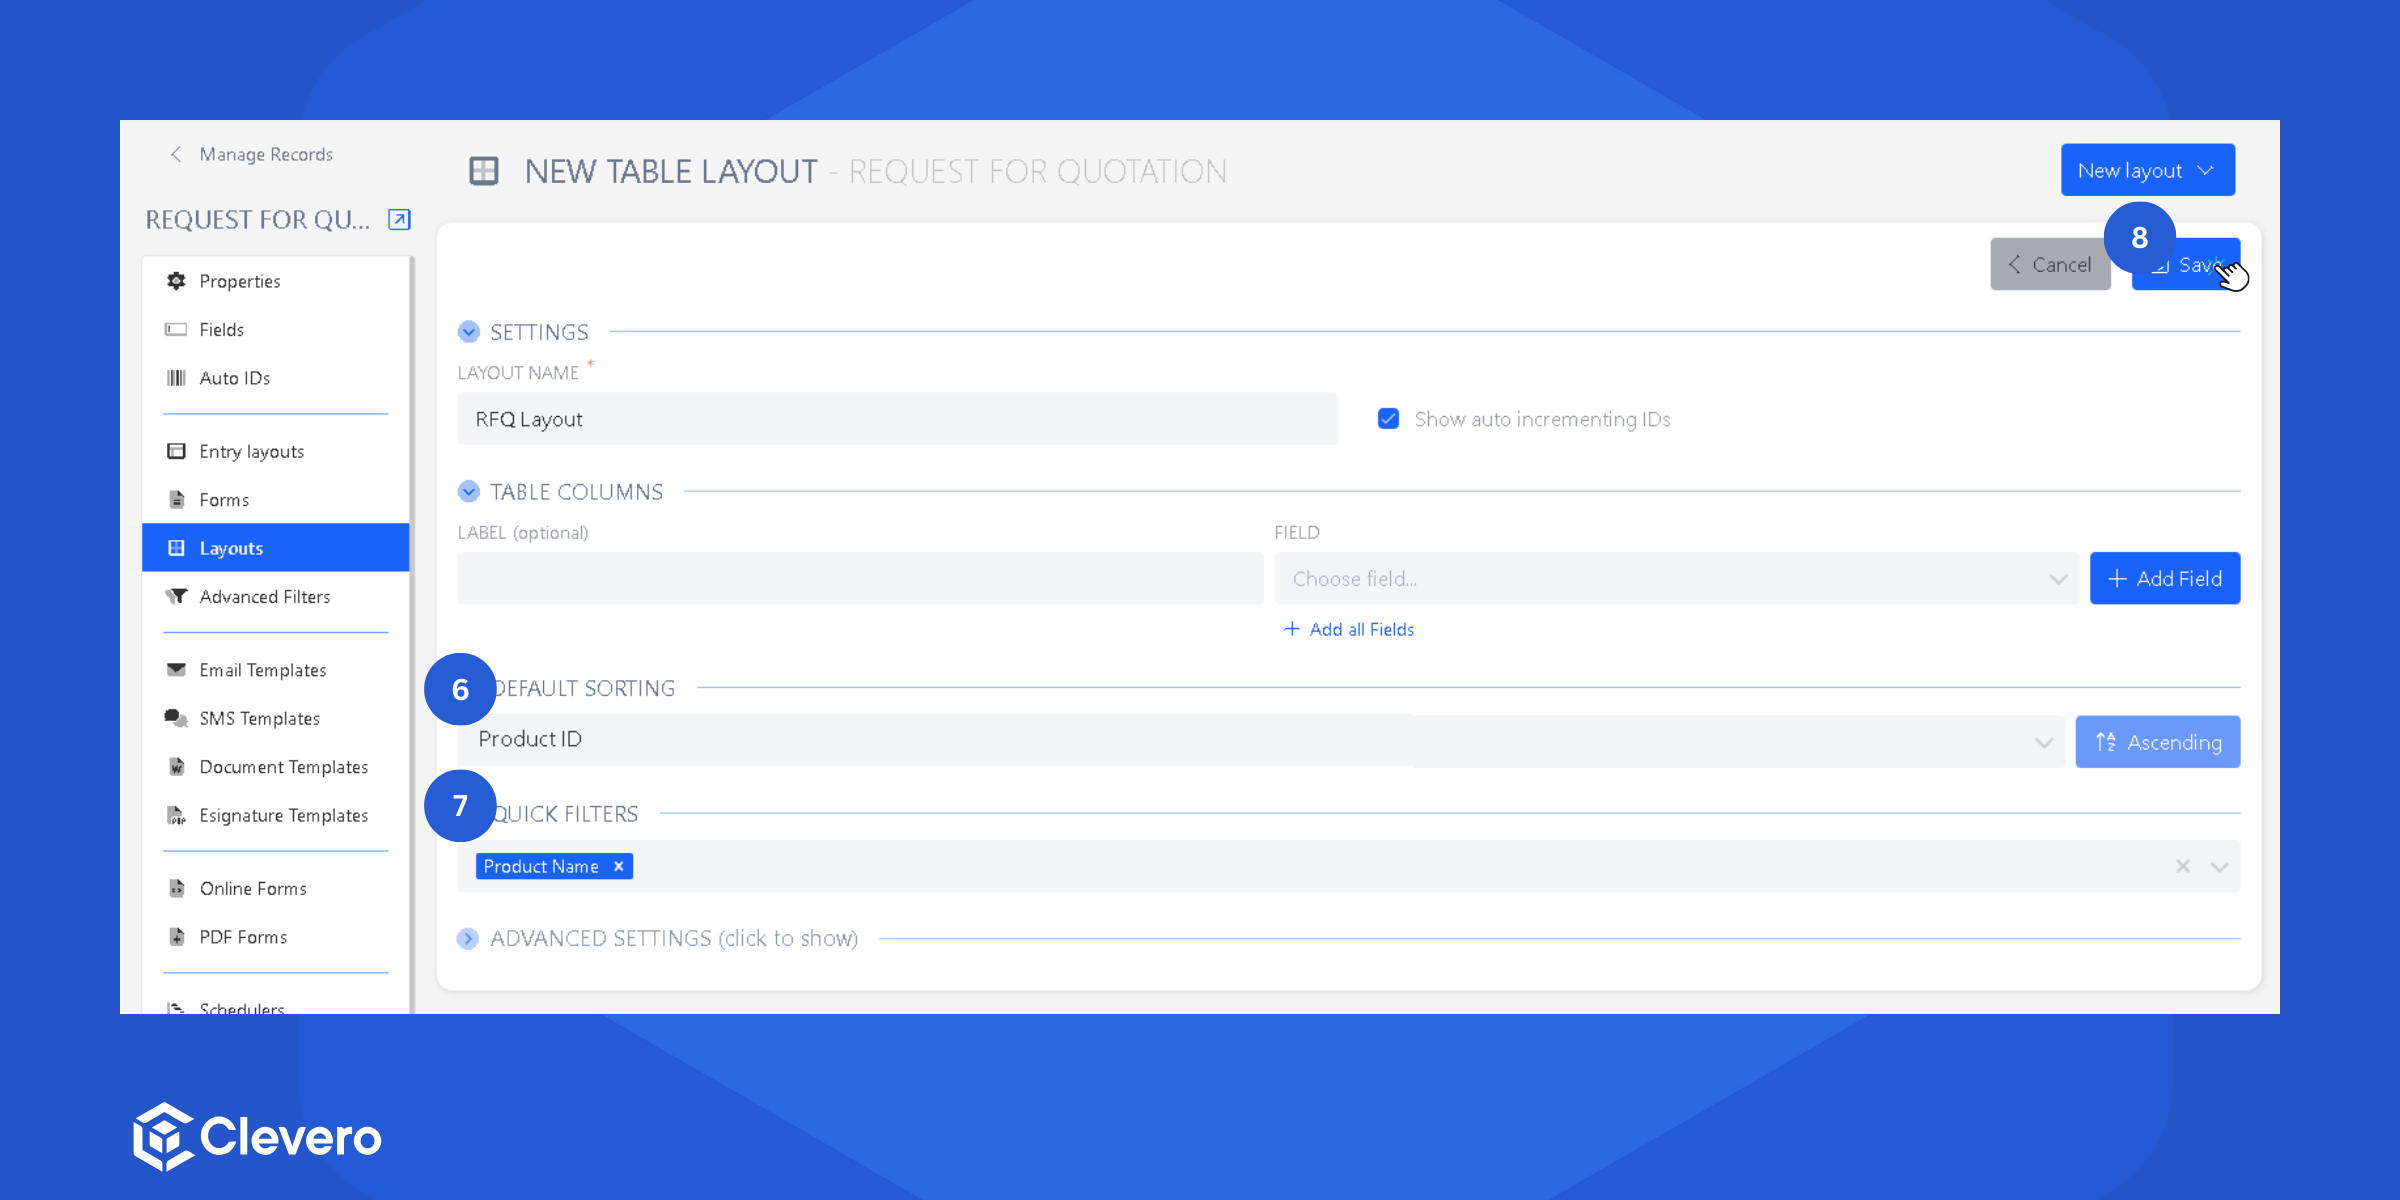
- Set up the Settings:
- Provide a name for the layout you are creating.
- Select the "Show auto-incrementing IDs" checkbox to display an auto-incrementing ID column.

- Specify the columns you want to display in the table by choosing the corresponding Field that links the data to each column.

Info:You can assign new Labels to the columns.
- Alternatively, you can click "Add all fields" to add all available fields to the table.
- [Optional] Set a field for Default Sorting. Specify whether it should be sorted in ascending or descending order.
- [Optional] Utilise Quick Filters to pre-define specific filter criteria for easy data filtration.
- Click on the "Save" button to save the changes.
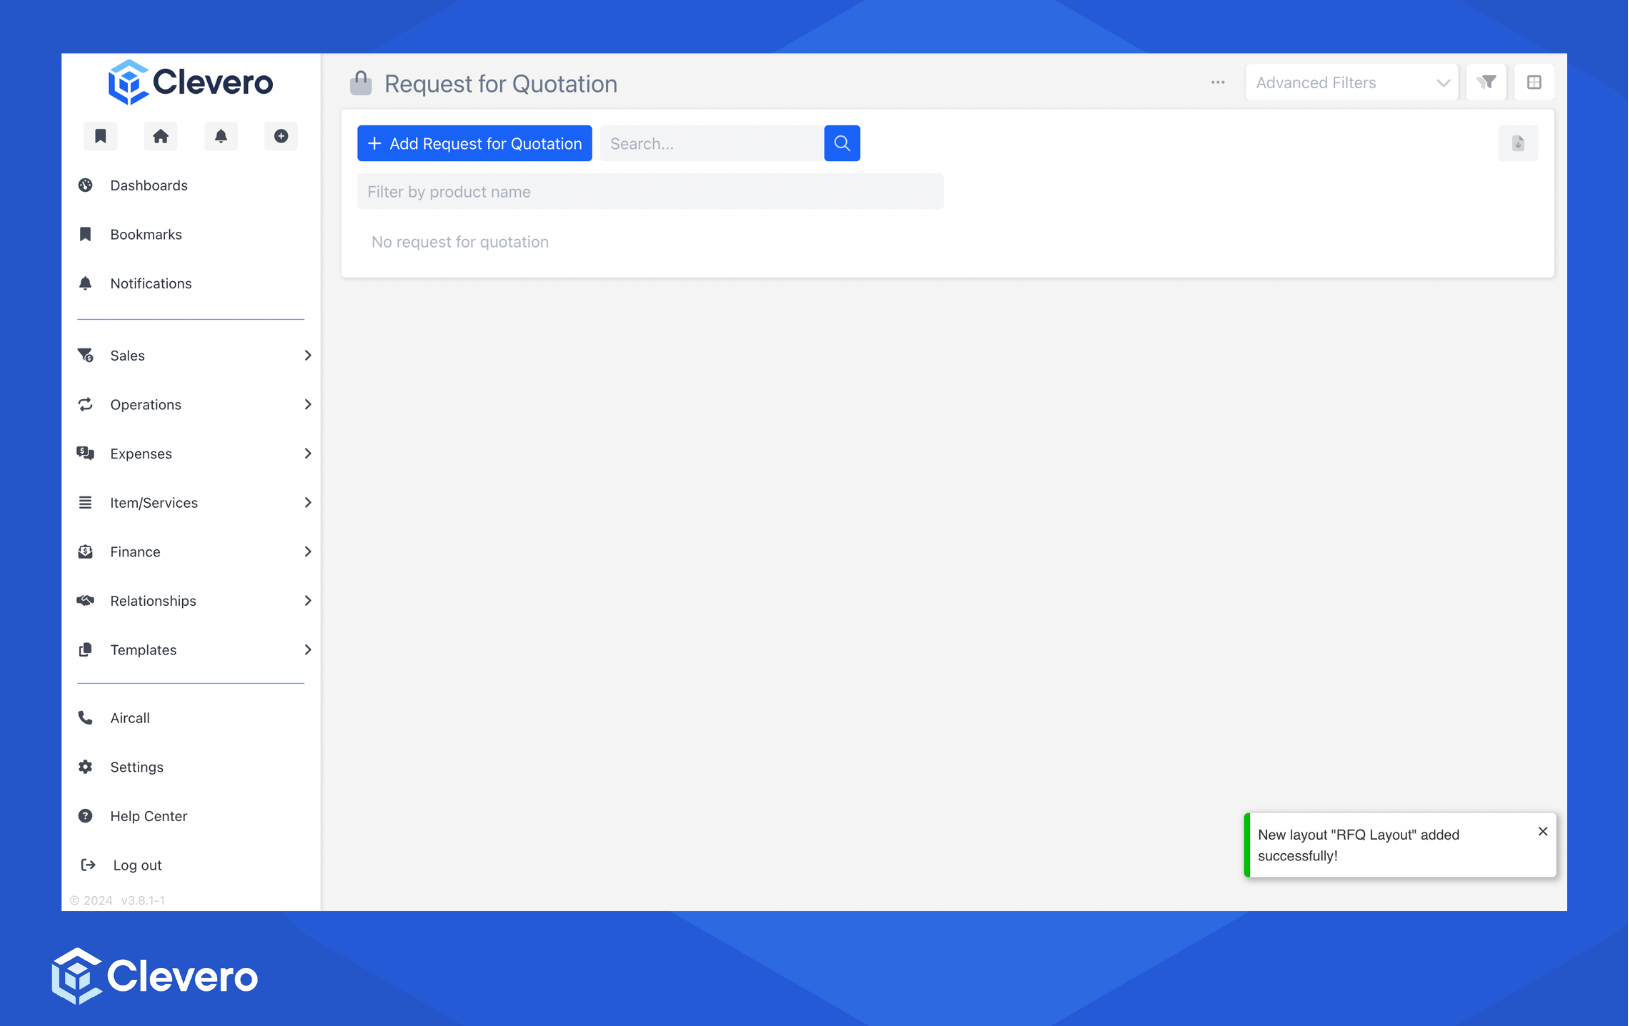
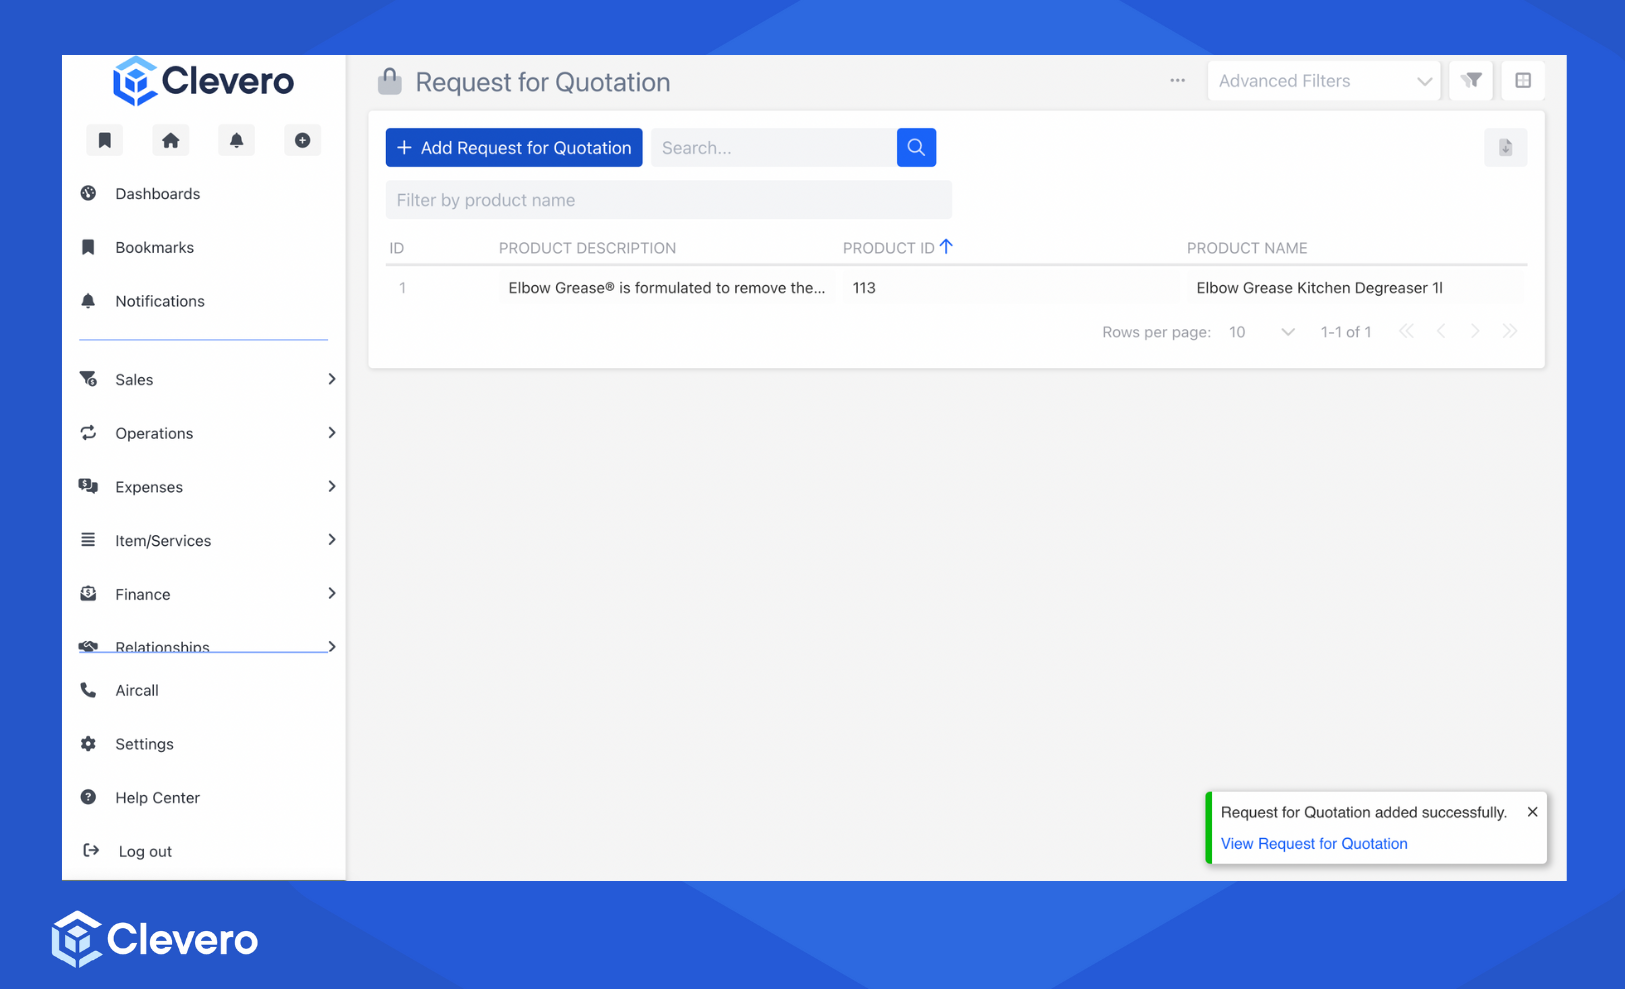
- The final result will look as shown below.
Add Your First Entry
- Click the Add button.
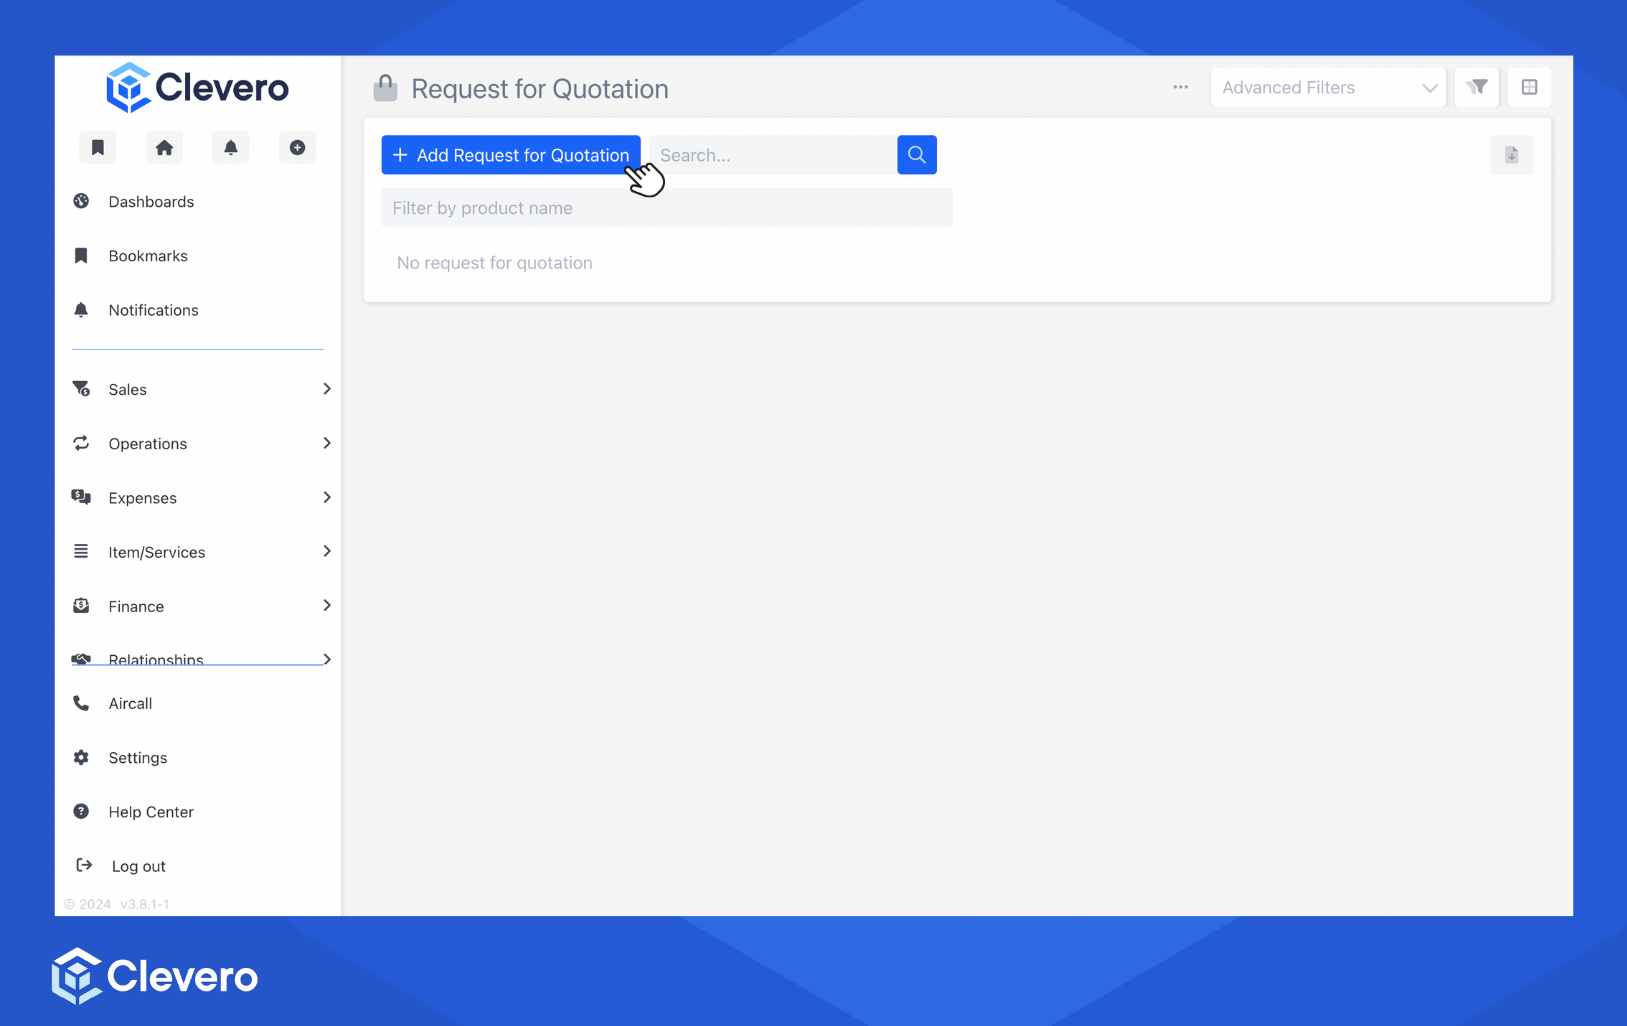
- Fill in the available fields. Ensure you fill in all the required fields.
- Click the Submit button to save the entry.
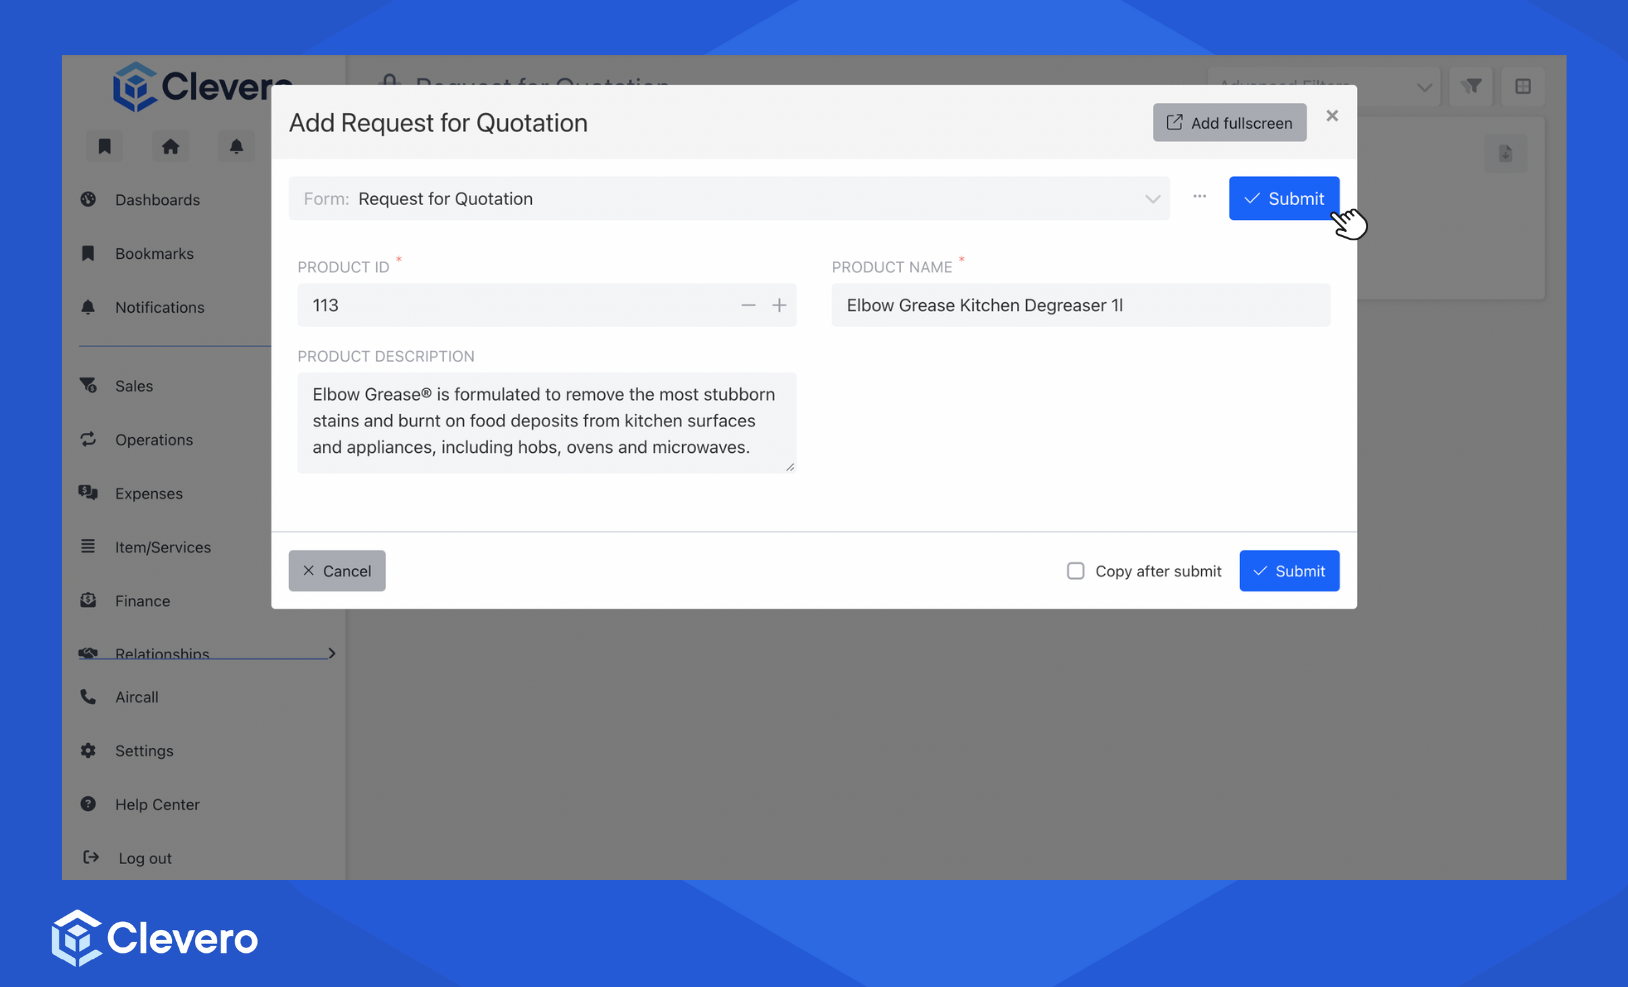
- Congratulations on your first entry! 🎉
📌 Need Help?
